⚠ This page is outdated. For more recent information have a look at the english original.
Windows Manual Build
This is an instructional guide how to build Ink/Stitch without using the manual install.
Info: For this description we use foo as a user name. Whenever it occures replace it with your personal windows user name.
Requirements
Install these dependancies to build a local build of inkstitch for windows.
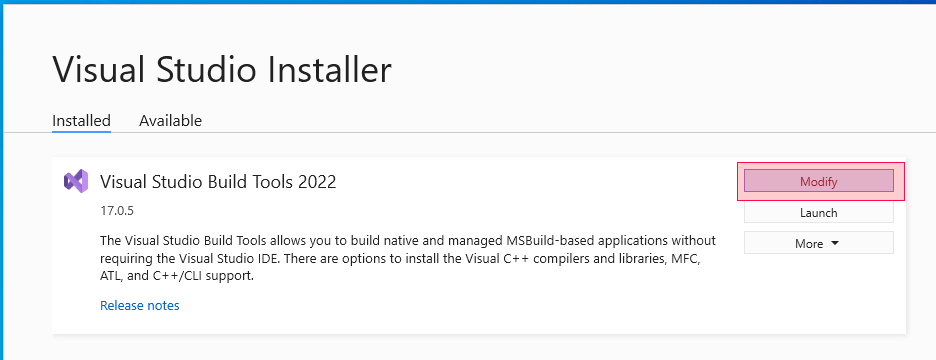
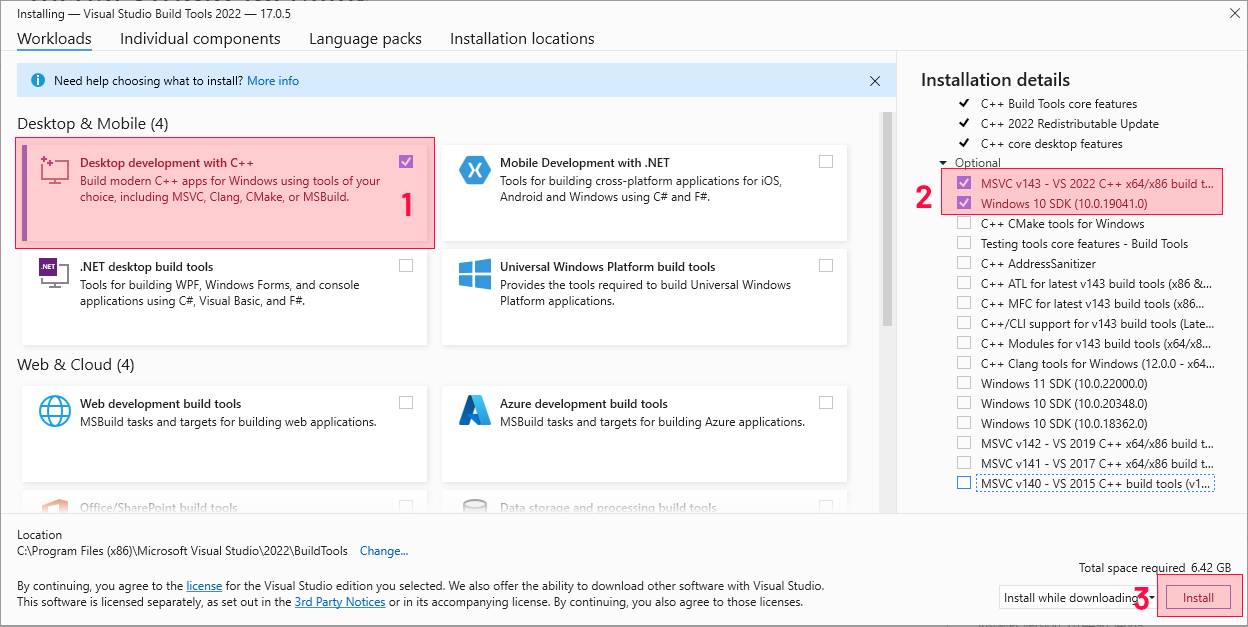
- Build Tools for Visual Studio 2022
- Scroll down on their website until you see “Tools for Visual Studio 2022” and open the submenu
- Scroll down again and download “Buildtools for Visual Studio 2022”
- Run the installation
-
Choose the 32bit version, run the installer and check “Add Python x.xx to PATH”. This for the bash enviroment to find python.
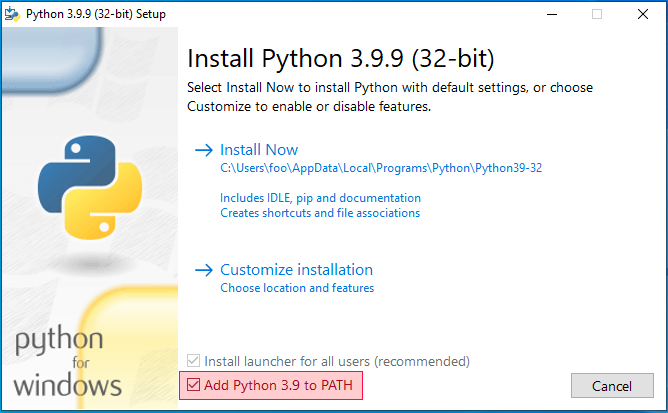 Then click on “Install now”
 -
This installs git as well as providing a terminal emulator to run build scripts.
Download Use the default settings during installation.
-
Install LTS 32 bit version. Install with default settings.
-
This provides the compiler to build the windows installer. Use the default settings.
-
This provides make to run the build scripts.
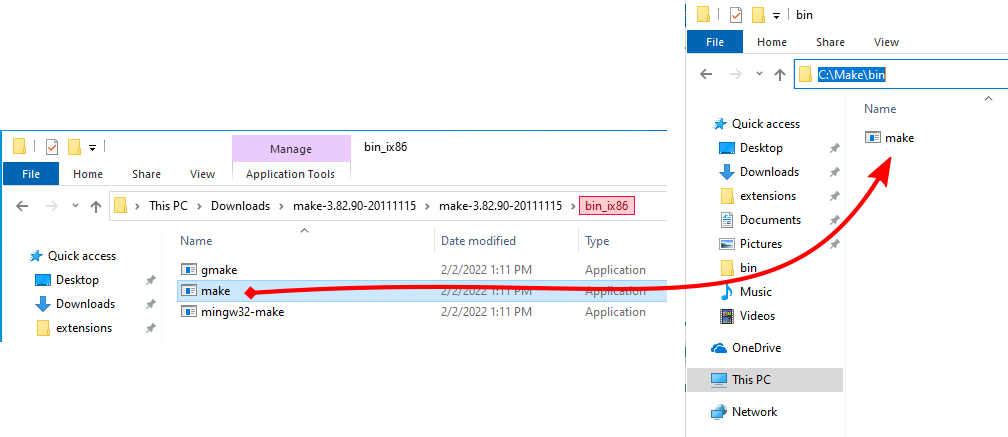
- Download make-3.82.90-20111115.zip
- unzip
- Create the folder C:\Make\bin
- Copy
make.exefromDownloads\make-3.82.90-20111115\make-3.82.90-20111115\bin_ix86toC:\Make\bin
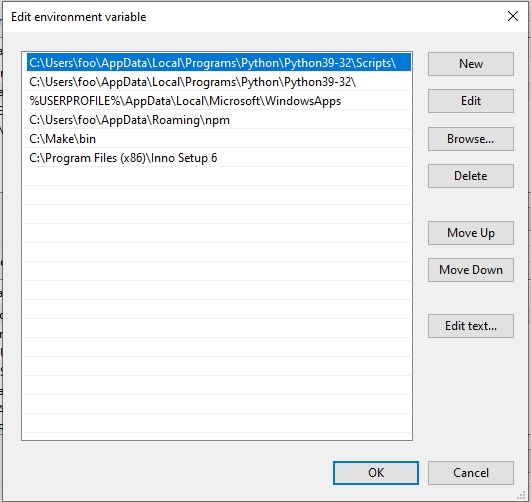
PATHS
The bash environment needs some paths for the installed software. So let’s set it up.
-
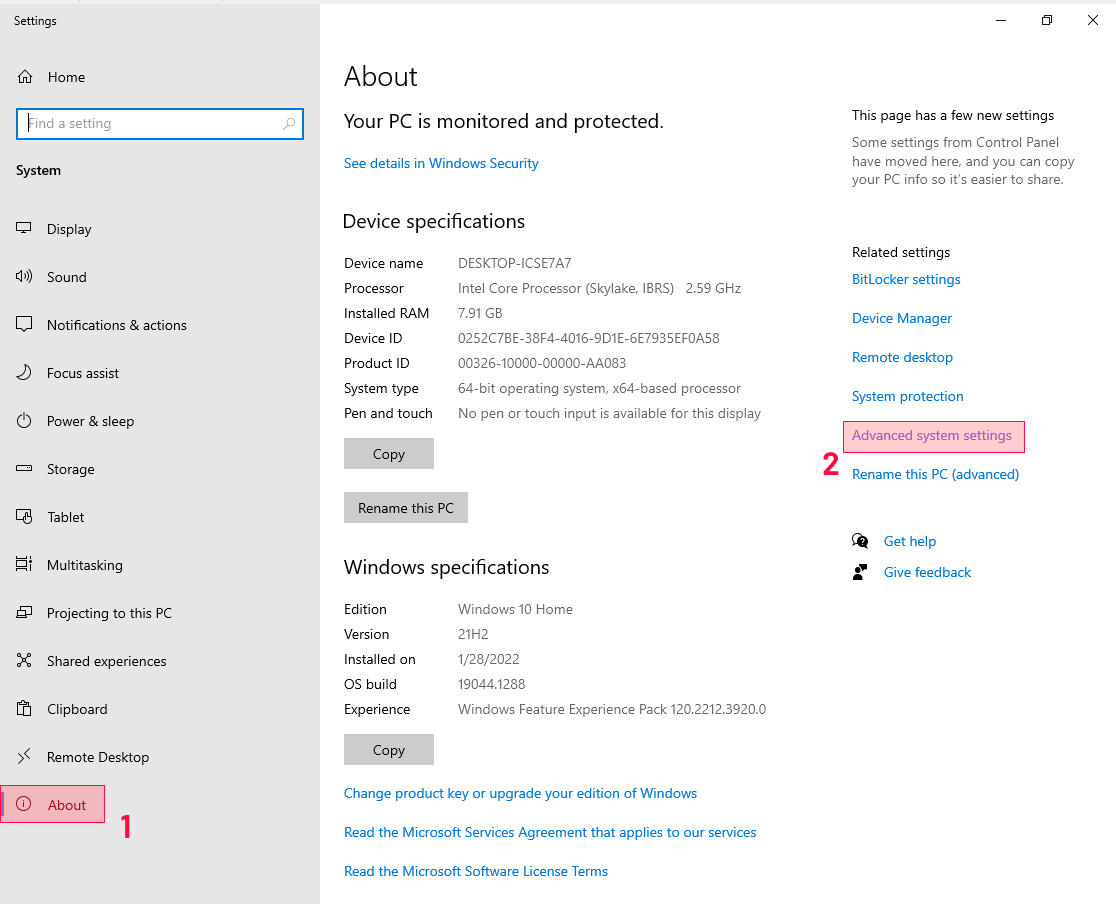
Open Windows settings > System > About > Advanced system settings
-
In Advanced Settings click on
Enviroment Vairables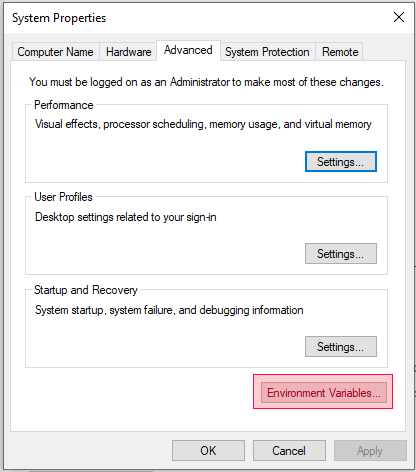
-
In
User variables for [foo]click on Path (1) and then onEdit...(2)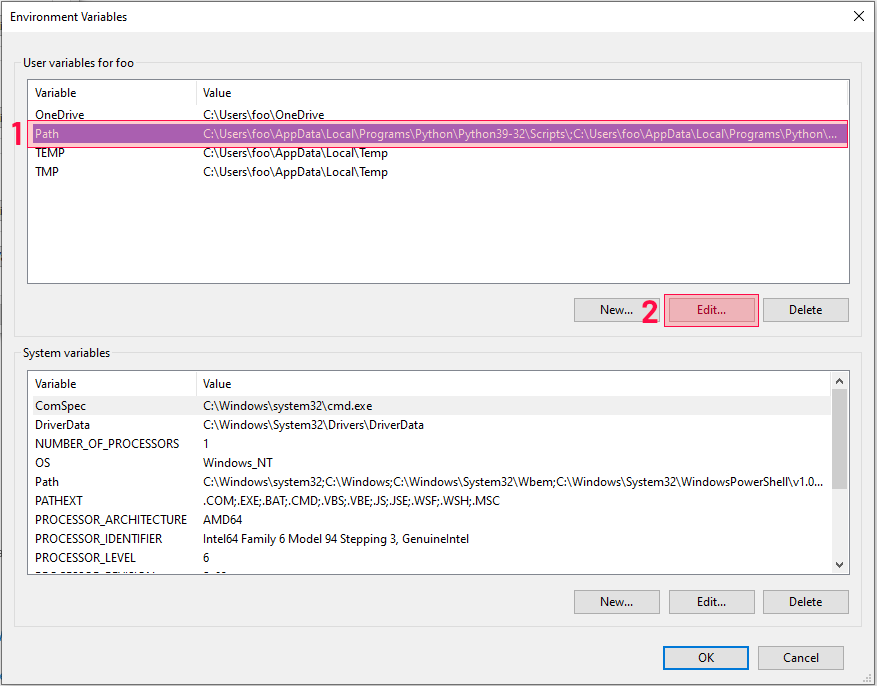
-
For each of the paths below click on
Newthen copy paste the file path:C:\Make\bin C:\Program Files (x86)\Inno Setup 6 -
Now it should look like this:
Download Ink/Stitch
- Create a folder where you want to keep your Ink/Stitch source files
-
Right click into the file browser and click on
Git Bash Here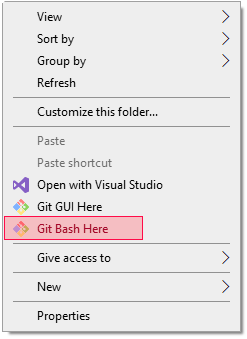
-
Run the following commands in the terminal emulator:
git clone https://github.com/inkstitch/inkstitch
git clone https://github.com/inkstitch/pyembroidery
Edit Ink/Stitch requirements
- Open the new inkstitch folder in the file browser
- Open requirements.txt with your prefered text editor
- Delete
./pyembroidery - Replace
numpy<=1.17.4withnumpy
- Delete
Setup Python
-
In the terminal emulator run the following commands:
python -m pip install --upgrade pip python -m pip install wheel python -m pip install git+https://github.com/gtaylor/python-colormath python -m pip install -e pyembroidery/ cd inkstitch python -m pip install -r requirements.txt python -m pip install pyinstaller -
For debugging with pydevd also run:
python -m pip install pydevd
Setup yarn
-
In the terminal emulator run
npm install --global yarn
Set Ink/Stitch environment variables BUILD and VERSION
-
In the file browser open the
Makefilewith your predered text editor Add these line to the Makefile at the beginging:export BUILD=windows export VERSION=my-dev-build -
Open the bin folder and edit the file
build-distribution-archivesComment out VERSION
# VERSION -
Also in the bin folder edit
build-windows-installerUpdate VERSION to the same name which you used in the Makefile
VERSION=my-dev-build
Build Ink/Stitch
-
In the terminal emulator run:
make distclean && make dist -
In the file browser you will find the finished builds in the folder
artifacts