Fonts for Ink/Stitch
@Augusa wrote an excellent article about the creation of new fonts for Ink/Stitch in her blog: Inkstitch : Créer une police de caractères brodés
Here you will find a shortened and slightly altered version of her text in english translation.
This article wil not explain how to digitize single letters, but how to create a font to be used in the lettering tool of Ink/Stitch.
It would be possible to create a completely new font with the svg font editor tool offered by Inkscape. I will prefer to use an existent font. Using Fontforge will make it easy for us to define the kerning (distances between letters) later.
A SVG font contains a layer for each glyph. Each layer has to follow a precise pattern. Especially the baseline will be important in order to use the font with Ink/Stitch.
Warning
Fonts are copyrighted, as are images or embroidery files. It is therefore important to carefully review the required permissions. “Free” does not mean that you can do anything with it. In particular, if the file is to be published for use with Ink/Stitch. The license terms must be strictly adhered to. For example, choose fonts under public domain or Open Font License. In any case, it is advisable to read the license carefully before starting the laborious digitization work.
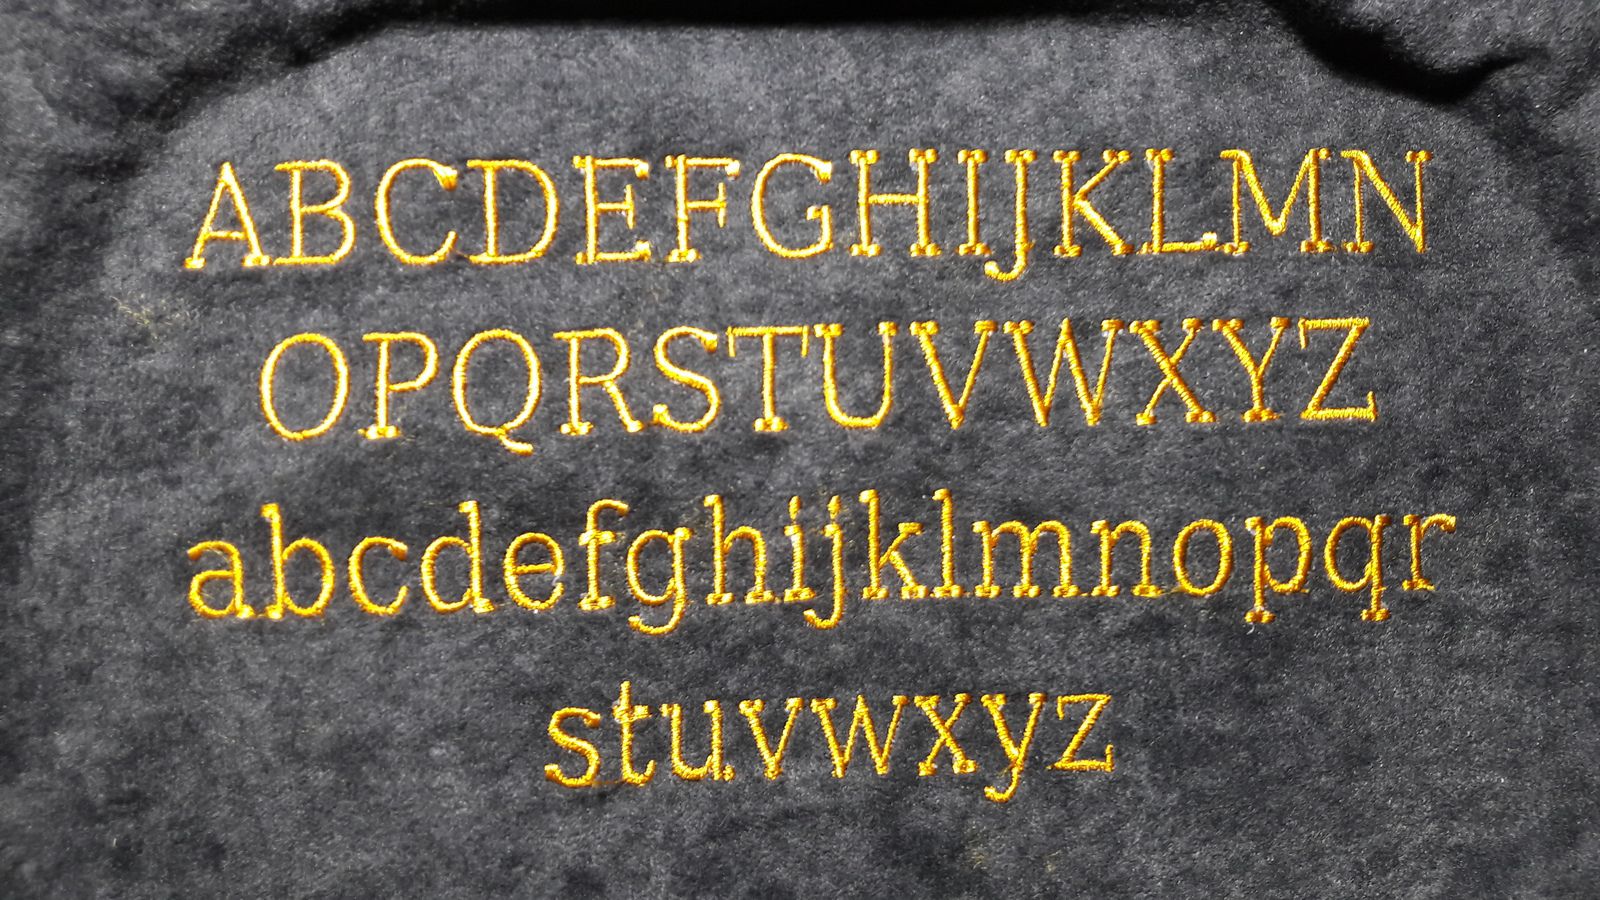
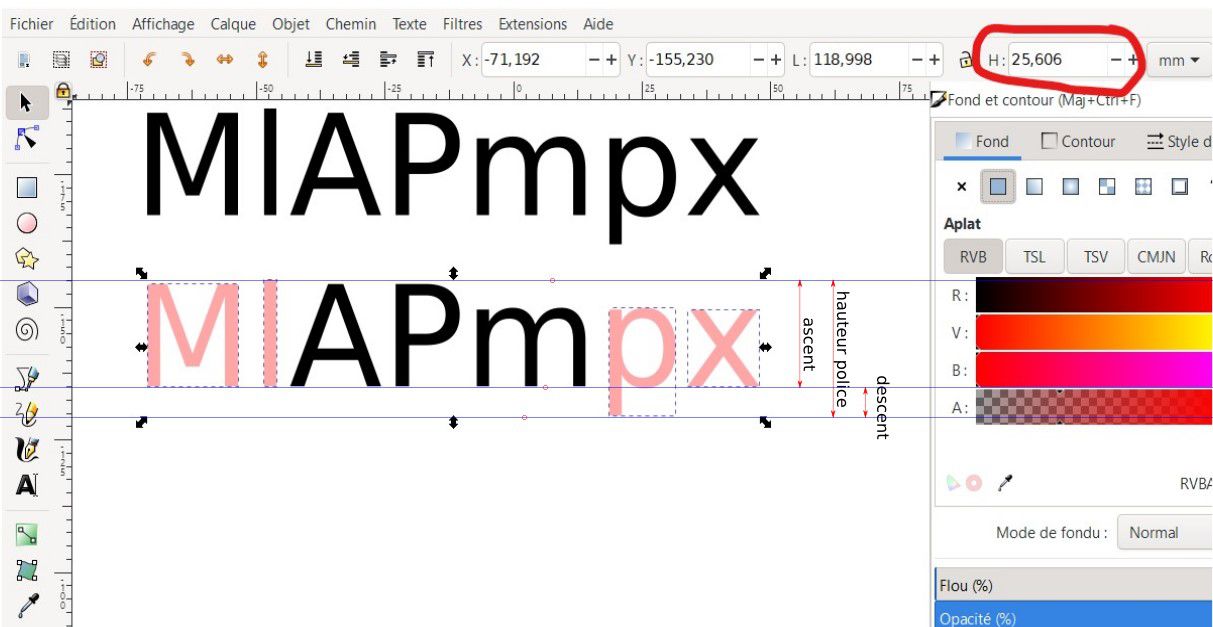
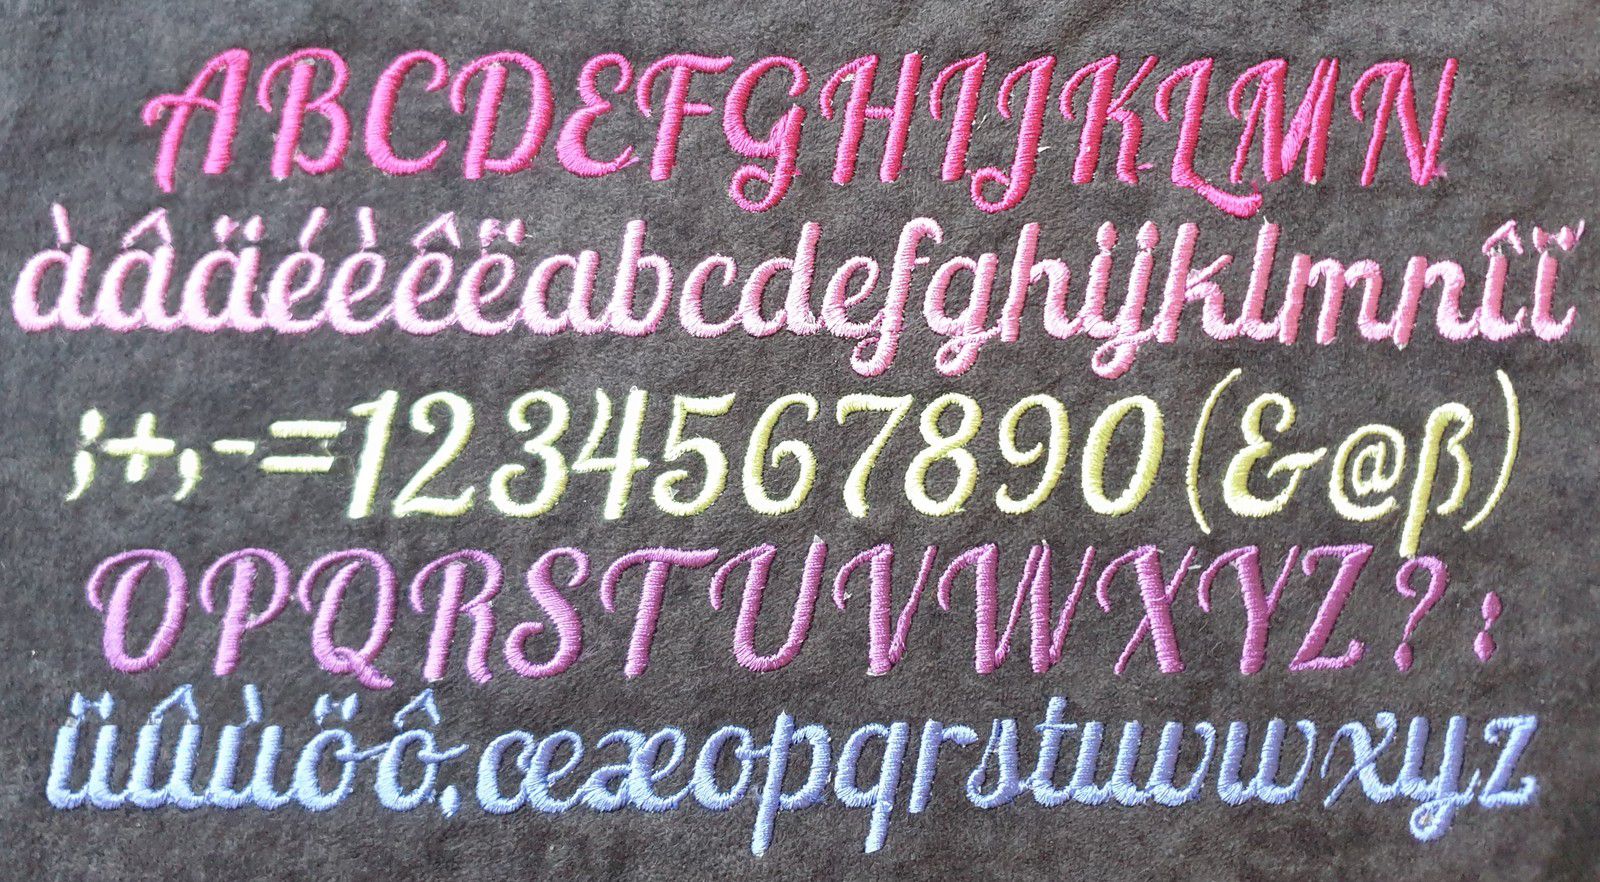
After checking the font license carefully, start to determine the size of the font. We have to know the maximum height of the letters above and below the baseline. These values can be determined by writing all uppercase and lowercase letters of the alphabet. In some fonts lower case letters are taller than capitals (e.g. b or l). In the image you can see, that the l is higher than the M.
1. Create a file with glyph layers
-
Use FontForge and open a ttf-file or any other font-fileformat.
-
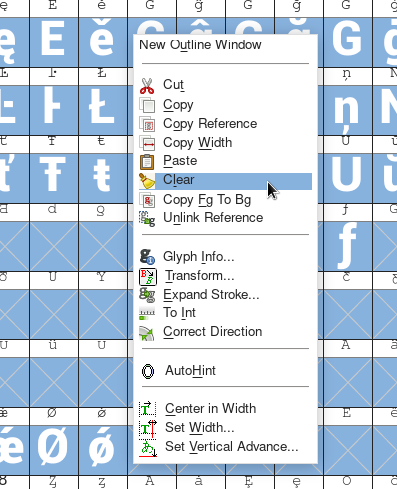
Select those glyphs which you are wanting to digitize. Count the approximate number of glyphs, you will need it later. Make sure to really select every sign you want to digitize, also scroll to the very bottom of the list. The selection shown in the image is not a guide which glyphs to choose.
After you’ve done your selection go to
Edit > Select > Invert Selection.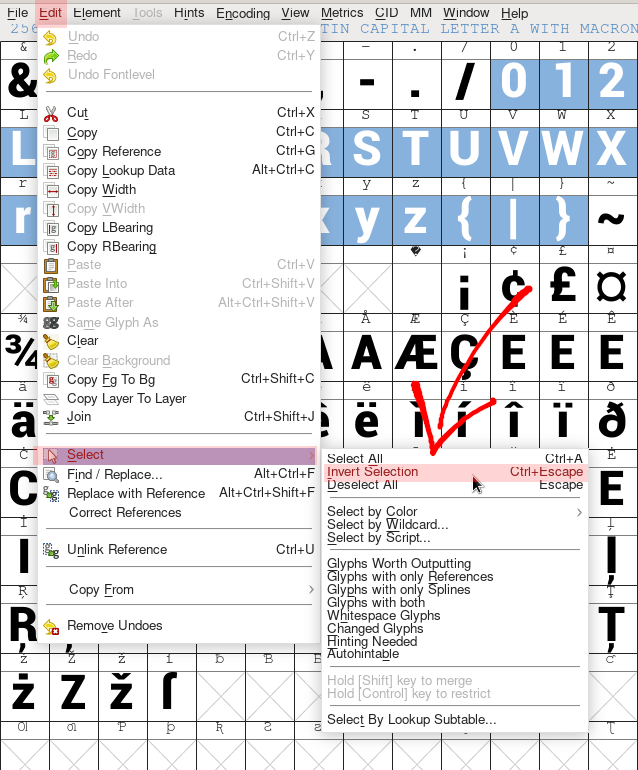
Delete the now inverted selection through the menu popup on right click.
-
Open the General Font Information:
Element > Font Info... > General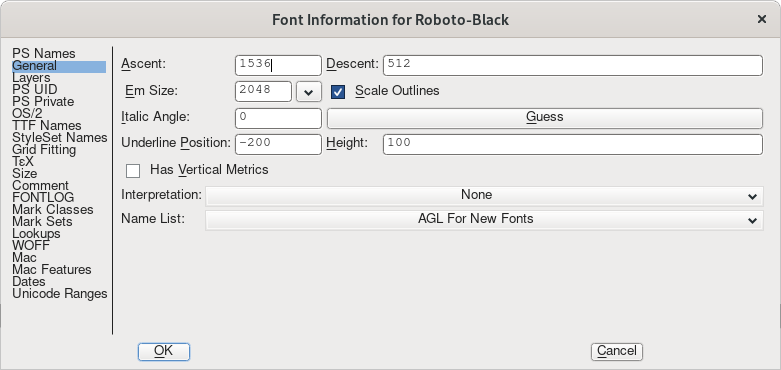
Define Ascent (maximum height above the baseline), Descent (maxmimum height below the baseline) and Em Size (the sum of ascent ad descent).
-
Run
File > Generate Fonts > SVG font > Generateand ignore errors.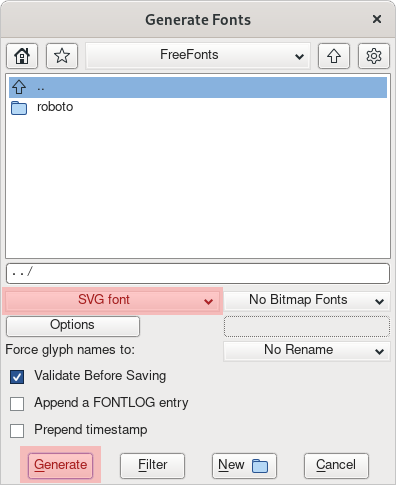
Fontforge will now generate the svg font file.
-
Open the generated file in Inkscape. It is empty!
-
Run
Extensions > Typographie > Setup Typography Canvas...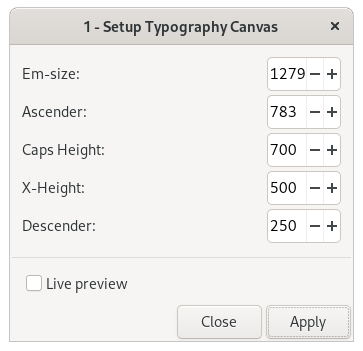
Set at least the Em-Size correctly.
-
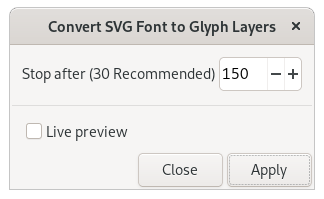
Run
Extensions > Typhographie > Convert SVG font to Glyph layers...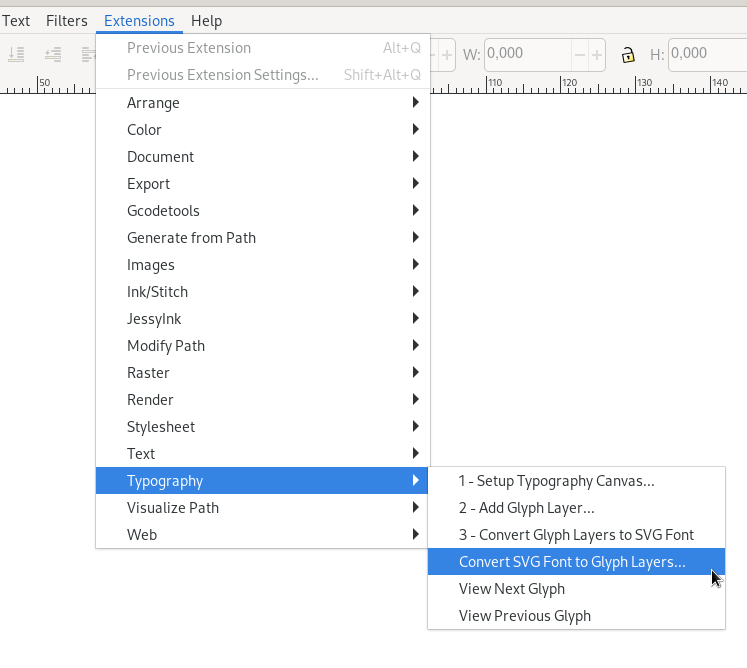
Enter the approximate number of glyphs to convert (higher values will cause no error) and apply
-
The basic file is done. Now it will be necessary to open
File > Document properties. In Scale click on+and-once. This will create aviewboxtag in the document which is missing otherwise and the baseline will not be properly regognized by Ink/Stitch. -
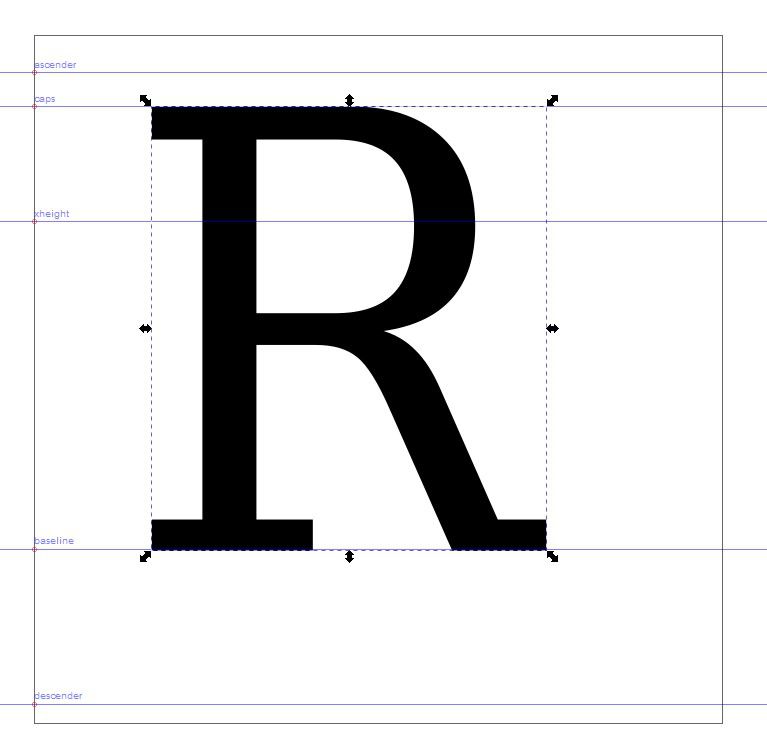
Define font lines. Place the lines while unhiding suitable letters.
- Descender will be at the lowest point of your glyphs. In most cases the p can be used to define it.
- The baseline (writing line) will be the only line which is used by Ink/Stitch to position the glyphs and must be set properly (use e.g. M).
- Caps will define the height of the upper case letters (e.g. M).
- xheight the height of lower case letters (e.g. the top of x)
- Ascender defines the highest point of your glyphs in most fonts it can be set with help of the l)
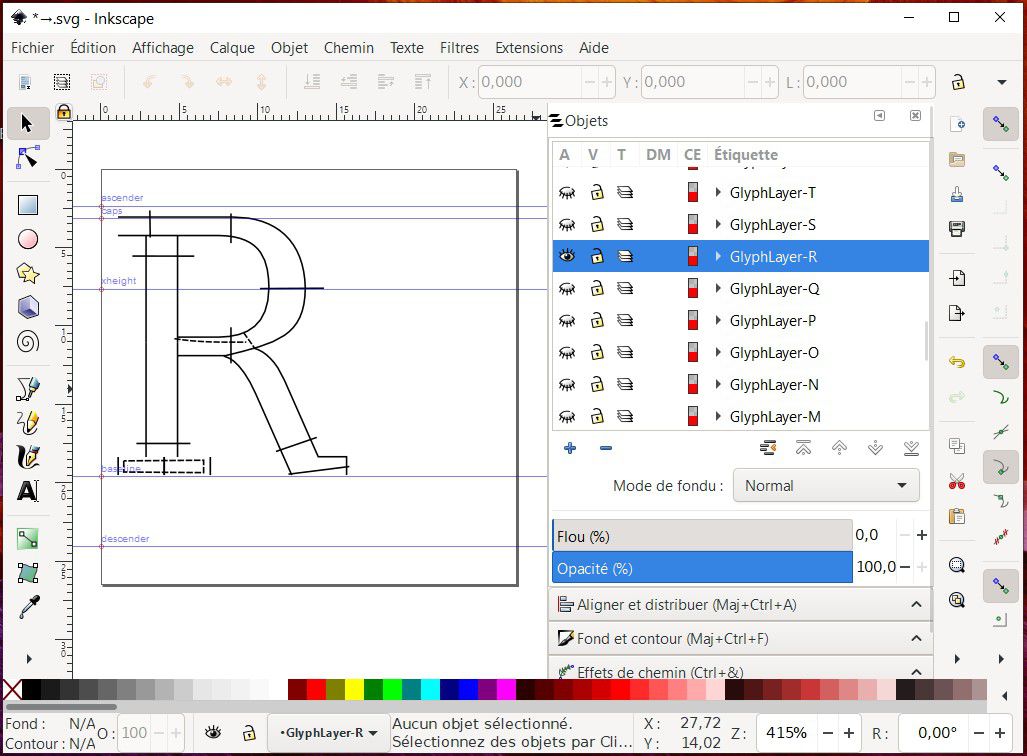
Now your file will look similar to this:
Keep the original file. Just in case there will be problems with the font at a later time.
2. Digitize the Glyphs
We will now beginn to prepare a glyph to be embroiderable.
Satin columns are best for letters. Create them without having the order in mind.
Before you order them correctly save a copy of the file and name it →.svg.
In this copy define the glyph order so that it can be stitched from left to right:
each glyph should have its starting point in the lower left corner and end in the lower right corner.
Ink/Stitch comes with a tool named “Auto-Route Satin”. Use it to order your satin columns. If all letters run without any issue, you don’t have to do anything more. Use your basefile and allow Ink/Stitch to automatically run the Auto-Route Satin tool when inserting the letters into the document.
Otherwise inspect every letter carefully and create separate files for each stitch direction with manual routing.
3. JSON and Kerning Information
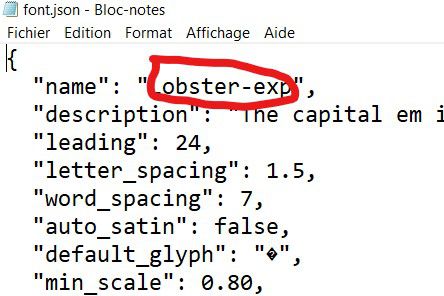
Each font in Ink/Stitch has its own font.json file. It defines the name of the font and can also contain a short description. Additionally the font spacing will be found here.
Additionally to the font files and the json file, a license file has to be placed into the font folder.
For the font to look even and harmonious the kerning has to be right. Here a little example for better understanding:
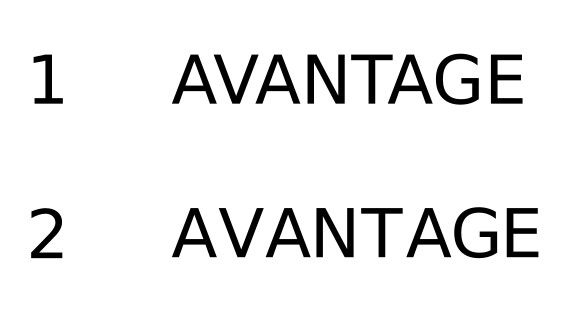
Line 1 was created with the Inkscape text tool. We read “AVANTAGE” without hesitation.
In line 2 all letters are equally spaced. The reading is more difficult and we hesitate a little between the words “AVANT” and “AGE”. We now select all the letters and compare the two lines.
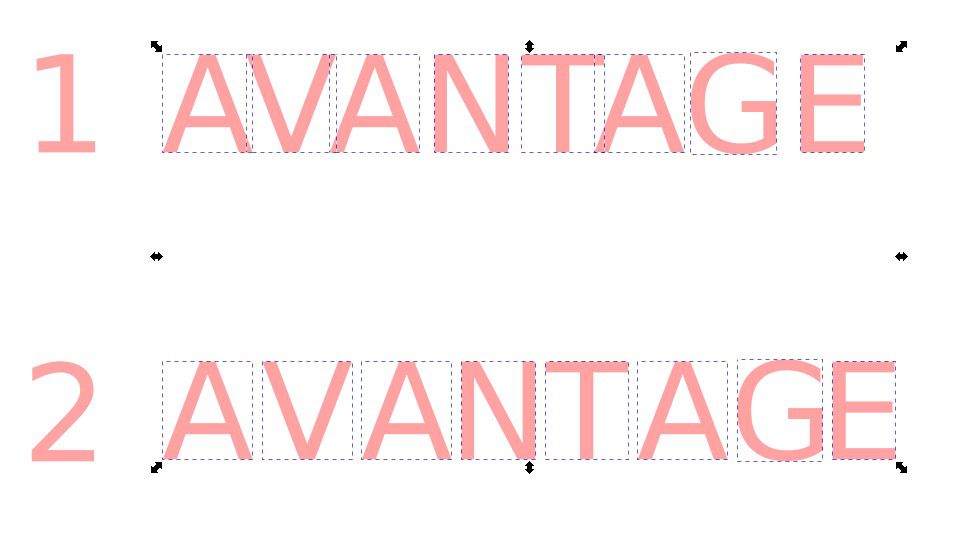
In line 1 the letters are not evenly arranged, while in line 2 they are evenly spaced.
For better quality it is therefore necessary to adjust the position of the letters relative to one another and to achieve the best possible kerning. We must therefore examine the position of the letters relative to one another. For example, A and V are close to each other, while G and E are far apart. A font has 2 by 26 letters plus accented characters plus special characters plus punctuation. We quickly come to more than 80 glyphs or 6400 pairs.
It’s impossible to do that by hand. Now we can benefit from the method that we used to digitize the fonts (FontForge). This means that we have already integrated the correct kerning into the font file and only need to extract it from here.
Ink/Stitch offers a tool for you to create the json file with the correct kerning.
-
Extensions > Ink/Stitch > Font Tools > Generate JSON ...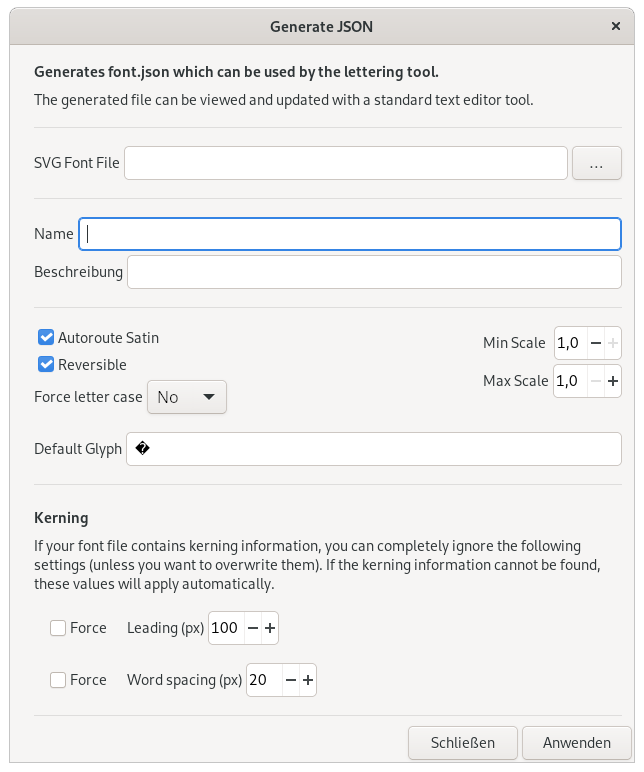
- Fill in everything you want to include into the json file:
- Name: the name of your font (mandatory).
- Description: additional information about your font (such as sizing information, etc)
- Font File (mandatory): When you have been using FontForge to generate your svg font file, Ink/Stitch will read the kerning information from your font to include it into the json file. Additionally the font file will be used to determine the output path.
- AutoRoute Satin:
- enabled: Ink/Stitch will generate a reasonable routing for satin columns in your font when used in the lettering tool. More information about AutoRoute Satin
- disabled: Ink/Stitch will use the glyphs as is. Disable this option, if you took care for the routing in your font by yourself.
- Reversible: wether your font can be stitched forwards and backwards or only forwards
- Force letter case:
- No: Choose this option if your font contains upper and lower case letters (default).
- Upper: Choose this option if your font only contains upper case letters.
- Lower: Choose this option if your font only contains lower case letters.
- Default Glyph: the glyph to be shown if the user requested glyph isn’t available in the font file (missing glyph)
- Min Scale / Max Scale: Define how much can your glyphs can be scaled without loosing quality when stitched out
The following fields are optional only necessary, when your svg file doesn’t contain kerning information. If kerning information cannot be found, these values will be used instead.
-
Force custom values: Do not use the kerning information from the svg file, but use the given values instead.
- Leading (px): Defines the line height of your font. Leave to
0to let Ink/Stitch read it from your font file (defaults to 100 if the information cannot be found). - Word spacing (px): The width of the “space” character
- Click
Applyto finally generate the json file. It will be saved in the same folder as your font svg file. It can be edited with a text editor (e.g. Notepad) if necessary.
4. Ink/Stitch Font Directories
Ink/Stitch can read fonts from various places. But the easiest way is to define your own custom font directory.
- Open
Extensions > Font Tools > Custom Font Directory ... - Choose the folder where you want your fonts to be placed
- Click
Apply
Now you can create a new folder inside your custom font directory for each font and copy your font files (svgs, json, license) into it.
When everything works out, test embroider your font with the lettering tool (Extensions > Ink/Stitch > Lettering)
If font or letters will not show up, inspect your glyphs carefully again, searching for rendering errors.
5. Cleanup the SVG Font File (Optional)
⚠ Warning: Changes made by this tool cannot be reverted. Make sure to save a copy of your file before performing these steps.
Your font is ready to be used. But when you created your font with FontForge it now contains a lot information which isn’t necessary for your font to work and could possibly slow it down a little. Ink/Stitch comes with a tool to clean up your svg font.
- Make sure you save a copy of your font. The additional information may not be necessary for the font to be used, but it can become handy when you want to add additional glyphs.
- Run
Extensions > Ink/Stitch > Font Tools > Remove Kerning - Choose your font file(s)
- Click on apply