⚠ This page is outdated. For more recent information have a look at the english original.
QR code
Diese Funktion ist Teil einer zukünftigen Ink/Stitch Version und ist in der aktuellen Version noch nicht verfügbar.
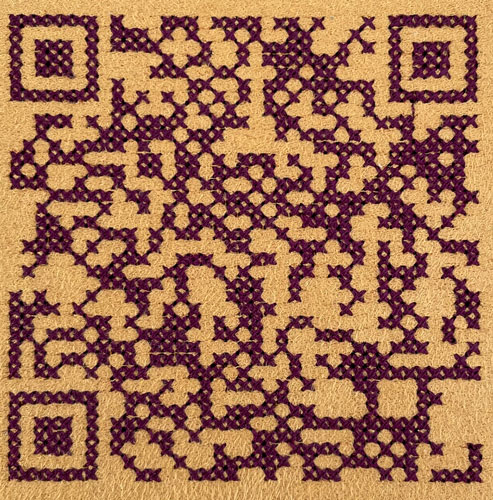
Using Inkscape extension Render > Bar Code /QR code > QR code and Ink/Stitch cross-stitch, one can easily embroider a working QR code:
Using the QR code extension
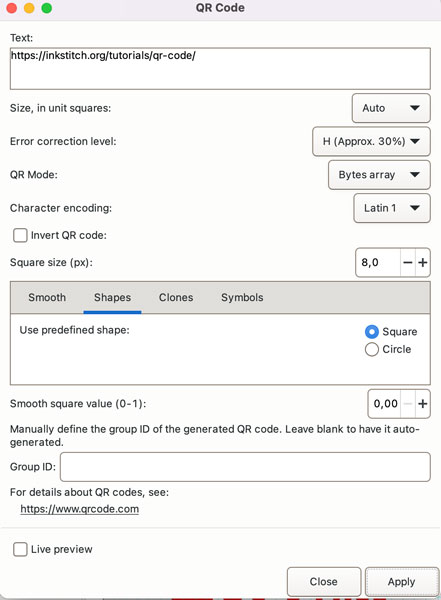
Text Field
In the Text field, enter whatever you want to code. In this tutorial, we will use this page URL, that is
https://inkstitch.org/tutorials/qr-code/
Do not forget the https:// at start.
If you wish to create a QR code to share your Wi-Fi information, the Text field should be filled with something like this
WIFI:S:<SSID>;T:<WPA|WEP|>;P:<password>;;
For instance, if your wifi SSID is “My_Wifi” , your password is “Hello” and your security protocol is WAP, enter this in the Text field
WIFI:S:My_Wifi;T:WPA;P:Hello;;
Error correction level
Chose a high level there, it will help us embroider later on.
Size
Here, you chose the squares width in pixel. You will need the same size in mm for the cross-stitch extension.
I chose 8 px width for my squares, that will be 2.12 mm for Ink/Stitch.
Apply
After applying, you get two different objects, one is a rectangle, remove it, and then the QR code as a single path, keep it
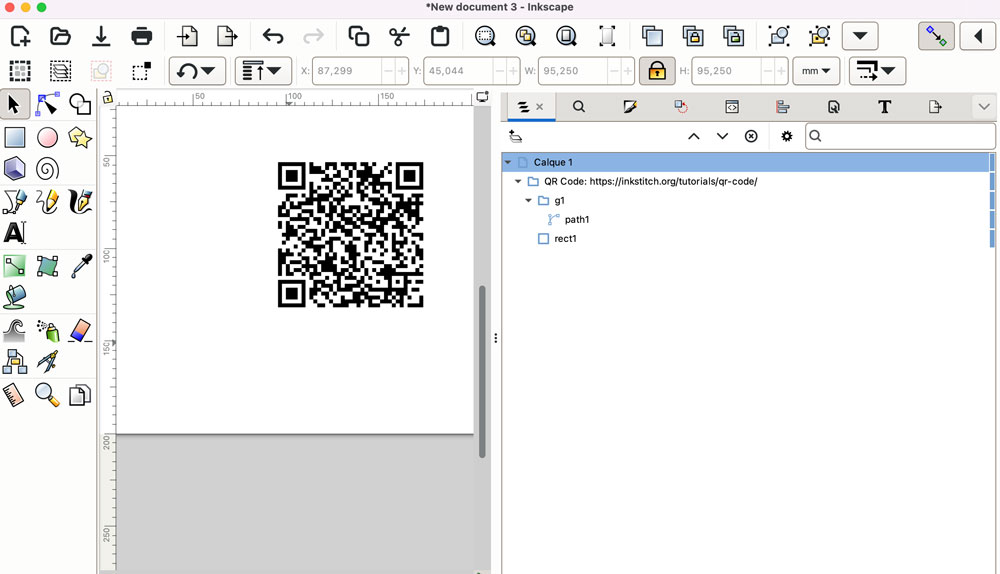
Prepare the QR code for Ink/Stitch Cross Stitch
- Select the QR path and move it to the upper left corner of the screen by setting X=0 and Y =0 in Inkscape toolbar. This will align your QR path with the cross-stitch grid
- Very important step : After setting Inkscape Behavior > Steps > Inset/Outset by: to 0.5 px, slightly outset the QR code path using Path > Outset.
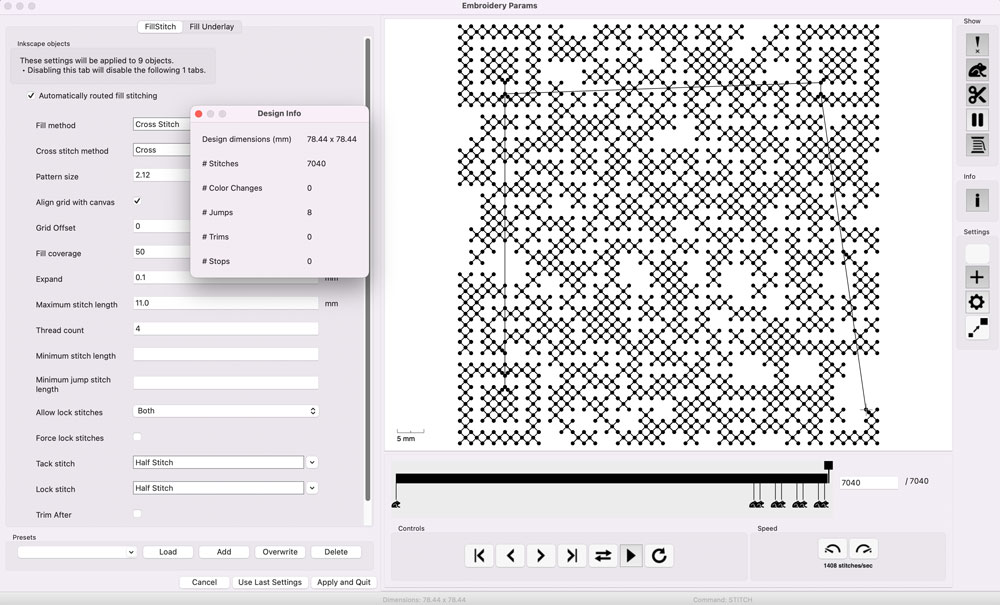
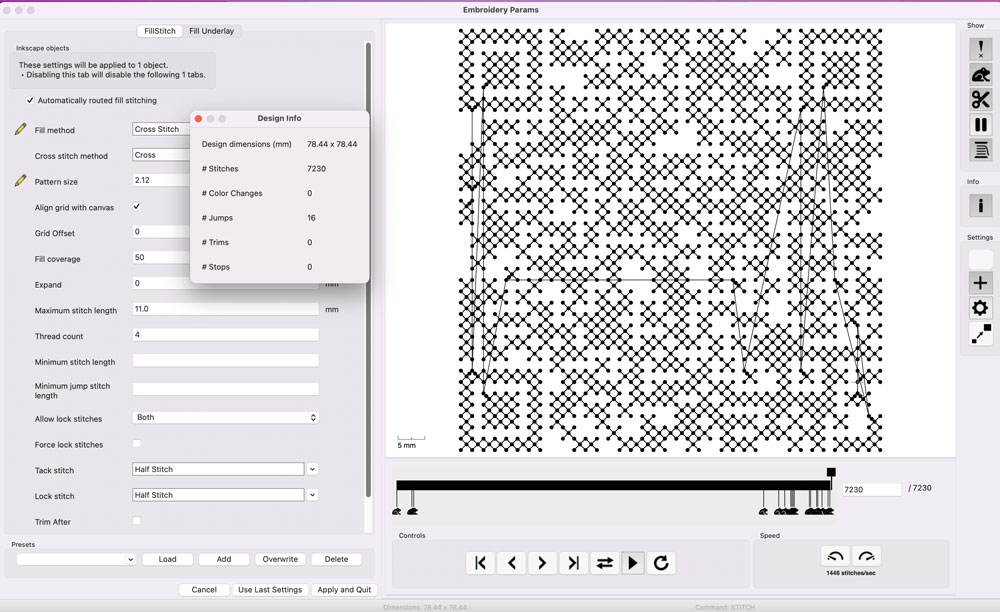
Using Ink/Stitch Cross Stitch
Select the prepared QR-code Path and apply parameters, chose cross-stich fill with pattern size 2.12. As you can see in the screenshot below, you have an embroidable cross stitch QR code.
We can have a better embroidering experience by lowering the number of jumps.
Because we chose a high error correction level, we can simplify the code by removing smmall areas and still have a working QR code.
- First use the cross stitch helper (with grid spacing set to 2.12 mm) to pixelise the QR path: It will break the shape into several connected areas
- Then use Ink/Stitch > Trouble Shoot >Clean Up Document to remove area of surface smaller than 65 (8x8+1) squared pixel. This will remove all one square shapes
- In my example, it removes 5 squares.
- Check the QR code is still working It does, let’s try to simplify more
- Repeat the process, removing areas of surface smaller than 129 (2x64+1).
- In my example, it removes 4 shapes.
- Check the QR code is still working.
I now only have 9 shapes that I can reorder to get a smoother embroidering experience like this :