Cookie Cutter Tiling
 This tutorial explains how to fill a shape with pattern repetitions using the Tiling Live Path Effect , Clipping and Autorouting.
Tiling
Tiling Live Path Effect repeats a tile (a path or a group of paths) in rows and colomns, with many options to modify spacing, create offset, rotate, and add all kind of mirroring effects.
Tilings are really interesting for embroidery purpose, be it to create patterned fills or to loosely fill with repetitions of patterns.
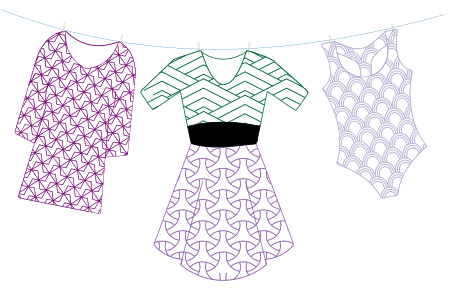
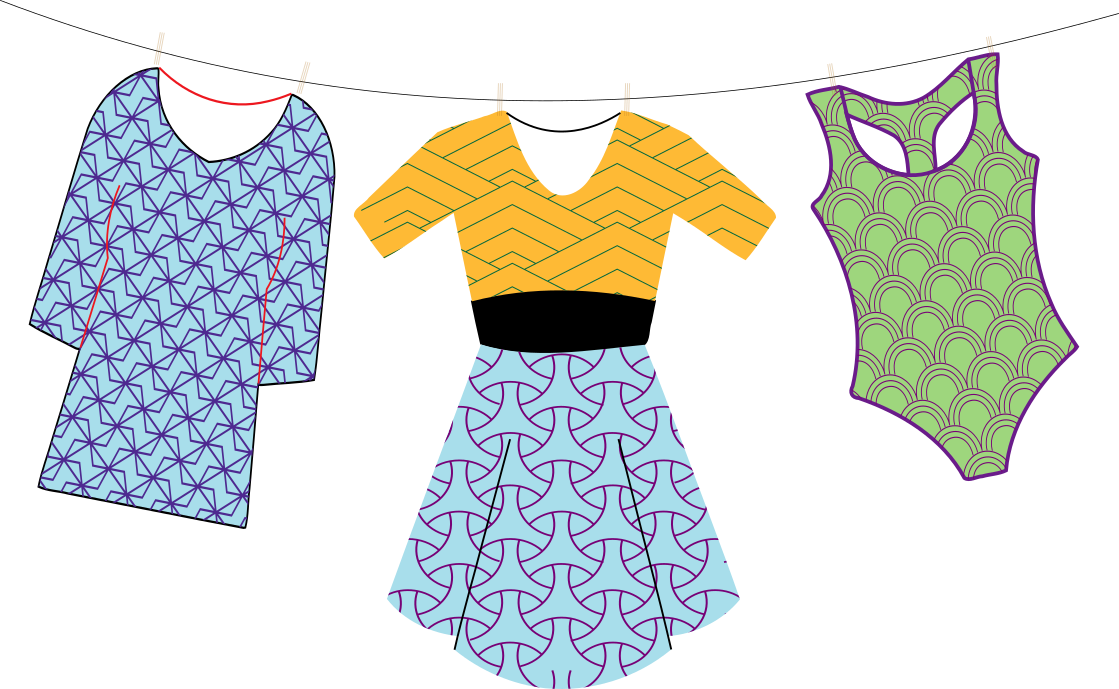
Here are some samples
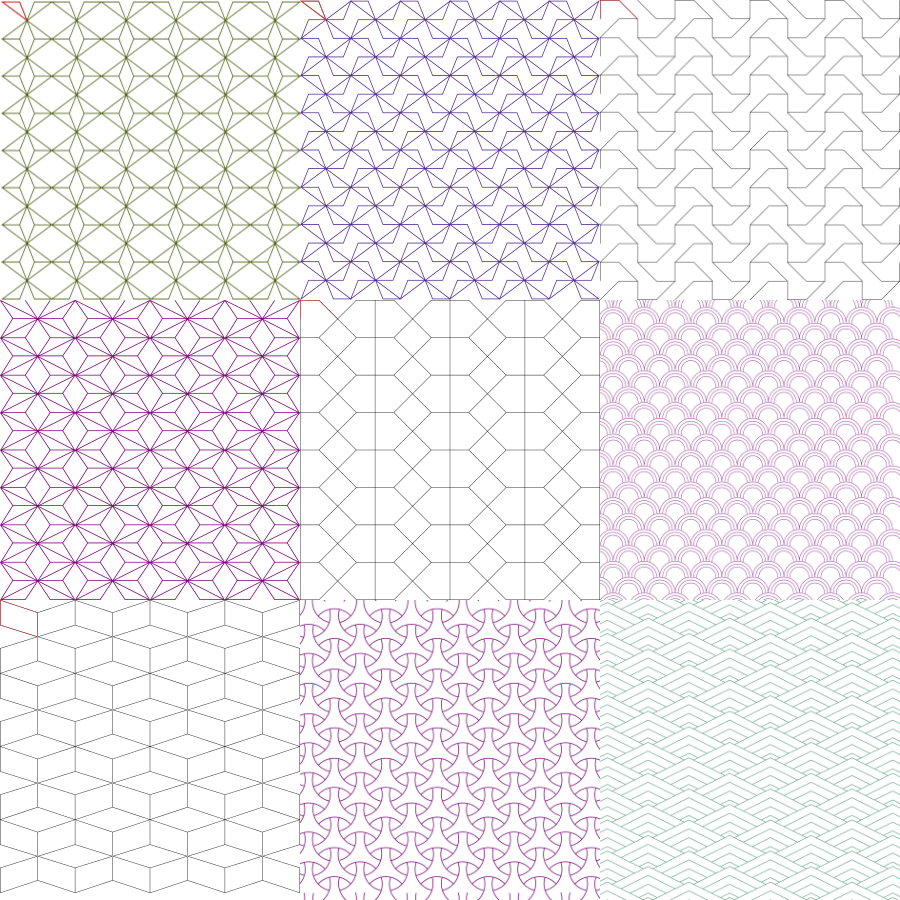
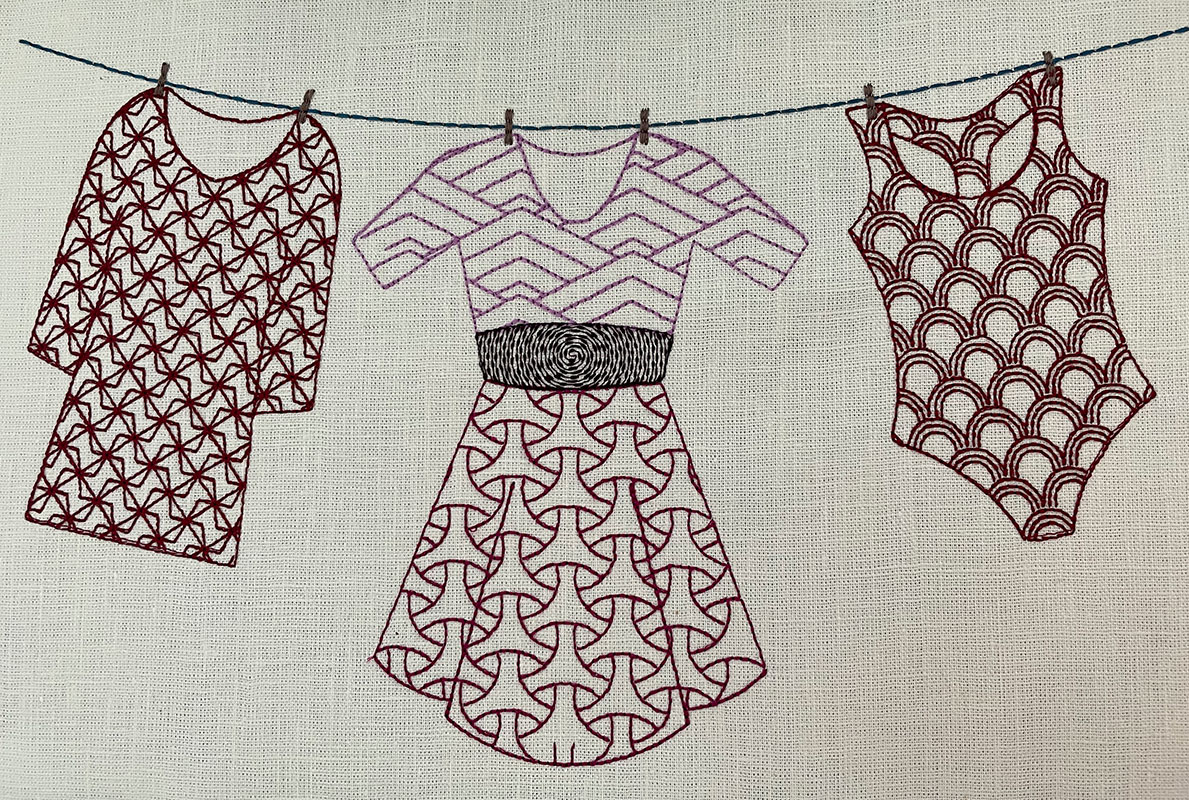
You may recognize them in the clothline embroidery:
- T-shirt : first row, middle tiling
- Dress top: last row, last tiling
- Dress Bottom last row, second last tiling
- Swiming Suit, middle row, last tiling
The Belt fill is a circular fill, with bean stitch repeat 0 2, that is alternating simple and quituple stitches.
All designs in this file are created applying Tiling LPE to a group, it makes it much easier to use than trying to apply the LPE individually on each path of a tile.
They are easy to modify: you may modify a path in the group or add a path and see immediatly the result on the canvas. From the LPE dialog you may change the number of rows and columns, again seeing immediatly the result.
You may use these tilings or create your tilings, it is really fun and easy to do.
To create the clothline design, besides tilings, we need cloth shapes.
Cloths Preparation
Instead of drawing cloths why not download them?
I used three svgs created by Bernd Lakenbrink of the Noun Project.
However, we need to modify these svgs to serve our purpose.
Let’s adapt the T Shirt.
This kind of svg is perfect for screen, or for cutting machine, but must be modified for embroidery, as what appears like a stroke is actually a fill. Using
Extensions > Ink/Stitch > Tools: Stroke> Fill to Stroke, this is easily solved.
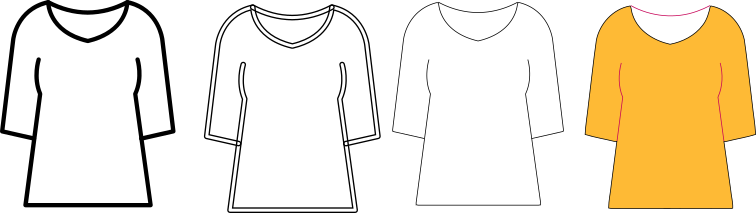
The four images below are from left to right:
- screen look
- what it looks like if we remove the fill and add a stroke
- what
Fill to Strokereturns - what we really need : a closed shape (orange fill) and two additional details (red paths)
So after downloading the T-Shirt
- Select all T-Shirt paths
Extensions > Ink/Stitch > Tools: Fill> Fill to Stroke- This create a “Centerline” group: in there, pick up paths and construct the shape (outline) of the T Shirt (joining nodes or breaking paths). Keep some additional details if you wish.
The cloth_line.svg file contains all prepared cloths in the “Cloths Preparation” layer and the same tilings again in the “Tilings” layer.
It also contains what you should obtain after each step of the process, up to the final embroidery. Each step of this tutorail corresponds to a layer of the file, proceed from bottom to top, remember to unlock and unhide a layer if you want to use it. Other layers are best left hidden and locked.

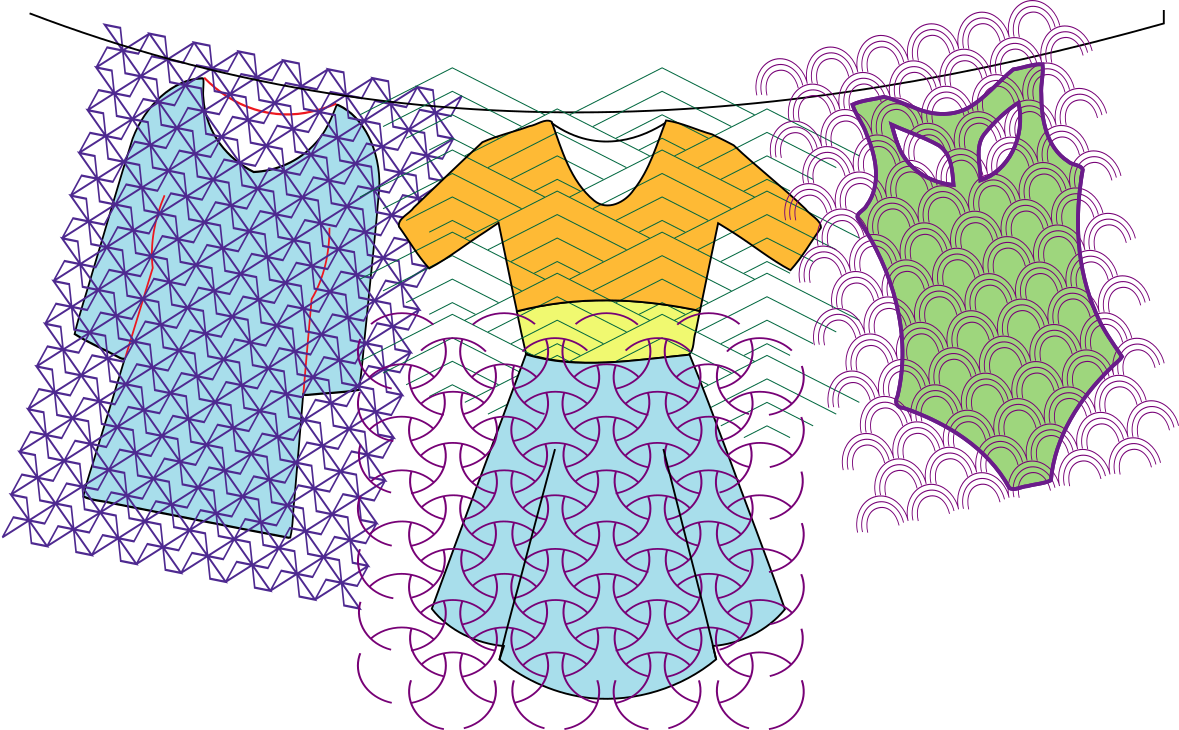
Covering each shape with a tiling
Next step is simply chose a tiling per shape to cover.
Working on the canvas, you may rotate or resize the tiling, from the LPE dialog you may change the number of rows and columns.
Do your best to entirely cover each shape to be filled, without having too many unuseful repetitions of patterns.
This is what was chosen (this is layer “Clothline preparing pattern fill” in the cloth_line.svg file )
Pattern filling
This is our goal
This is easy to achieve: just follow the following steps, respecting the ordering of the steps.
For each future pattern filled shape we have a group containing :
- shape: a close path that outlines the piece of cloth.
- Details: a group containing stuff to be embroidered over the filled shape. We want to embroider that after patterned fill is stitched.
- Tiling: the tiling group that contains all the paths of the tiling. The LPE Tiling is carried by this group
Tiling LPE overview
Let’s have a look at the Tiling LPE applied on the Tiling group of the T Shirt
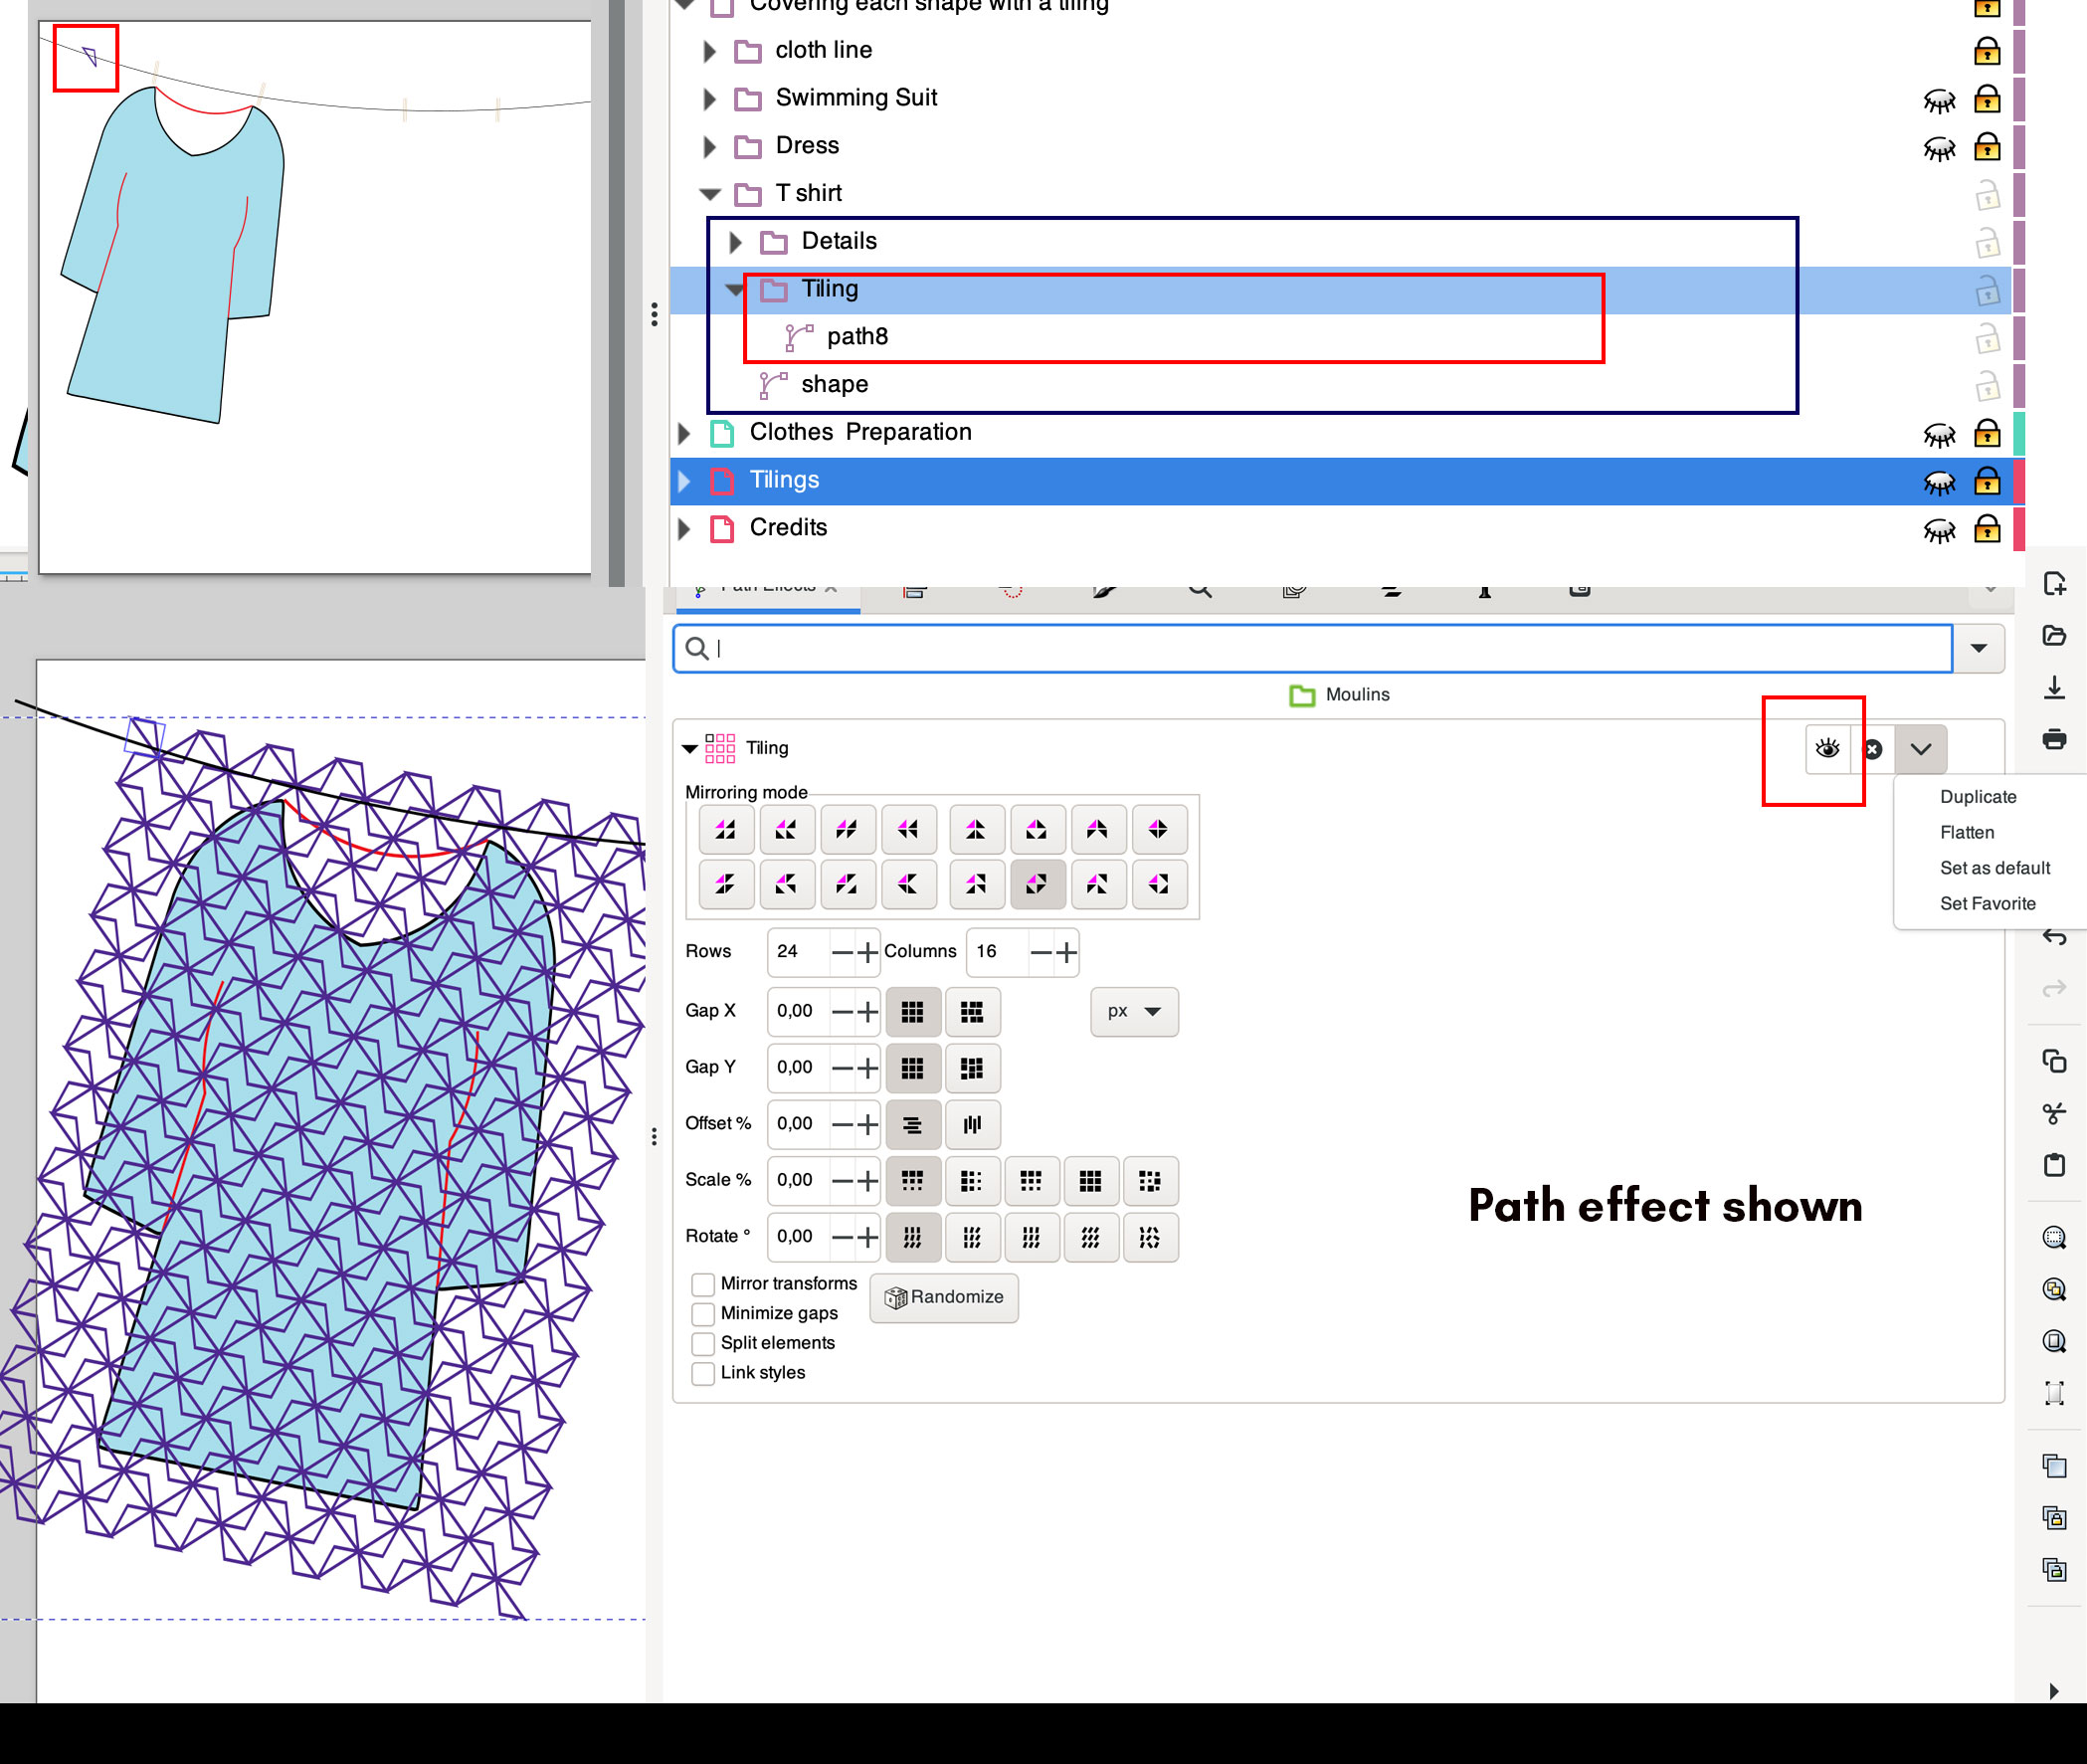 The eye in the red rectangle hides/shows the LPE.
Later on you will need to flatten the effect, see the menu to the right of the eye.
In another red rectangle is the  symbol that dictates the mirrors effect of the tiling.
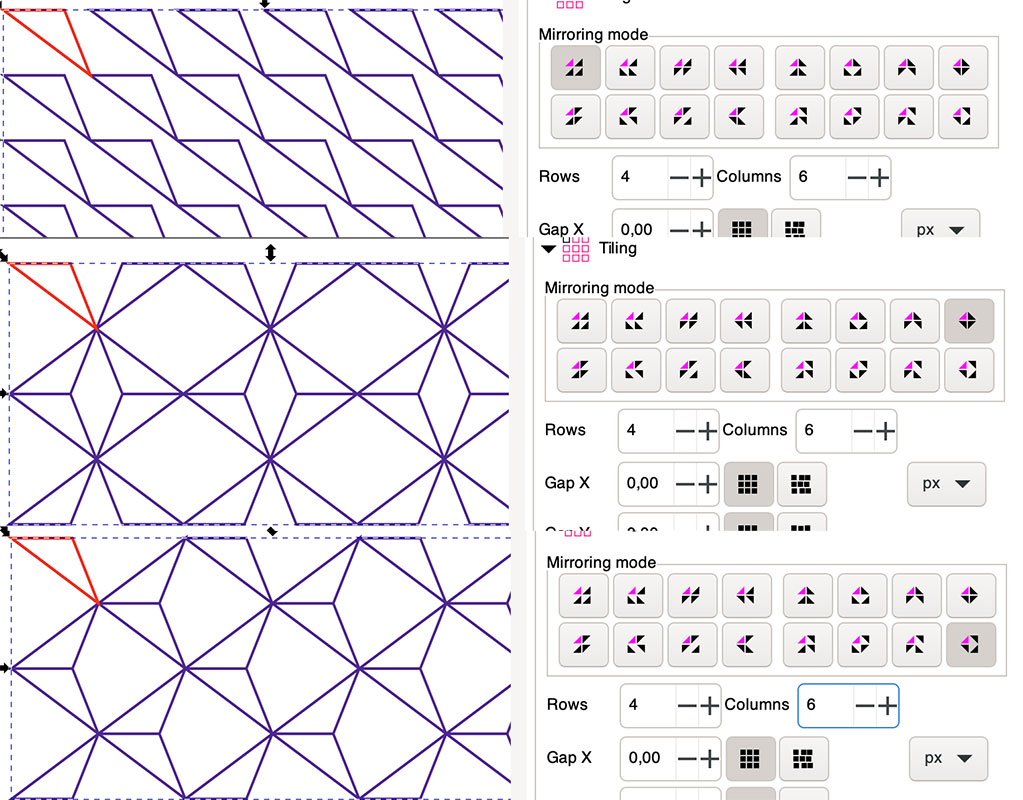
For a better understanding, let’s turn the tiling back to horizontal and set it to two rows and two columns:
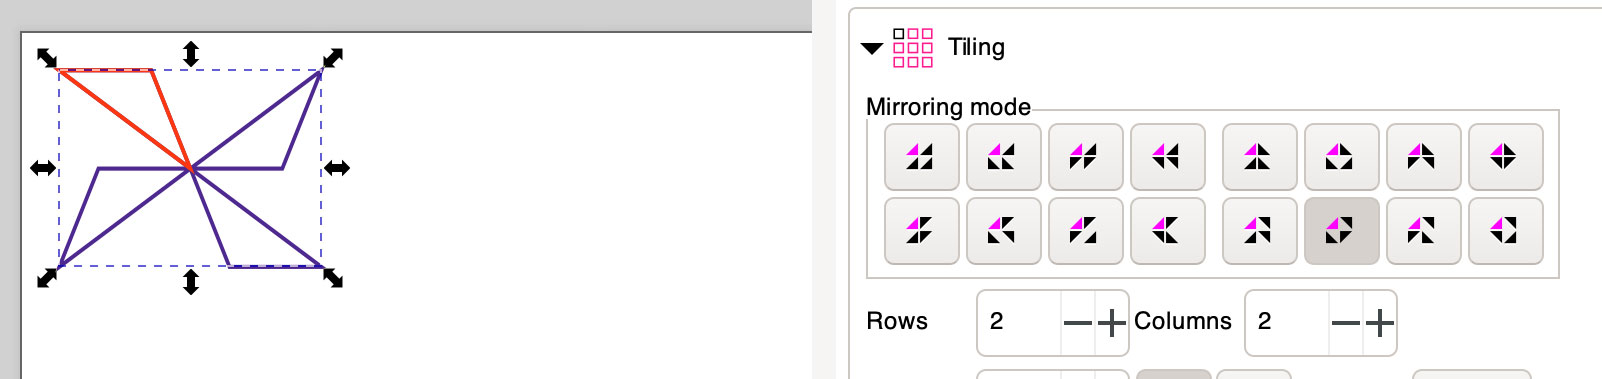
The pink shape of the symbol is the tile and the three other shapes shows the mirroring effects applied to rows and columns.
Click on another symbol and you will get another tiling. Try and chose your favorite.
Once you are happy with your modification flatten the LPE using the menu at top right of the LPE dialog.
After that, path8 is no more a triangle, but a composite path containing plenty of copies of the triangle.
Once the LPE is flattened, you can’t use the LPE dialog anymore.
In node edition mode, this is what you get when selectiong all path8 nodes :

Breaking apart this path would create plenty of triangles. Don’t.
In the general case you may need an additional step before flattening :
Combine paths in Tiling groups and flatten the effect
For each Tiling:
- If there is more than a single path in a Tiling group, combine all paths together.
- Select Tiling group and from the LPE panner flatten the effect.
If you look at the canvas, nothing is different.
Duplicate shape, and use it to Clip Tiling
For each Tiling:
- Duplicate shape
- Select the single path in the Tiling group and a copy of shape (this shape must be above the Tiling group in the Layers and Objects pannel)
Object > Clip > Set Clip
You should get :
Prepare for Embroidery Parameters
For each Tiling:
- Set the remaining shape path to stroke only.
- Make sure that Tiling path color and shape color are identical
- Choose if you also want the Details to be same color (i did, to have less color changes)
Add Embroidery Parameters
- Select shape ,Tiling and Details
- Run
Extensions > Ink/Stitch > Params
For nice triple stitches:
- Choose Runninng Stitch/ Bean Stitch as Method
- Set Running Stitch Length to 2 mm
- Set Bean Stitch Number of Repeats to 1
One Cloth at a time :
- Select the whole group
- Run
Extensions > Ink/Stitch > Visualise and Export > Stitch Plan Preview
You should get :
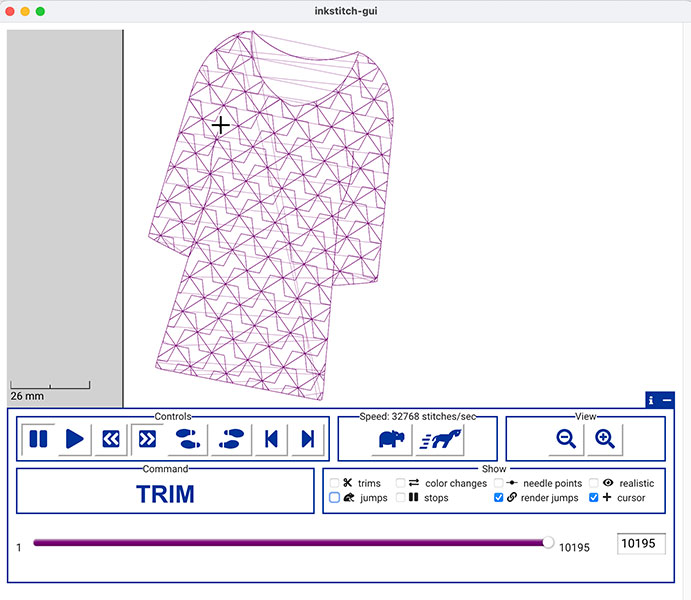
If render jumps is checked, you see that some path ordering is required, this is next step. However, you may disable it and check that the embroidery seems fine.
Autoroute
For each Tiling:
- Select the path in the Tiling group and the shape
- Run
Extensions > Ink/Stitch > Tools : Stroke> Autoroute Running Stitchonly checking add node at intersections
One Cloth at a time :
- Select the whole group
- Run
Extensions > Ink/Stitch > Visualise and Export > Stitch Plan Preview
and you will see that the jumps stitches are almost all gone.
If you look at the results in the Auto-Route groups you may notice some unuseful very short paths . You could get rid of them, but the easy way is
Extensions > Ink/Stitch > Preference- Set minimum stitch length to at least 0.5 mm locally only
Final steps
- remove all empty groups
- fine tune the positions of the cloth with respect to the clothline
If Details have a different color, the only jumps left are inside the Details group. Otherwise, there is also a jump from the last path of Autoroute to the first detail. You may either :
- Left the jumps as they are, and either your embroidery machine will turn them into trims, or you will have to trim later.
- Add a trim command or check trim after in the embroidery parameters
- Or convert jumps to paths
You may use Extensions > Ink/Stitch > Tools : Stroke > Jump Stitch to Stroke to help you : if you chose two consecutive paths with a jump in between and run this extension, it will create a straight path from
the end of the first path to the begining of the second. No need to guess where the fill is ending…. But it is up to you to camouflage it (see example in the dress belt)