Cross Stitch Lettering
This feature will be part of an upcoming Ink/Stitch release. It is not yet integrated in Ink/Stitch.
Using the Lettering Tool
The simplest method is to use a ready-to-use cross stitch font from the lettering tool, chosen from the twenty or so available.
It’s easy to limit the font sélection to cross Stitch fonts in the font menu, by simply selecting “Cross Stitch” from the dropdown menu in the upper right corner.

Then, everything works just like with other fonts.
Using a Pixel Font for Custom Lettering
Many pixel fonts are available.
You can find some on fonts.google.com by filtering for pixel appearance, but there are many more free pixel fonts on the web.
For this tutorial, we will use the doto font, available on fonts.google.com.

We will assume that this font is installed on your computer.
Note: If you install a new font on your system to use in Inkscape, you may need to restart Inkscape (depending on your system) for it to appear in the dropdown menu of installed fonts for the Inkscape Text tool. This is critical for using the font in Inkscape.
Our aim is to convert each “pixel” of the font into a cross stitch. With standard thread, it’s reasonable to produce crosses between 1.8 mm and 4 mm high. Using thinner thread allows you to go below 1.8 mm, while using thicker thread allows for even larger crosses.
Instructions
The steps are as follows:
-
Check that in Inkscape preferences, under the Interface tab, the “Origin at upper left, y-axis pointing downward” option is checked.
-
Decide on the size of the crosses: in this example, we will aim for 3mm crosses. This size is suitable for all the types of cross stitch available in Ink/Stitch.
-
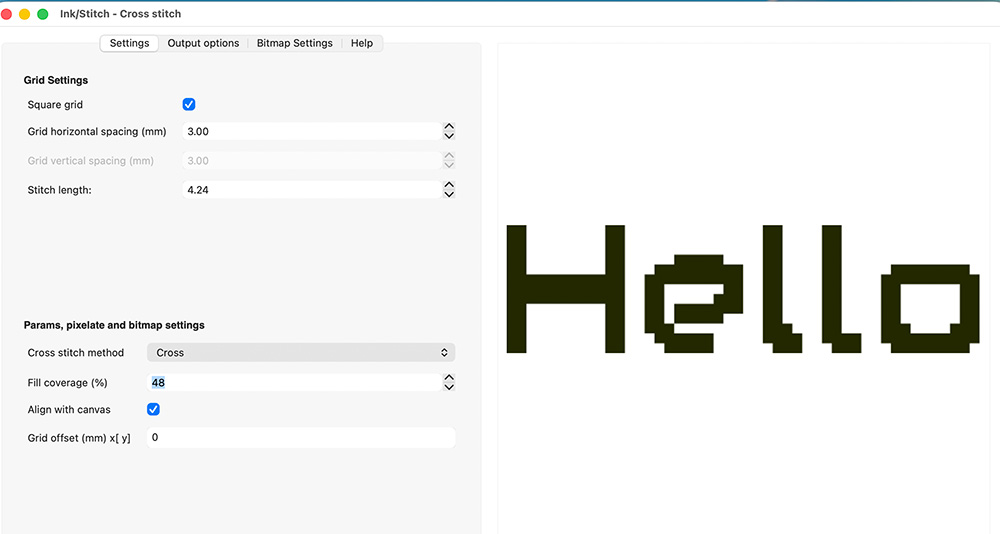
Display a grid with 3mm horizontal and vertical spacing, either using the document properties or the Cross Stitch Assistant (Deselect everything, then go to I
nk/Stitch > Tools: Fill > Cross Stitch Assistantset the horizontal grid spacing in the Parameters tab, and check “Show grid” in the Output Options tab). - Select the text tool, and make sure its style has a background color and no outline color.
- Select the Doto font from the font dropdown menu.
- Type your text using Inkscape text tool.
- If necessary, resize the text until you have one small square (“pixel”) per grid cell.

-
Convert the text to a path. Here, simply use
Inkscape > Path > Object to Path. -
Select the created paths, and then
Ink/Stitch > Tools: Fill > Cross Stitch Assistant.
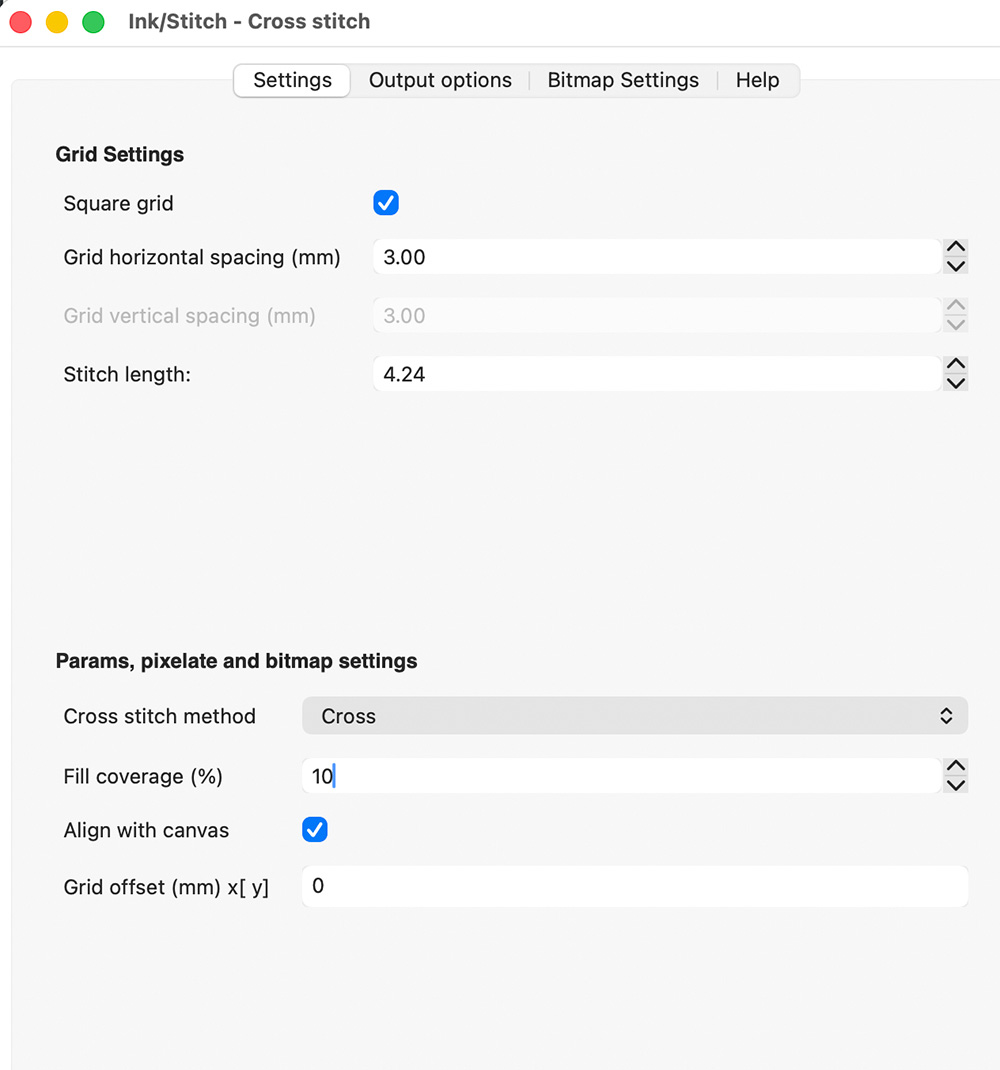
In the parameters tab, the important parameters are:
-
Horizontal grid spacing
-
Fill coverage percentage: Since the “pixels” are small compared to the grid squares, you should enter a small value in this parameter.
-
The chosen cross stitch method will be automatically selected for the parameters of the fill, which can be adjusted in this same operation provided that:
in the Output Options tab:
-
the parameters box is checked.
-
the pixelate box is checked.
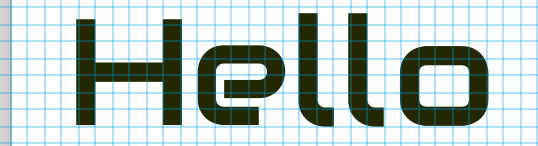
The shapes on the canvas change appearances and the cross-stitch parameters are set:
![]()
Each letter has become a unique shape; while embroidering, jumps only occur between letters.
Maybe more information that you wish for ?
You can stop reading this section here, but if you like to understand everything, you might be interested in reading further.
As a reminder, the cross stitch assistant has three independent functions that we just used:
-
Creating a grid on the canvas. This is a visual tool that shows how Ink/Stitch divides the space to calculate filling coverage (color by color). Displaying the grid is entirely optional. This grid can be displayed via the cross stitch assistant or via the document properties.
-
Embroidery Parameters. They can be set via the cross stitch assistant or via the Ink/Stitch Parameters extension. The cross stitch assistant adds a small expansion (0.1) to each shape, which is always a good idea when creating cross stiches shapes.
-
Pixelate. This modifies the shapes: each time the coverage threshold is reached on a square, the shape is enlarged to fill the entire square. If two squares touch, the shapes they contain are merged. In the previous example, after pixelate, each letter becomes a unique shape. Note that the pixelation is done for a given grid spacing; if you later change the size of the cross stitches, it will no longer accurately reflect the shape of the embroidery!
What would have happened if we had only checked the “parameter” box and not the “pixelate” box?
In this case, the shapes on the canvas remain unchanged. But the embroidery parameters have been applied.
If we call the parameters extension again to see the result, we get this:
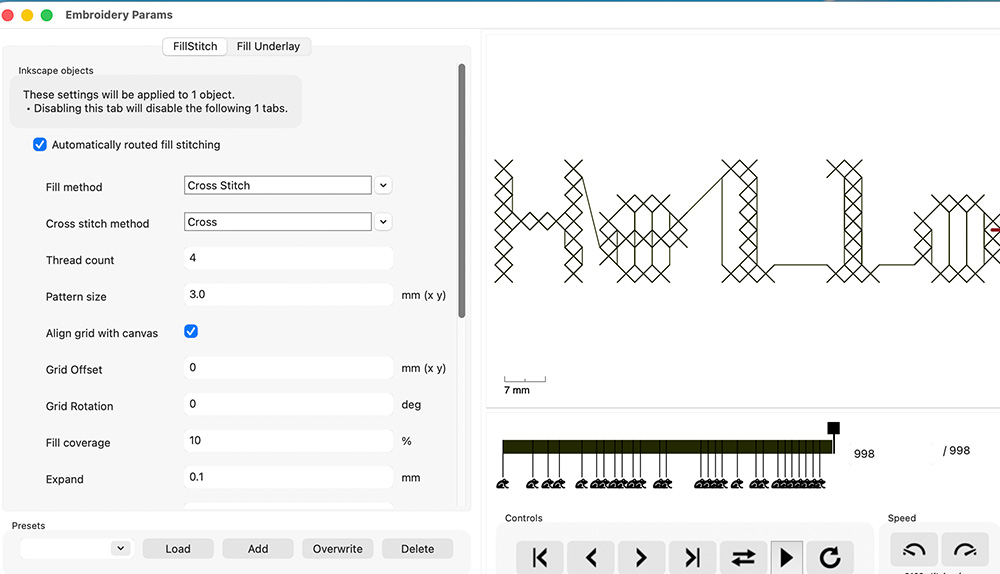
Each cross stitch continues to completely fill the squares, even though the shapes are not pixelated.
The parameters apply to the initial shapes, that is, each of the letters. But what is a letter here? It’s a shape composed of several squares separated from each other, not touching . As with all Ink/Stitch fills, for each letter, each square is treated independently, and Ink/Stitch orders the squares in its own way. Here, this somewhat obscures the sequential nature (cross by cross embroidery) because adjacent cross stitches are processed fairly well, but not perfectly, as can be seen, for example, by looking at the “e”.
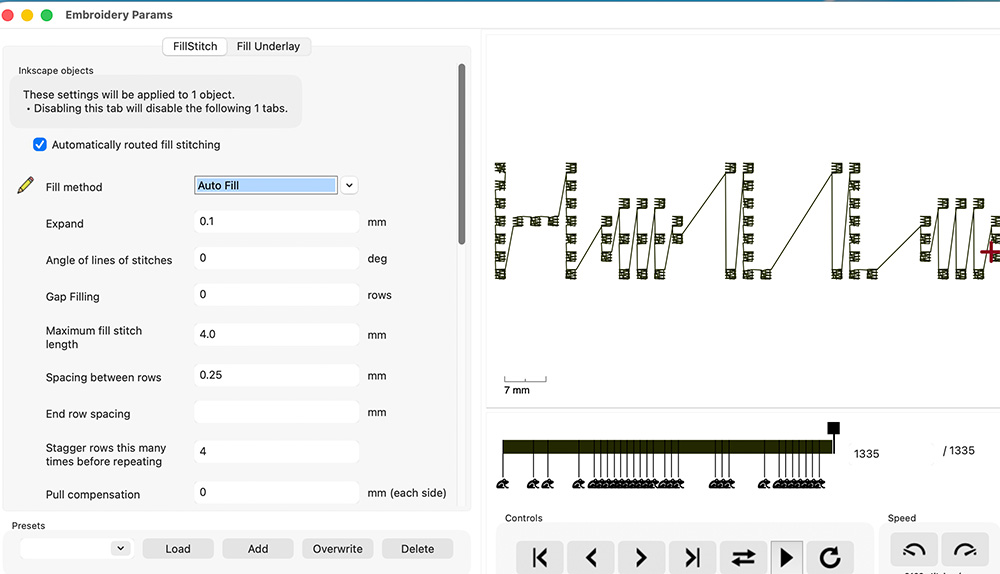
The order in which the squares are processed (which remains the same!) is more visible if you choose automatic fill:
Pixelization therefore serves two purposes:
- better visualization of the result: you can see how much space the embroidery will occupy (provided that the pixelation was done with the same cross stitch size as in the parameters)
- better embroidery: once the entire squares are filled, they touch and can be merged. There will be far fewer jumps in the final result.
However, pixelate is by no means mandatory.
Using Any Font
It’s actually possible to use almost any font. Sometimes it can even be very simple.
Example of a script Font
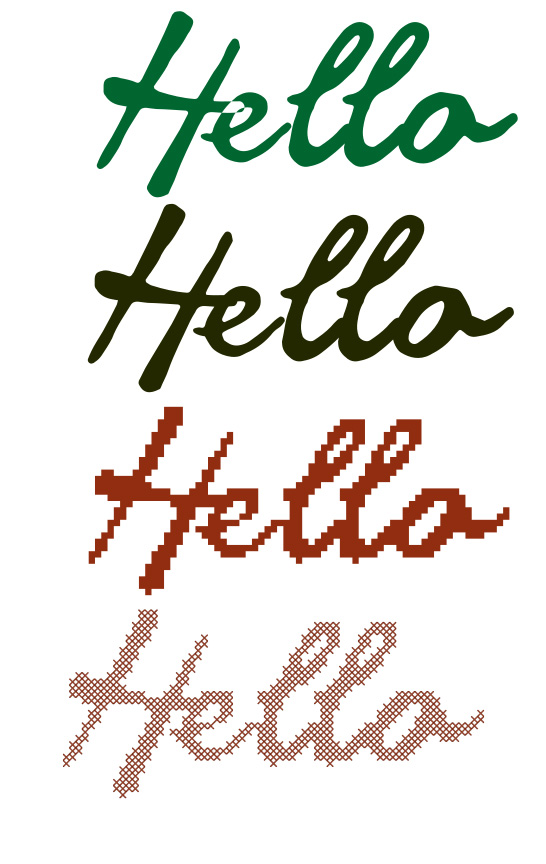
Let’s use the Great Vibes font, also available on fonts.google.com
-
In green, what you get directly with Inkscape the text tool. Note how the intersection of the H and the e is not colored black.
-
A simple way to obtain the black shape is to:
- Select the text
Inkscape > Type > Text to Glyphs- Select all the glyphs
Inkscape > Paths > Union
For a satisfactory result, it’s best to have a fairly large number of crosses, which is why here the text is 60 mm high and the crosses are 2 mm. Obviously, the more crosses you have, the more faithful you can be to the original shape of the text.
Pixelate is not mandatory, but it allows you to obtain the third shape visible in the image, below which is the embroidery simulation.
With a cursive font like this one, you get an embroidery without any jumps.
Example of a font with detached letters
Let’s use the audiowide font this time, still available on fonts.google.com.
It’s a font with a nearly constant width and no overly fine details, which will lend itself quite well to this exercise.
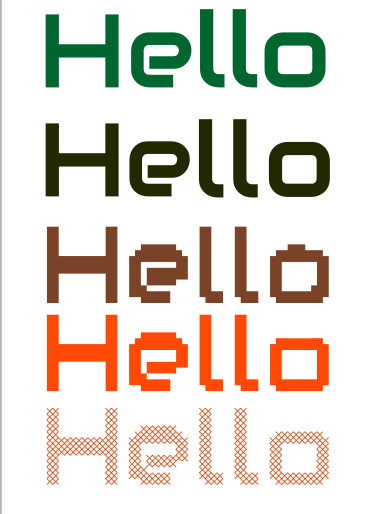
- In green, what you get directly with Inkscape the text tool.
This time, it’s important to be able to place the letters one by one on the grid. To do this:
- Select the text and go to
Inkscape > Text > Text to Glyphs.
It’s now possible to move each letter; the result is shown in black.
-
Convert each letter to a path.
-
Pixelate and add parameters using the cross-stitch assistant.
You can use the SVG preview to test different values for the percentage of coverage threshold.
The result is shown in brown; it can be modified manually, for example, to obtain a perfectly symmetrical “o” (result shown in red).
This time each letter embroiders without inside jump, but there is a jump between each letter.