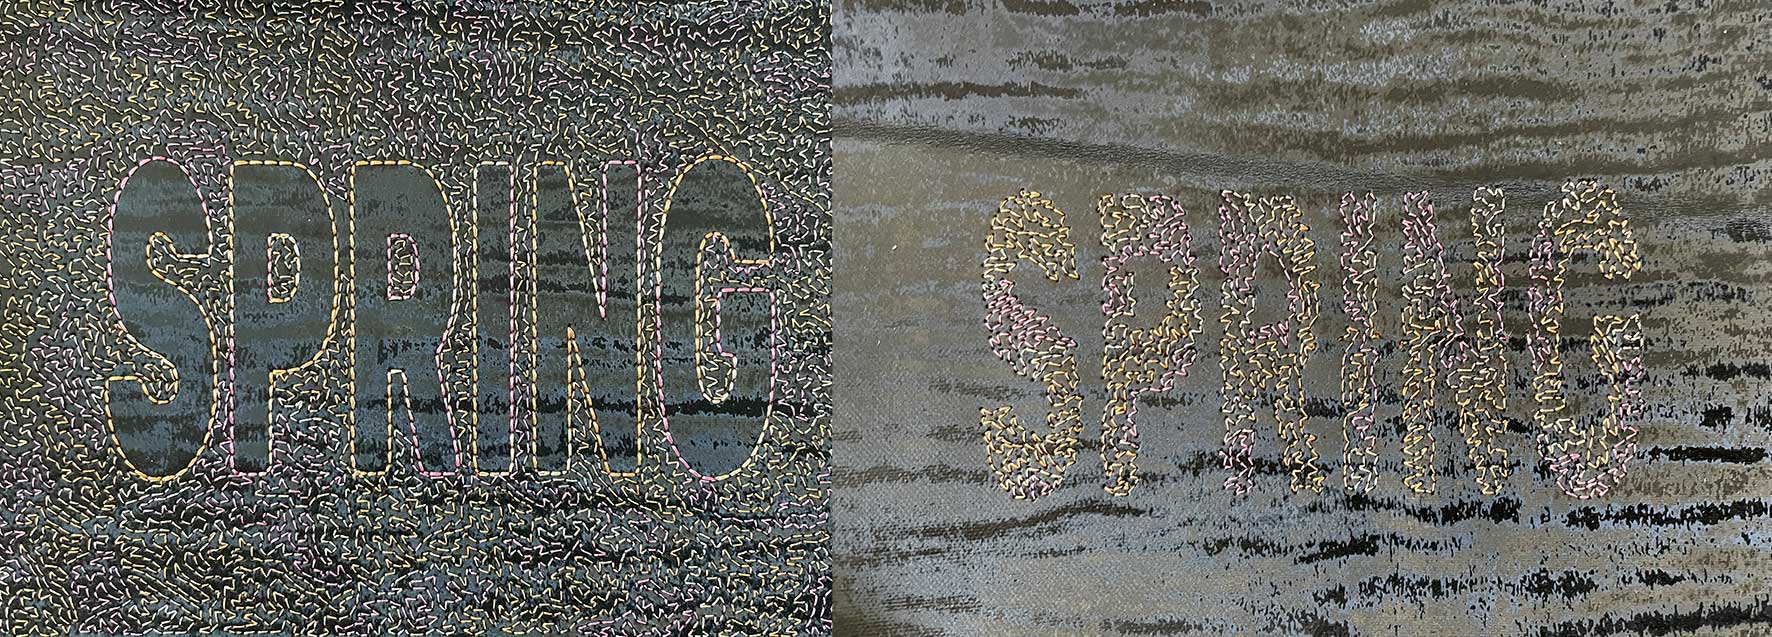
Writing with meander fill
This tutorial is not about using Ink/Stitch Lettering, but using a font (.ttf or .otf) installed on your computer before opening inkscape.
This method should not be used for creating small letters (aiming to at least 4 or 5 cm high letters is good). On the other hand you can create very large letters that will embroider quickly.
Positive space writing
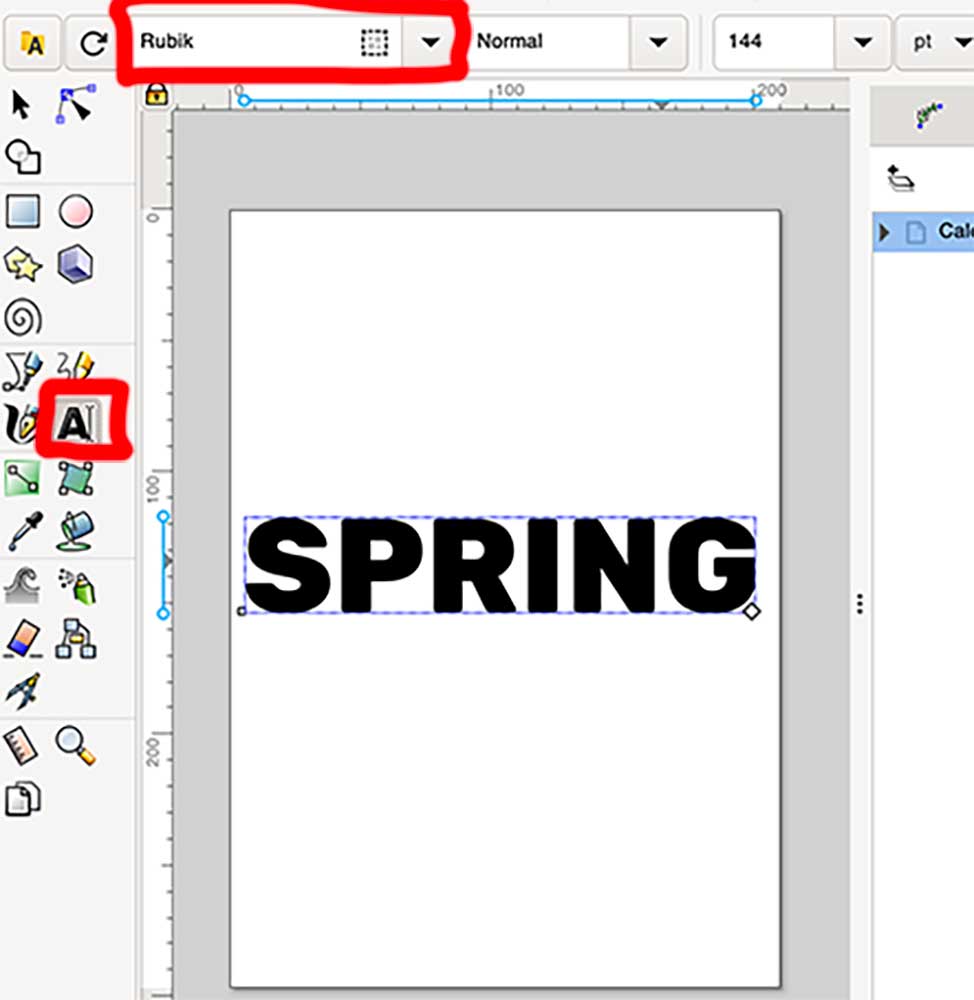
- Use inkscape Text tool to write a short text with your chosen font.
-
You may wish to tweak the result. Here the font is Rubik ultrabold, but the height of the letters has been scaled up while keeping the width. You may also use any inkscape text manipulation tool at this step.
- Select your text and
Path > Object to path - In the “Layers and Objects” dialog, your text is turned into a group of paths
- Select this group and
Extensions > Ink/Stitch > Params - In the Parameter dialog:
- Uncheck Underlay in the Underlay Fill tab
- If you prefer trims over jumps, check Trim after. You may wish to do so temporarly to avoid seeing the jumps in the params simulator window.
- Play with the settings to choose your favorite meanders
- You can also configure letter by letter and choose different meanders for each letter. Sometimes a letter is more difficult to fill because of its shape, parametring it separately may help.
- The meandering filling contains a part of randomness, you can also try to reroll the dice (at the bottom of the setting) if an area has been forgotten. Reducing the size of the meander also helps to visit everywhere
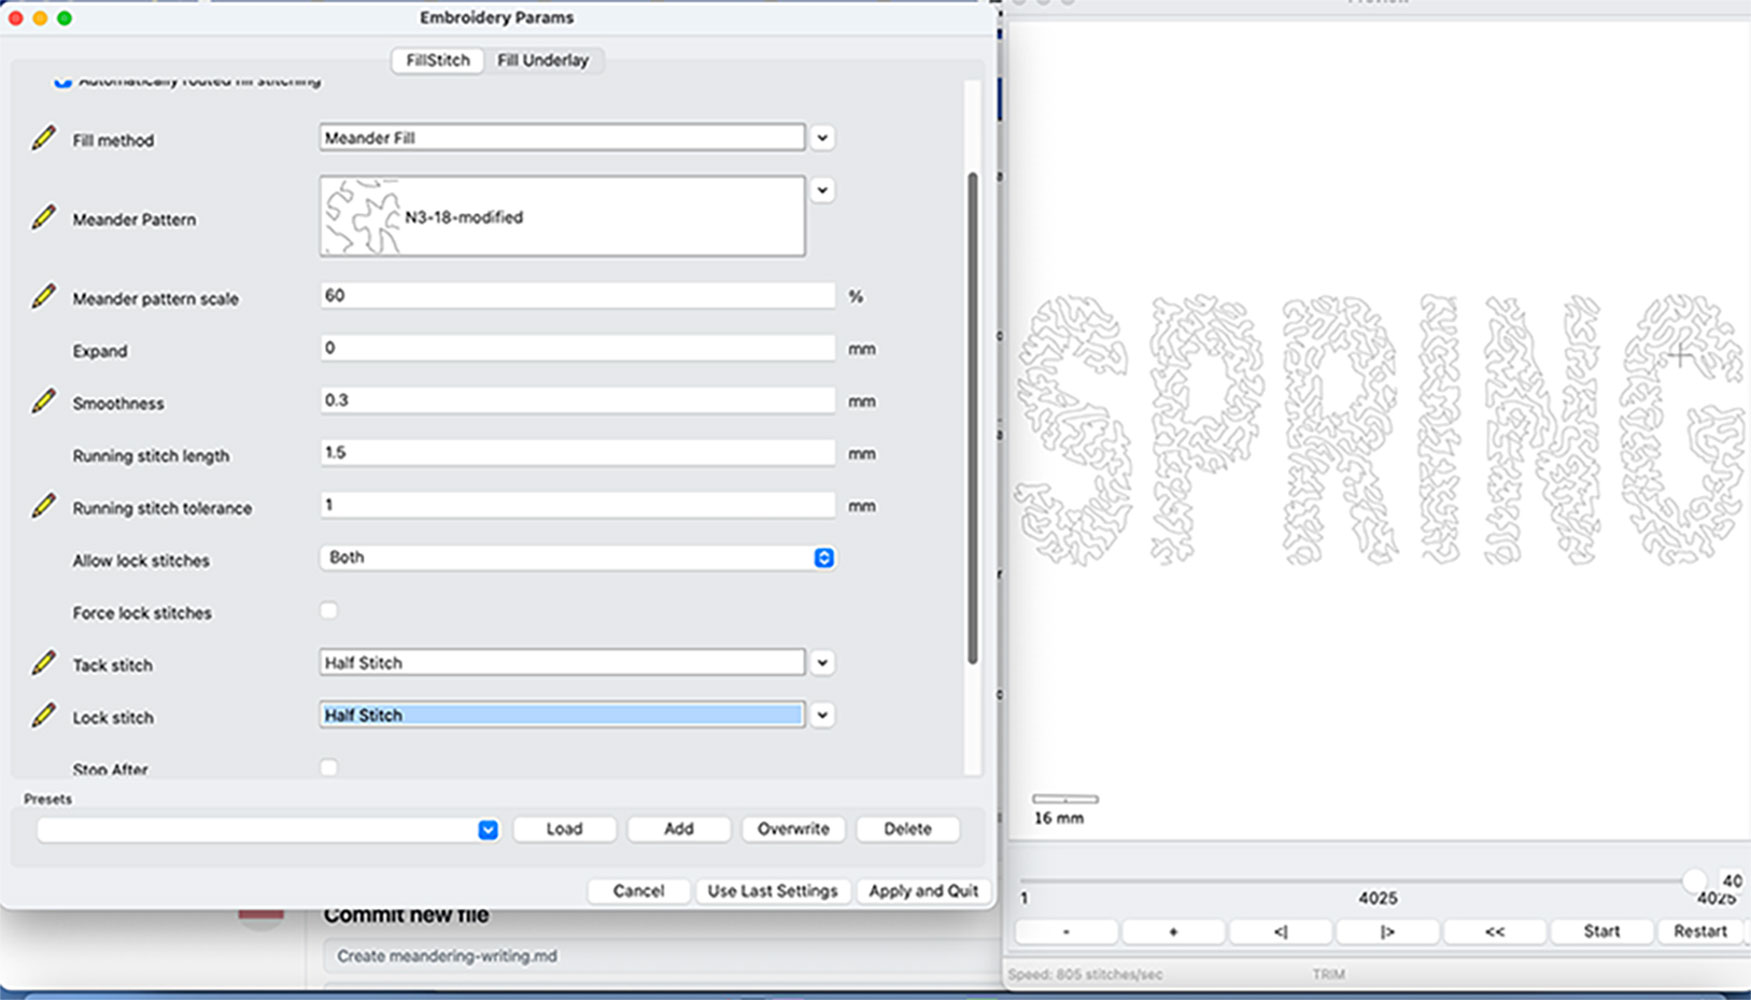
- Click Apply and Quit and your embroidery is ready.
Negative space writing
Meannder fill is very fast to embroider, but may be somewhat long to calculate. The larger the area to be filled, the longer it takes. Don’t start with too large an area to fill.
In the embroidered negative space sample, they are two embroidery steps, a triple stitch around the letters and a meander fill in the space around the letters.
Draw a rectangle (or another shape) around your text where you want meandering. Give it a fill color, but no stroke color. Lower the opacity if you wish, it won’t change the result.
Before you turn your text object into a path, duplicate it, you will need both copies.
Triple stitch
- Select one of the copies of your text
- Remove the fill color, and add a stroke color
Path > Object to path- In the “Layers and Objects” dialog, your text object has turned into a group of paths
- Select this group of paths and
Extensions > Ink/Stitch > Params - Set your bean stitch parameters
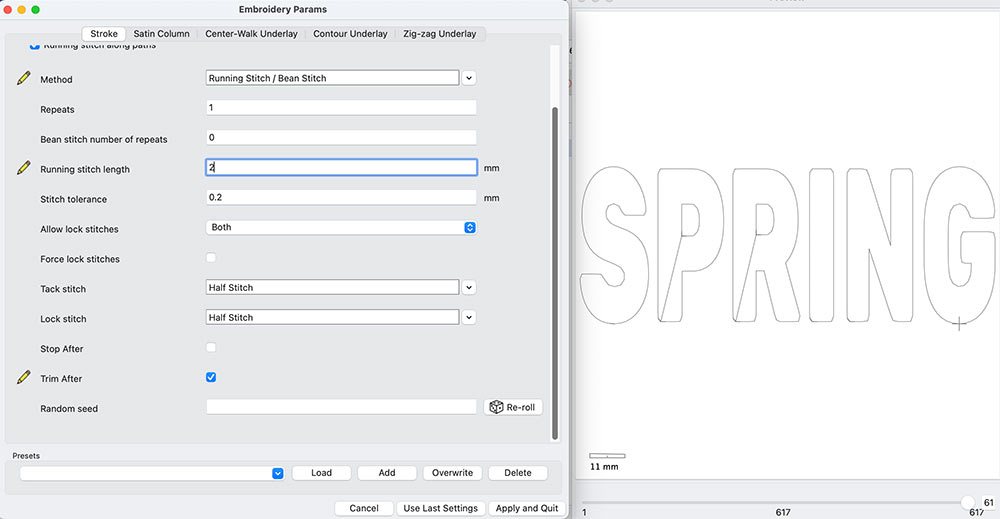
- The params simulator shows that there will be jumps inside the letters. If you want to turn them into trims, select the letters and
Path > Break Apart - You will need to call Params again.
Negative space meandering
- Select the other text copy
Path > Object to pathPath > Combine- Instead of the text object, you now have a group which contains exactly one path.
- Check that this group is above the rectangle in the “Layers and Objects” dialog. If necessary move the rectangle.
- Select both the group that contains the text and the rectangle
Path > Exclude- Check that the result of the operation is selected
Extensions > Ink/Stitch > Paramsand choose the settings for your meanders.
“Apply and Quit” and you are all set.
How to choose the font
Choose a plump font, you want to avoid narrow areas. If possible at least in bold.