Simulation
Simulateur
Sélectionnez les objets que vous souhaitez voir dans un aperçu simulé. Si vous souhaitez voir toute votre conception simulée, sélectionnez tout (Ctrl+A) ou rien.
Puis faites Extensions > Ink/Stitch > Visualiser et Exporter > Simulateur.
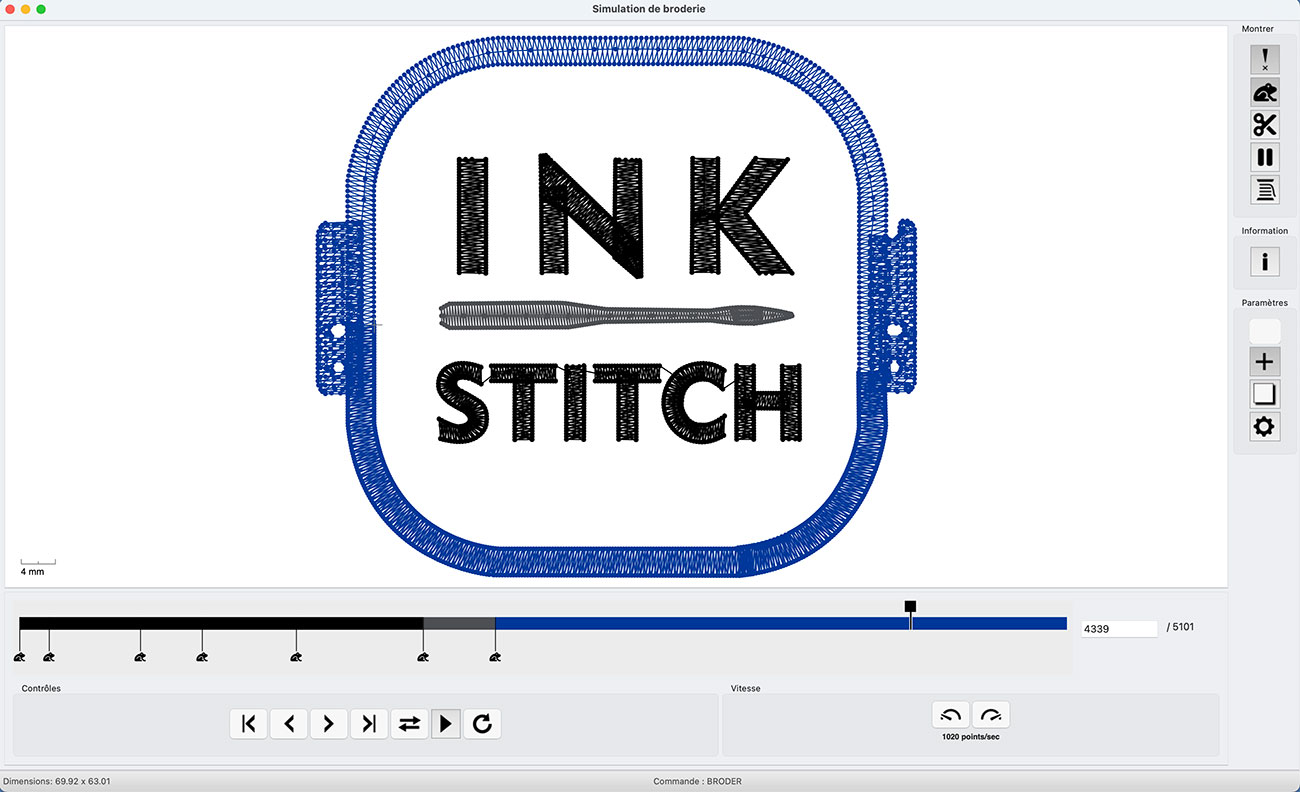
Boutons et raccourcis du simulateur
| Bouton | Effet | Raccourci | |
|---|---|---|---|
| Contrôles | |||
| Retourner à la dernière commande | |||
| Reculer d’un point | |||
| Avancer d’un point | |||
| Aller à la prochaine commande | |||
| Changer le sens de l’animation | |||
| Début/pause de l’animation | |||
| Redémarrer au début | |||
| Vitesse | |||
| Moins vite | |||
| Plus vite | |||
| Montrer | |||
| Points de pénétration de l’aiguille | |||
| Sauts | |||
| Coupes | |||
| Arrêts | |||
| Changements de couleur | |||
| Info | |||
| Information sur la broderie | |||
| Paramètres | |||
| Changer la couleur de l’arrière plan | |||
| Montrer la position courante de l’aiguille | |||
| Montrer les limites de la page | |||
| Ouvrir le paramétrage pour choisir la vitesse, l’épaisseur du trait et la taille des points de l’aiguille |
C’est aussi possible de zoomer et de déplacer la simulation avec la souris.
Simulation du plan de broderie
La prévisualisation du plan de broderie insert un plan de broderie sur le canevas. Selon vos réglages, ce plan sera placé au dessus de votre dessin ou sur le coté droit du canevas (option : positionner le plan de broderie hors du canevas)
Pour y accéder faire
Extensions > Ink/Stitch > Visualiser et Exporter > Prévisualisation du plan de broderie....
Options
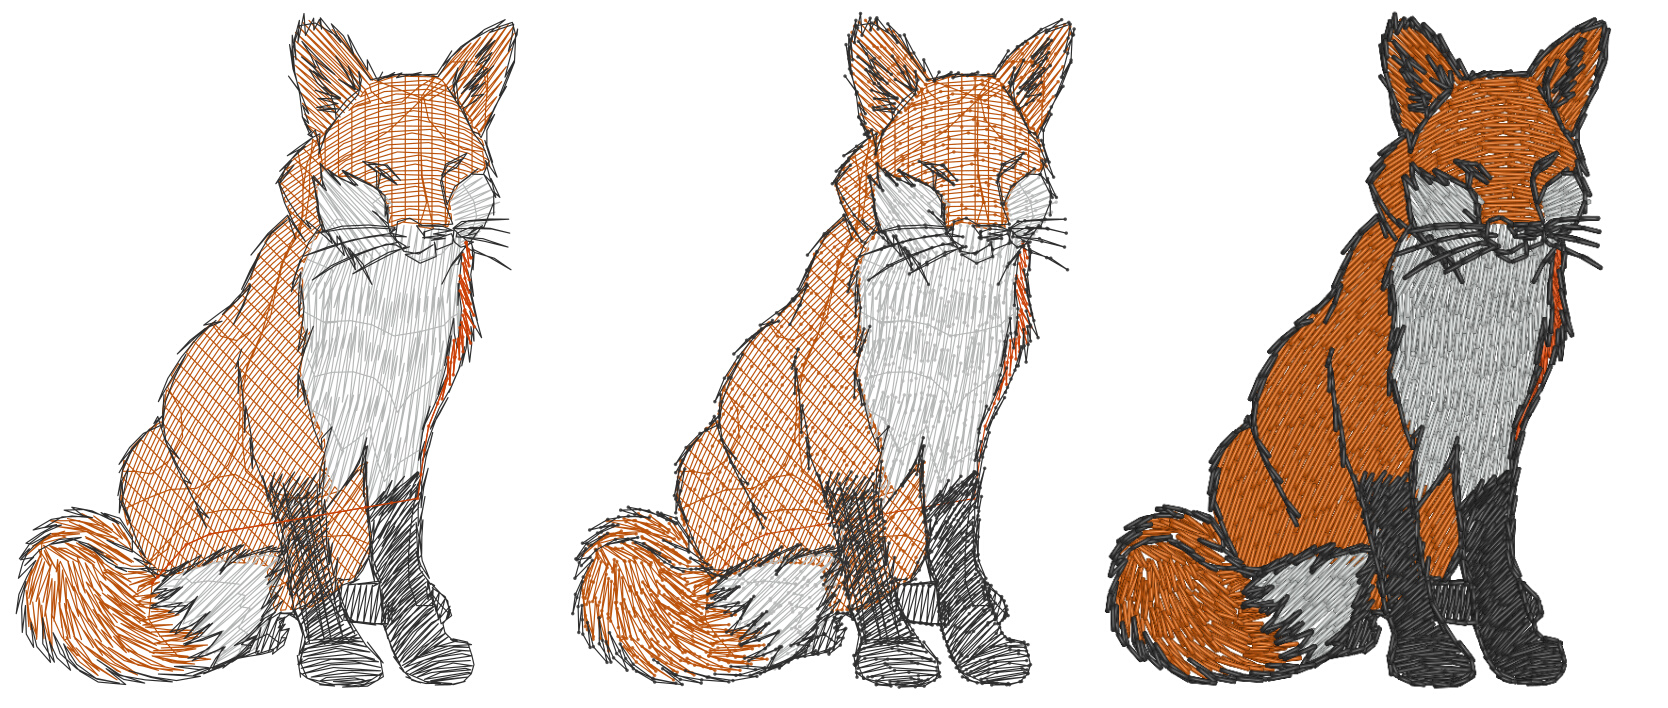
De gauche à droite: 1. Rendu simple, 2. Rendu simple avec les points de l’aiguille, 3. Rendu réaliste
Source de l’image: Pixabay
- Visibilité du calque de conception : définit la visibilité du calque de conception du momtif.
- Inchangé : laisse tel quel.
- Caché : masque le motif original.
- Baisser l’opacité : affiche le motif original avec une opacité réduite.
- Mode de rendu
- Simple : dessin au trait simple.
- Réaliste : aperçu réaliste au format PNG (8 bits) intégré au canevas.
- Réaliste haute qualité : aperçu réaliste au format PNG (16 bits) intégré au canevas.
- Vecteur réaliste (lent) : rendu vectoriel avec filtres réalistes.
Lent signifie que ce mode peut ralentir Inkscape après le rendu, voire le bloquer.
À utiliser avec précaution pour les motifs complexes et enregistrez votre motif avant de lancer le rendu du plan de broderie.
- Positionner le plan de broderie hors du canevas Affiche l’aperçu à droite de la zone de travail. Si cette option est désactivée, le plan de broderie sera placé au-dessus de votre motif. Dans ce cas, vous pouvez masquer votre motif ou réduire son opacité.
- Points de l’aiguille : affiche les points de pénétration de l’aiguille si cette option est activée.
- Verrouiller : rend le plan de broderie insensible aux interactions de la souris (facilite le travail sur le motif principal lorsque le plan de broderie est visible).
- Montrer les symboles de commande
-
Montrer les sauts
- Ajouter la commande « Ignorer le calque »
- Écraser le dernier plan de broderie
Si cette option est cochée, le nouveau plan de broderie remplacera le précédent. Décochez-la si vous souhaitez conserver le plan de broderie précédent.
Optimisation du flux de travail avec les raccourcis clavier
Configurez des raccourcis clavier pour l’aperçu du plan de broderie et l’annulation du plan de broderie (voir ci-dessous) afin d’optimiser votre flux de travail.
- Nous vous recommandons de choisir l’option « Aucune préférence » dans le menu des raccourcis clavier.
L’extension s’exécutera alors directement (sans passer par la fenêtre de paramètres) avec les derniers paramètres appliqués.
- Activez l’option « Verrouiller » pour pouvoir accéder à tous les tracés sans interférence avec les éléments du plan de broderie.
- Assurez-vous que l’option « Remplacer le dernier plan de broderie » est activée, sinon plusieurs plans de broderie s’afficheront sur la zone de travail.
Annuler l’aperçu du plan de broderie
Utiliser l’aperçu du plan de broderie au dessus d’objets de broderie cachés ou ayant une opacité amoindrie aide à se faire une idée visuelle de la broderie finale.
Il est parfois utile de garder le plan de broderie de objets déjà présents pour ajouter de nouveaux objets de broderie,mais pour l’export ou pour modifier des éléments existants vous aurez besoin des objets initiaux.
Pas très rigolo de devoir à chaque fois supprimer le calque du plan de broderie et rétablir l’opacité des éléments originels.
Cette extension le fait pour vous et vous aidera si vous utilisez cette méthode de travail.
Lancez Extensions > Ink/Stitch > Visualiser et Exporter > Annuler le plan de broderie
Carte de densité
- Sélectionnez des objets si vous ne souhaitez la carte de densité que pour ces objets là, sinon lancez l’extension sans rien sélectionner
- Lancez
Extensions > Ink/Stitch > Visualiser et Exporter > Carte de densité - Choisissez les valeurs de densité associées aux couleurs et appliquez
- Un nouveau calque non brodable est créé
- Inspectez (zoomez)
- Vous pouvez annuler avec
Ctrl + Z
Ceci montrera des marqueurs rouges, jaunes et verts au dessus de vos éléments, pour vous permettre d’identifier facilement les zones à forte densité. Tous les marqueurs d’une même couleur sont dans un groupe du calque Densité, ce qui vous permet de masquer facilement tous les marqueurs d’une couleur donnée.
Options
-
Marqueurs jaunes et rouges Définir à partir de quel nombre de points de l’aiguille dans quel rayon autour d’un point la coloration est rouge ou jaune
-
Visibilité du calque de conception Définir si Ink/Stitch doit laisser le calque de conception tel quel,le cacher ou baisser son opacité
-
Indicateur de taille Définir la taille des marqueurs (l’unité est celle du document)
Afficher l’ordre de broderie
Lancez Extensions > Ink/Stitch > Visualiser et Exporter> Afficher l'ordre de broderie....
Choisir la taille de la fonte et cliquer sur Appliquer pour créer un nouveau calque (non brodable) de texte qui numérote les éléments de broderie dans l’ordre de broderie, c’est à dire dans l’ordre inverse de la pile d’objets.
Export PDF
Les informations sur l’export PDF sont dans une autre section: plus d’info sur l’export PDF