Windows Manual Install and Manual Build
Info: For this description we use foo as a user name. Whenever it occures replace it with your personal windows user name.
Requirements
Install these dependancies for local build or a manual install of Ink/Stitch.
- Python
- Install Python version 3.11 or higher and 64bit only.
- Check
Add Python x.xx to PATH. This allows the bash enviroment to find python. - Then click on
Install now
-
This installs git as well as providing a terminal emulator to download Ink/Stitch source code and run build scripts.
-
This provides the compiler to build the windows installer, only needed to create the Ink/Stitch installer and not required for the manual install. Use the default settings.
-
This provides make to run the build scripts.
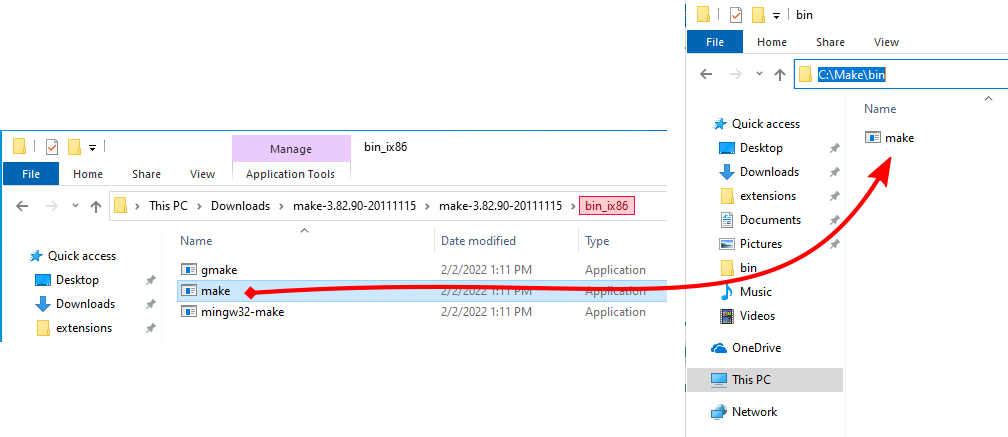
- Download make-3.82.90-20111115.zip
- unzip
- Create the folder C:\Make\bin
- Copy
make.exefromDownloads\make-3.82.90-20111115\make-3.82.90-20111115\bin_ix86toC:\Make\bin
PATHS
The bash environment requires the path of software to create a build or manual install to be set. So let’s set it up.
-
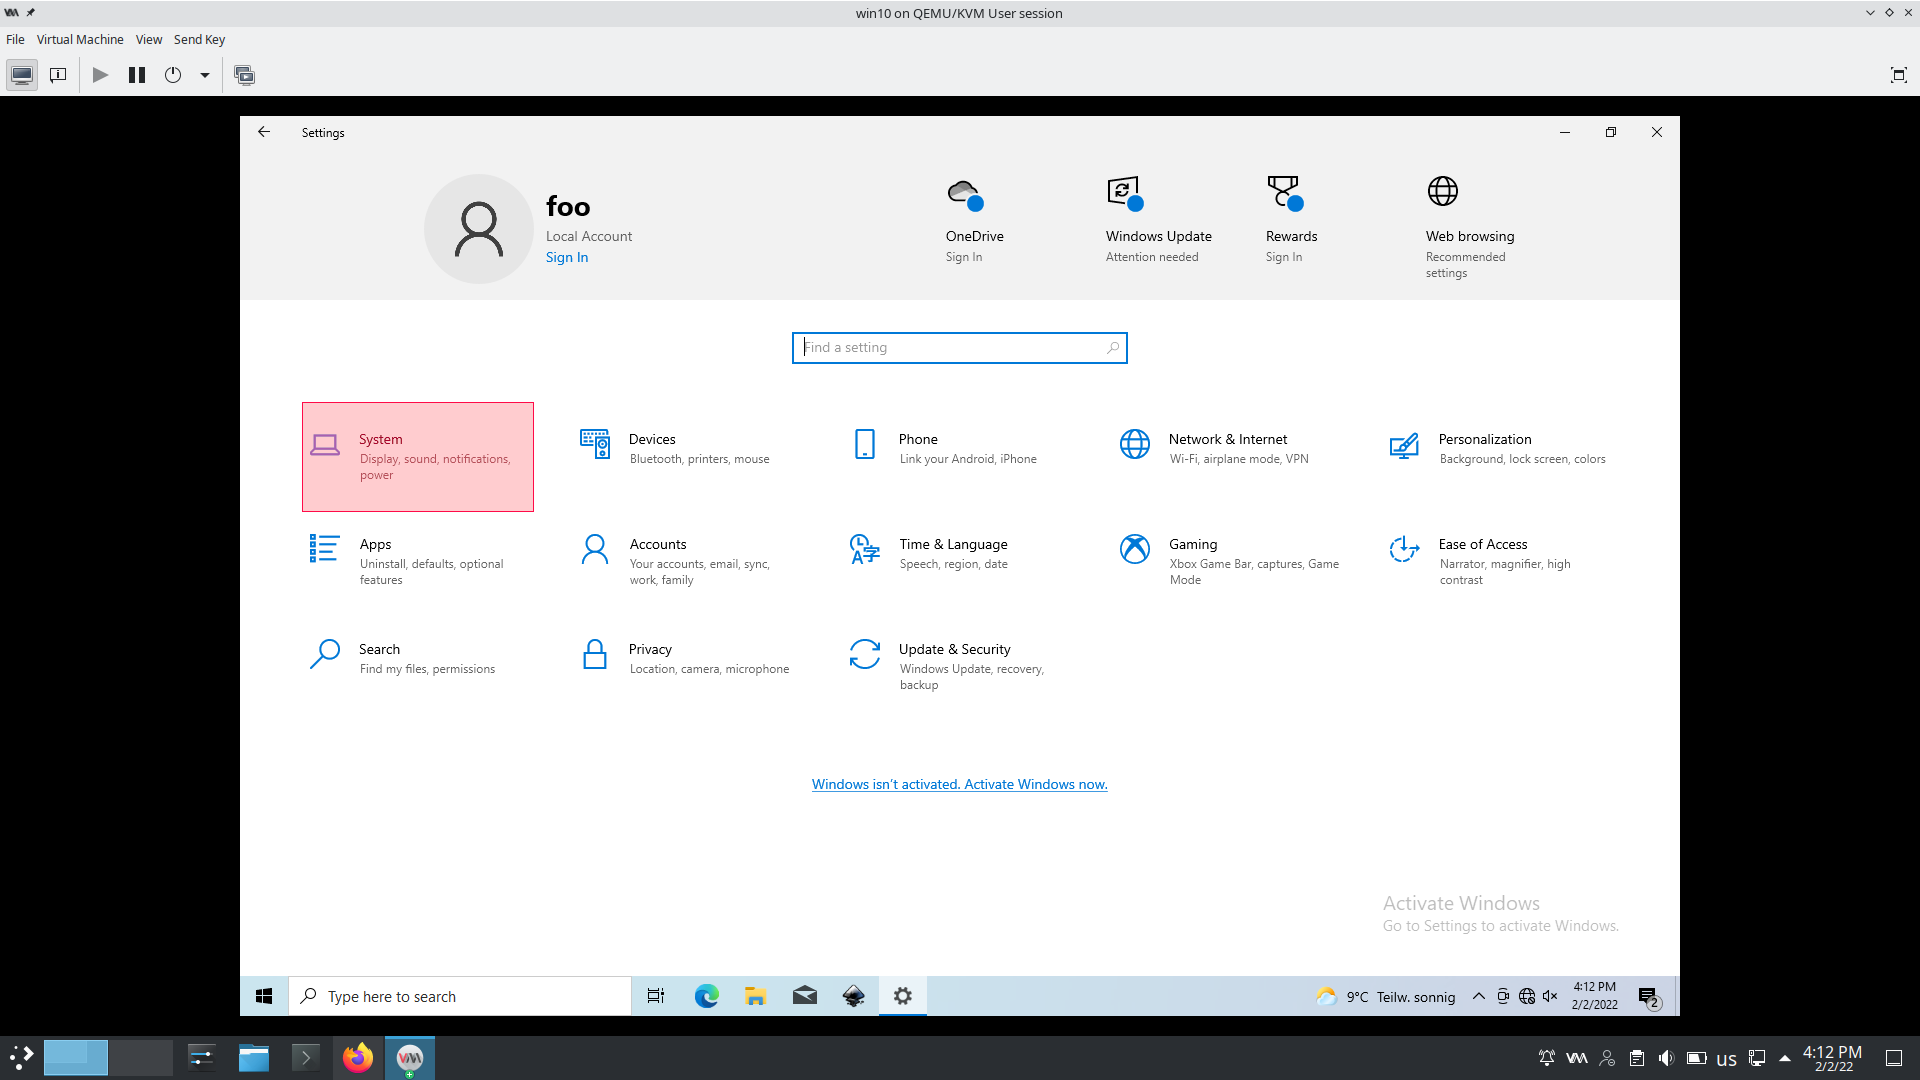
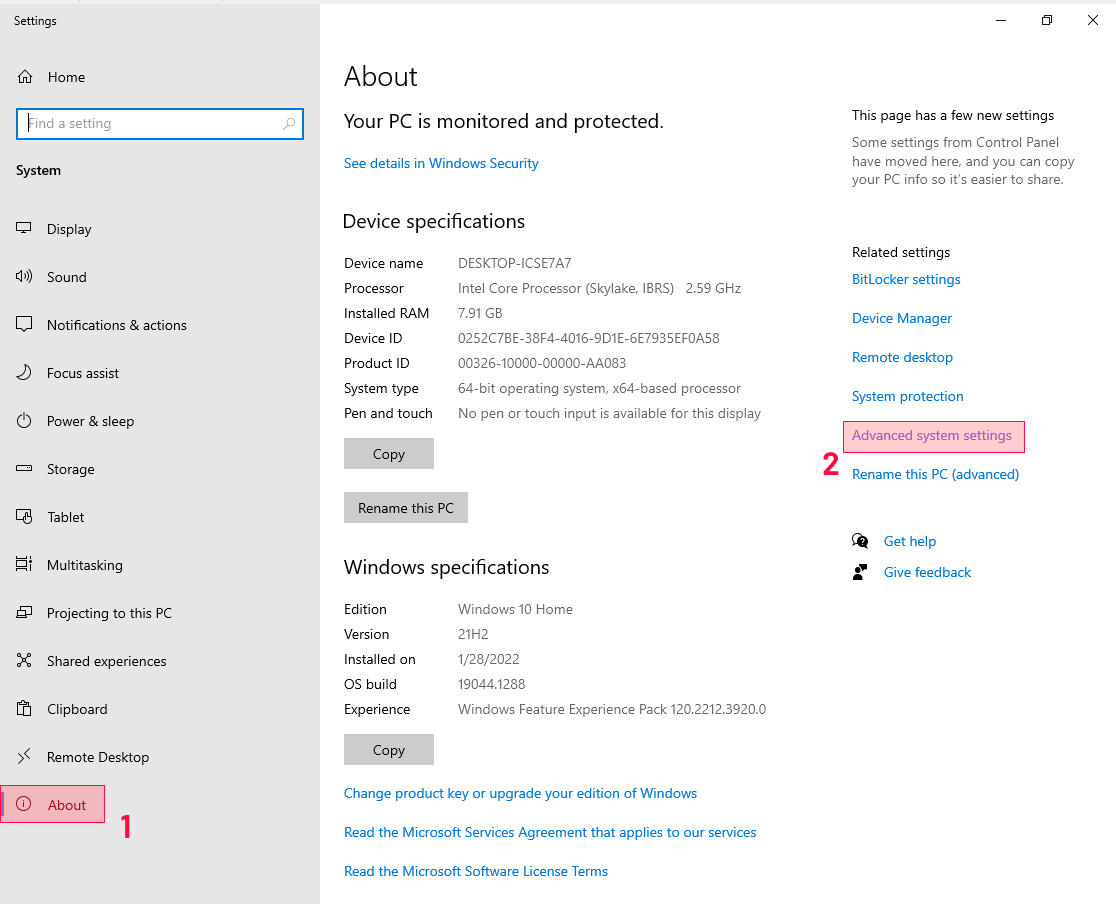
Open Windows settings > System > About > Advanced system settings
-
In Advanced Settings click on
Enviroment Vairables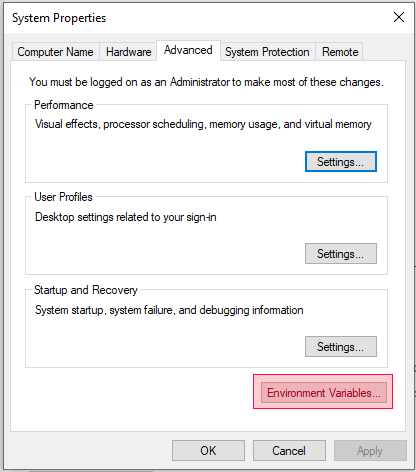
-
In
User variables for [foo]click on Path (1) and then onEdit...(2)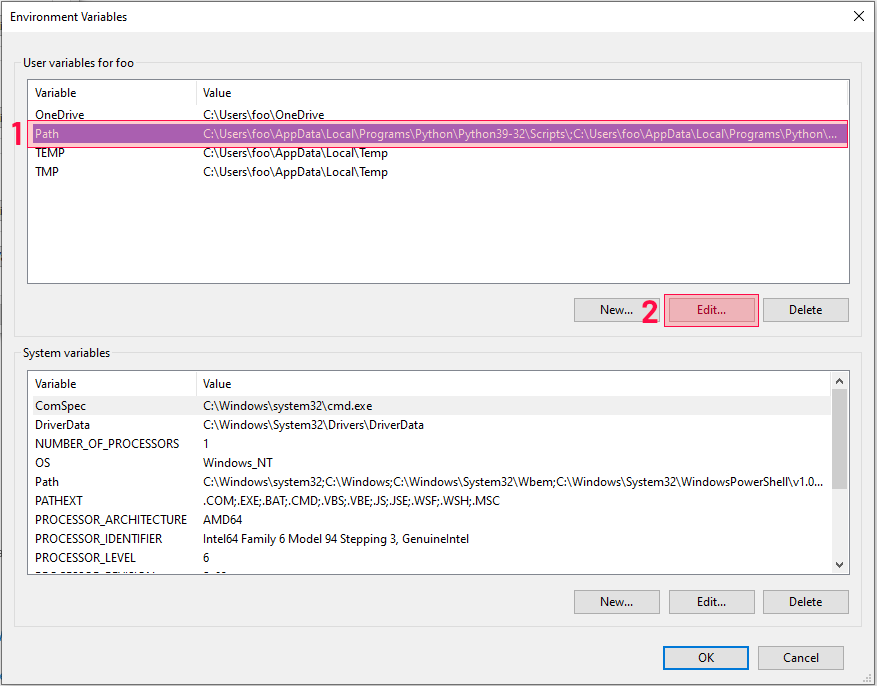
-
For each of the paths below click on
Newthen copy paste the file path:C:\Make\bin C:\Program Files (x86)\Inno Setup 6Make is required for both maunal install and local build. Inno Setup is only required when building the Inkstitch installer.
-
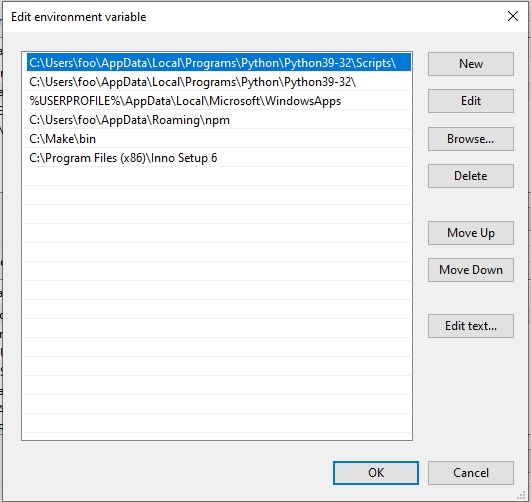
Now it should look like this:
Enable long names for git
-
In the search bar type
cdmand choseRun as administrator.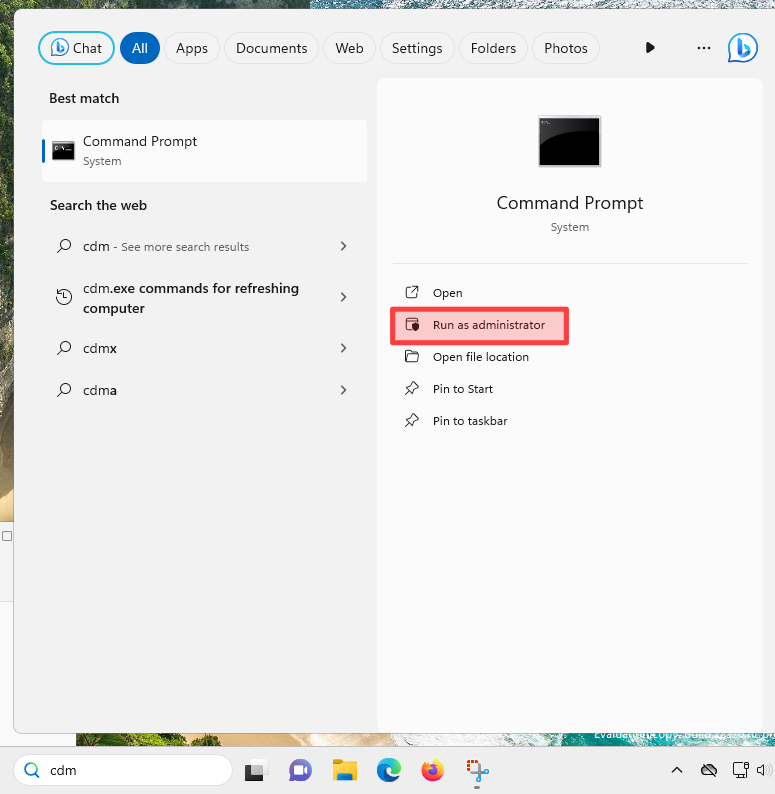
-
Run the following command
git config --system core.longpaths true -
Close the command prompt, we do not need admin rights after this.
Download Ink/Stitch
-
If you already have an Ink/Stitch version installed uninstall in order to avoid double menu entries in Inkscape extensions menu.
-
Go to
Edit > Preferences > Systemand open your extensions folder.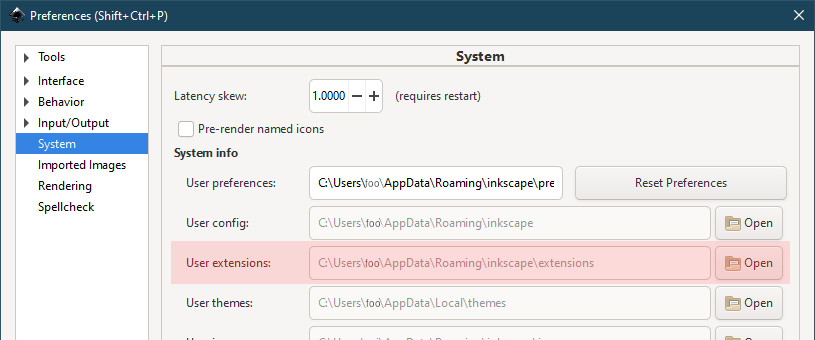
If you are not aiming for manual install but want to build both Ink/Stitch and it’s installer do not follow this step, but choose any other directory to save the Inkstitch source code
-
Right click into the file browser and click on
Git Bash Hereto download Ink/Stitch into the extensions folder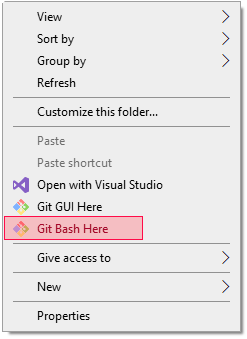
-
Run the following command in the terminal emulator:
git clone --recurse-submodules https://github.com/inkstitch/inkstitch
Setup Python
- Run the following commands in the terminal emulator:
python -m pip install --upgrade pip - Now we are ready to install the rest of the requirements through the Ink/Stitch requirements file
python -m pip install -r inkstitch/requirements.txt - For debugging with pydevd also run:
python -m pip install pydevd
Manual Install for developing Ink/Stitch
- We prepared everything to finally setup Ink/Stitch manual install itself. Go to Ink/Stitch folder located in extensions folder and run the terminal emulator:
cd inkstitch make manual - You can now use the Ink/Stitch installation. Changes to the Python code take effect the next time the extension is run.
- After adding a new template for new Ink/Stitch extensions, run the following command to update the Inskcape menu entries.
make inxIf you are running Ink/Stitch through Inkscape, close and reopen Inkscape after running the command.
Generate a build to test run your update on other Windows systems
- To build Ink/Stitch you’ll need to install pyinstaller pip package.
python -m pip install pyinstaller - Ink/Stitch uses 7-zip to zip up the build file. So you need to install it as well.
Add it to PATHS as described above as
C:\Program Files\7-Zip -
In the terminal emulator run:
cd inkstitch make distlocal -
In the file browser you will find the finished builds in the folder
artifactsDo not install the build version if you have the manual install in the extensions folder or you’ll have duplicated menu entries.
Troubleshooting missing Python modules
If when trying to open Ink/Stitch, you encounter errors about missing Python modules: ModuleNotFoundError: No module named 'diskcache'
Most likely you will need to manually set Python version in the preferences.xml of Inkscape:
- Within Inkscape, Go to Edit > Preferences > System > User preferences and click on Open.
- In your user preferences folder, locate
preferences.xml - Close Inkscape
- Open
preferences.xmlwith a text editor - Search for
<group id="extensions" - Add this attribute
python-interpreter="C:\Program Files\Python311\python.exe". Substitute the path with the version of Python. You can find the path by runningwhere pythonin a command prompt