Stitch Path Optimization
Optimising the stitch path is one of the most important subjects in embroidery. Learn how Ink/Stitch can assist you with the task.
Embroidery is not only a setup of various elements printed on a piece of paper. When you create embroidery it is essential to
- Put elements into a logical order
-
To avoid color changes where possible
It is still sometimes necessary to add an extra color change when either one color goes both - underneath AND on top of an other color or when push and pull on the fabric during the stitch out demands us to do so.
- To avoid registration problems
- To avoid puckering
-
-
Avoid jump stitches
There should be no unneccessary jump stitches in your file. Do not just try to hide them by adding trim commands. Trims produce chaos on the backside of the embroidery and slow down the machine quite a bit.
Each file is individual and you are the designer who has to decide on how to route your stitch paths. But Ink/Stitch has some tools to assist you with the task.
General Routing Options
Order elements in selected order
Moving the elements in the Layers and Objects panel up and down can be tiresome. Select the elements in desired stitch order and run the Ink/Stitch extension Re-stack elements in selected order and have it doing the task.
Jump to Stroke
After you’ve prepared the correct order of your elements and made sure where they are supposed to start and end, run the jump to stroke to create a running stitch from the end position of the first element to the start position of the second element.
You can then alter the stroke to be hidden under other elements. If the distance is short, you can also use it to make the connection stitch sink into the fabric while avoiding an additional jump.
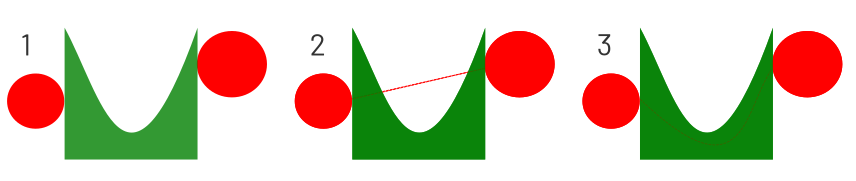
1: Original 2: Jump to Stroke 3: Manually adjusted stroke
Stroke Routing Options
Strokes elements start at the beginning of the path and run til the end. Closed paths should be opened to allow you to decide where the embroidery starts (and ends).
Make path directions visible
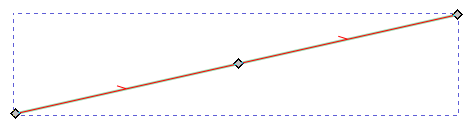
In our customize article we described, how you can setup Inkscape so that you can see the path direction right away and know where your stroke type stitches will begin and end.
Adapt stroke direction
You now already made sure, that you can see the path direction. When you select a path and run Path > Reverse, Inkscape will reverse the path and the stitching goes the other way around. You may need this function a lot. We recommend to set a shortcut key on it. In the customize section we describe, how that works.
Params: adapt repeats
When you need to start and end at the same spot of a stroke. You have several options to achieve it. In the params dialog, set the number for repeats to an even number. If you don’t want to do that (maybe because you have a bean stitch applied), duplicate the stroke and the direction of the copy.
Auto-route running stitch / Redwork
When you have a bunch of strokes, it can be a tidious job to route them correctly. Ink/Stitch now has two tools for it. Redwork is definitely the one to prefer in most cases, since it will take care, that you’ll receive exactly two passes for each line. You can set a start position. Redwork will always start and end at the same. If you do not wish that and want to define a start- and end position, then maybe auto-route running stitch may be the better option for you.
Satin Routing Options
By default, the Start/End at nearest point setting is enabled, and satin column stitching begins as close as possible to the previous stitching element and ends as close as possible to the next stitching element. If this setting is disabled, stitching begins at the beginning of one rail and ends at the end of the other rail. The start and end points of satin column stitching can also be specified using visual commands (start position and end position).
Make sure the rails are no closed paths. Ink/Stitch can handle loops (closed paths), but it may end up in funny results.
Auto-route satin
Same as with the stroke type elements, Ink/Stitch has a routing extension for satins. It may need some care though as with the enabled option preserve oder, no running stitches are generated which could connect the satins underneath unrenedered columns. If you disable it, you do not have control of which parts of the satins are on top and which ones are underneath.
Best option so far would be to prepare the order carefully (use the above mentioned extension to order elements) and run auto-route satin with the preserve order option checked. Then with all routed elements selected, run the above mentioned jump to stroke extension to remove all left over jumps. Push the running stitches into a good shape, so that they are hidden when possible.
Cut Satin
When you manually cut a satin column for better routing, you may lose the param settings. So it’s better to use the Ink/Stitch extension to cut the satin and keep the previous setup.
Params: swap rails
In the params dialog it is possible to swap the rail on which the stitches will start and on which stitches will end. Be aware that all sided properties with be swapped, so you may need to adjust a few of them if you only want to swap the start position. A default satin column doesn’t have any other sided property except for the start and end position.
Params: reverse rails
In the params dialog you can also switch the stitch direction of the whole satin.
Params: adapt centerline underlay repeats
When you adapt the repeat value for the centerline underlay in the params dialog to an odd value, the satin column will start and end at the same side. This can be an easy option to avoid manual running stitches for routing.
Fill Routing Options
Ink/Stitch is quite tolerant with open path fills. Still you may avoid problems by closing paths with a fill color.
Start- and Stop commands
By default, a fill stitch starts as close as possible to the previous stitching element and ends as close as possible to the next stitching element. These fill start and end positions can be modified using visual commands (starting / ending position).
If you set a lot of these commands the canvas can become a bit crowded. So it might be good to know, that commands will still work, even when invisible.