Füllstich Werkzeuge
Füllstich-Objekte zerlegen
Füllstich Objekte sollten aus Objekten bestehen, deren Randlinien sich nicht kreuzen. Manchmal ist es wirklich nicht einfach, diese Regel zu erfüllen, denn oft entstehen winzige Schleifen, die man in Inkscape gar nicht sehen kann. Aus diesem Grund können Füllstiche oft ärgerliche Fehlermeldungen hervorrufen.
Diese Erweiterung soll dir helfen, kaputte Objekte zu repaireren. Nutze diese Funktion einfach für alle Füllstich-Bereiche die eine Fehlermeldung ausgeben. Sie wird kleine Schleifen entfernen und wenn nötig, deine Form in kleinere Unterabschnitte unterteilen.
Funktionsweise
- Wähle ein oder mehrere Füllobjekte aus
- Öffne das Dialogfenster unter
Erweiterungen > Ink/Stitch > Füllstich Werkzeuge > Füllstich-Objekte zerlegen
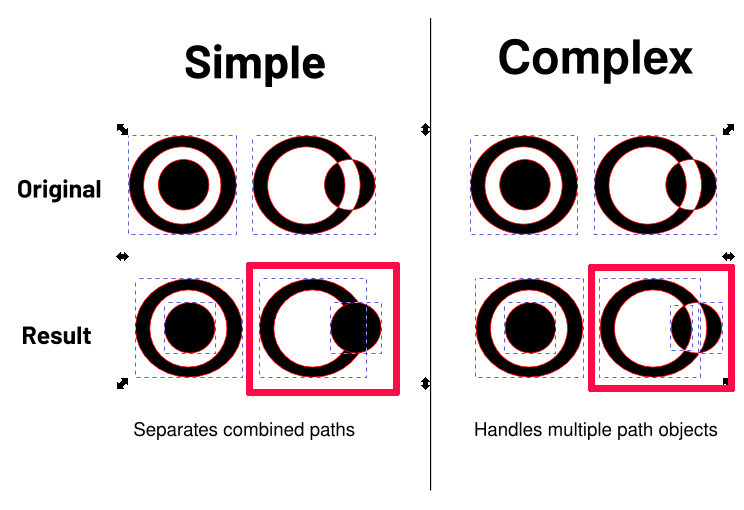
Einfach oder Komplex
-
Einfach kann mit Löchern, unverbundenen Objekten und sich überkreuzenden Rändern arbeiten. Kombinierte Pfade werden in einzelne Pfade zerlegt.
-
Komplex agiert genauso wie “einfach”, kann aber zusätzlich mit Objekten mit mehreren sich überschneidenden Pfaden umgehen.
Farbverlauf in Blöcke aufteilen
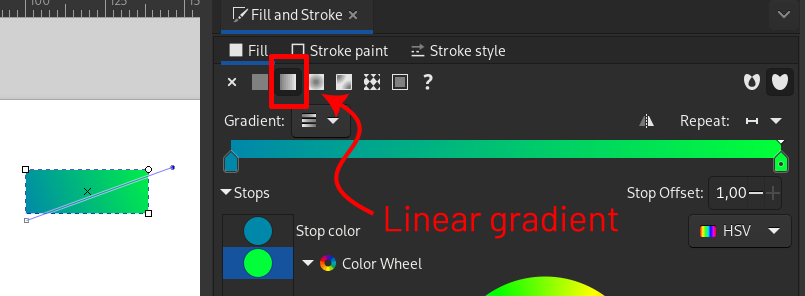
Diese Erweiterung teilt ein Füllobjekt mit einem linearen Farbverlauf in mehrere einfarbige Blöcke auf und setzt den zuvor bestimmten Wert für Reihenabstand Ende.
Funktionsweise
-
Setze einen linearen Farbverlauf
-
Erweiterungen > Ink/Stitch > Werkzeuge: Füllung > Farbverlauf in Blöcke aufteilen...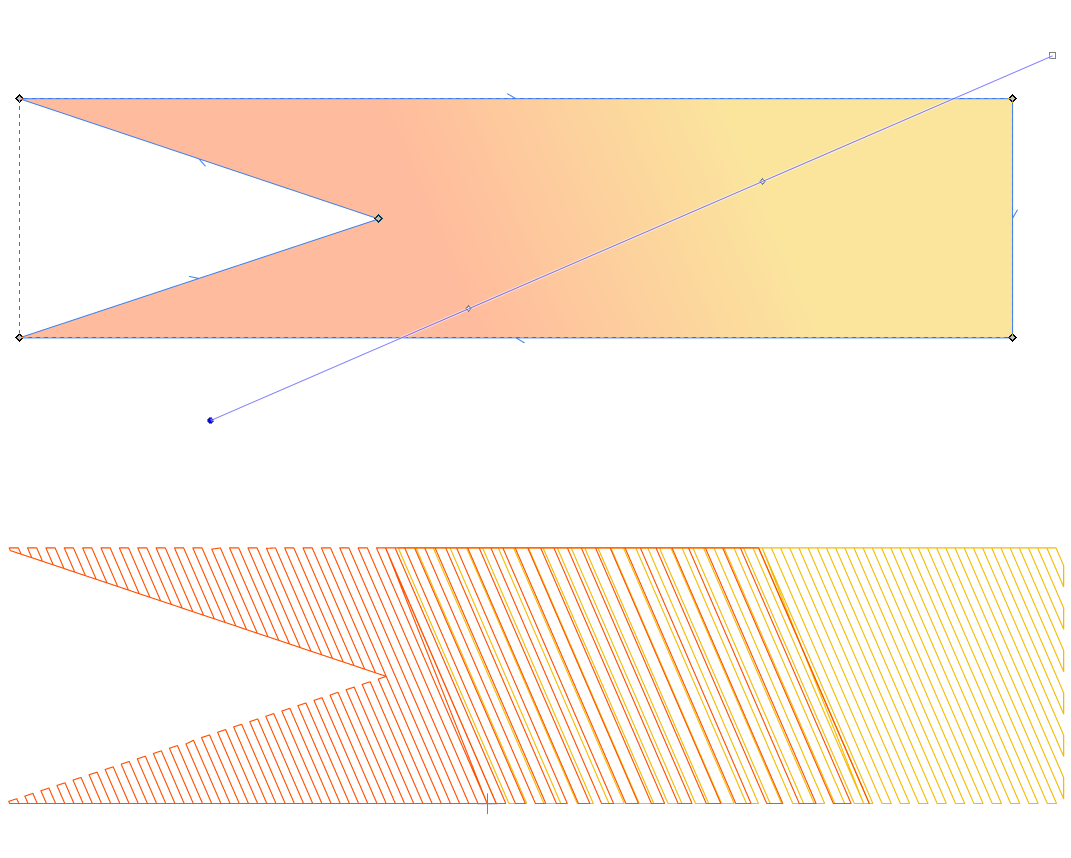
-
Setze einen Wert für den Reihenabstand am Ende der Füllung. Bei einem Wert von 0.00 wird der doppelte Wert des ursprünglichen Reihenabstandes angenommen.
Kreuzstich-Assistent
Der Kreuzstich-Assistent kann bei der Erstellung von Kreuzstichmustern auf verschiedene Weise unterstützen.
- Überprüfung und Anpassung der diagonalen Stichlänge
- Anlegen des Seitengitters
- Verpixeln von Füllflächen
- Gittergröße als Parameter auf die Füllflächen übertragen
Funktionsweise
- Optional: Wähle ein oder mehrere Füllflächen aus
- Öffne die Erweiterung unter
Erweiterungen > Ink/Stitch > Werkzeuge: Füllung > Kreuzstich-Assistent - Stelle die gewünschte Gittergröße ein
- Lege die gewünschten Optionen fest, wie die Gittergröße angewendet werden soll (siehe unten)
- Klicke auf
Anwenden
Das Kreuzstich-Gitter
Cross Stitch Assistant
The cross stitch assistant can assist in various ways when creating cross stitch patterns.
 Der Kreuzstich-Assisten ist für folgende Aufgaben ausgestattet:
- Überprüfung und Anpassung der diagonalen Stichlänge
- Erstellung eines Seitengitters für die Positionierung der Kreuzstiche (als visuelle Unterstützung während der Bearbeitung)
- Verpixeln und kombinieren der ausgewählten Elemente. Dies hilft Sprungstiche und Überschneidungen zu verhindern und eine bessere visuelle Representation der Kreuzstich-Positionierungen zu erhalten.
- Kreuzstich-Parameter auf gewählte Elemente anwenden
- Convert bitmap images into cross stitch fill elements
Funktionsweise
- Optional: wähle Füllelemente und/oder Pixelgrafiken aus. Ohne eine Auswahl kann lediglich das Seitengitter angepasst werden.
- Öffne den Assistenten über
Erweiterungen > Ink/Stitch > Werkzeuge: Füllung > Kreuzstich-Assistent - Setze die gewünschten Einstellungen für Parameter, Ausgabe-Einstellungen und Bitmap-Einstellungen (siehe unten)
- Klicke auf
Anwenden
Einstellungen
-
Grid settings
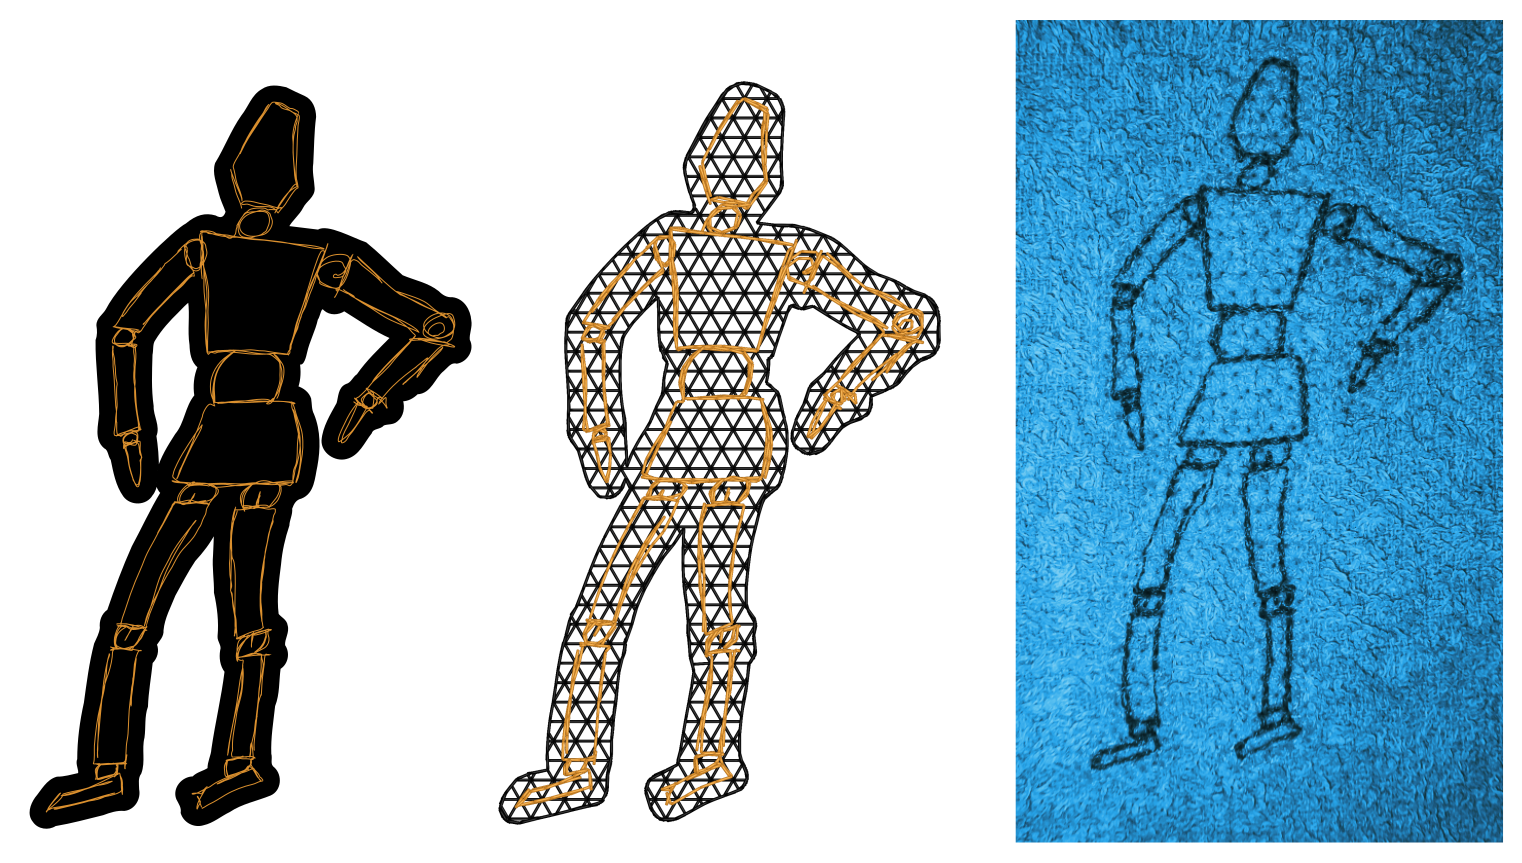
Um beieinanderliegende Flächen gut aufeinander abzustimmen, richten sich Kreuzstche nach einem Gitter. Das heißt, je nachdem an welcher Stelle auf der Arbeitsfläche sich ein Element befindet, kann sich das Stickbild ändern. Zur besseren Planung ist es hilfreich, das Seitengitter an die Kreuzstichmustergröße anzupassen. So können die Stichpositionen schon direkt visuell erfasst werden.
Überprüfe, ob das Seitengitter an der oberen linken Seitenecke ausgerichtet ist.
Ist dies nicht der Fall, muss das Gitter underDatei > Dokumenteinstellungen... > Gittermanuell angepasst werden. Dort gibt es eine Funktion (An der Seite ausrichten), die nicht über Ink/Stitch-Einstellungen erreicht werden kann. Setze die Ausrichtung auf die linke obere Seitenecke.Bei der Festlegung der Gittergröße sind die Sitchlängen der diagonalen Kreuze nicht direkt ersichtlich. Die Stichlänge spielt in der Sticherei aber immer eine wichtige Rolle. Daher gibt der Kreuzstich-Assistent die Stichlänge an, bzw. kann die Gittergröße auch direkt über die Stichlänge angepasst werden.
-
Parameter, verpixeln und Bitmap-Einstellungen
Es ist möglich einige wichtige Kreuzstich-Einstellungen direkt hier vorzunehmen und an die Gittereinstellungen anzupassen.
Ausgabe-Optionen
-
Gittereinstellungen anwenden: Hier wird festgelegt, was der Kreuzstichassistent tun wird.
- Parameter: Wenn aktiviert, werden die im Einstellungs-Tab gesetzten Kreuzstich-Parameter auf die ausgewählten Füllelemente angewandt.
- Verpixeln: Wenn aktiviert, verpixelt der Kreuzstich-Assistent die Form der ausgewählten Füllelemtene. So können die Formen direkt am Gitter ausgerichtet werden und die Stichpositionen werden visuell klar dargestellt.
- Knoten hinzufügen: fügt Knoten an den Eckpunkten des Gitters hinzu. So können die Formen schneller manuell auf der Arbeitsfläche angepasst werden. Bei nicht quadratischen Gittern, wird der horizontale Abstand beim Hinzufügen der Knotenpunkte verwendet.
- Elemente:
- Überlappungen entfernen: Wenn aktiviert, werden die Formen neu zusammengesetzt, kombiniert und ohne Überlappungen ausgegeben.
- Seitengitter anpassen:
- Seitengitter: Definiert, ob das Seitengitter an die gewählte Gittergröße angepasst werden soll
- Gitterfarbe: Definiert die Farbe der Gitterlinien
- Vorhandene Gitter entfernen: definiert, ob zuvor gesetzte Kreuzstichgitter aus dem Dokument entfernt werden sollen. Existierende manuelle Gitter werden nicht entfernt, sondern nur deaktiviert.
Bitmap-Einstellungen
- Bitmaps konvertieren: Wenn aktiviert, werden Pixelgrafiken in Füllelemente umgewandelt
- Ein Kreuz pro Pixel: Aktiviere diese Option, um jeden Pixel in ein volles Kreuz zu verwandeln (ändert die Größe der Grafik)
- Farbauswahl: Farbreduktionsmethoden
- Anzahl der Farben: definiere die Anzahl der Farben für die Füllungen und wähle eine Farbreduktionsmethode. Das Ergebnis hängt stark vom Ausgangsbild ab.
- Ausgewählte Konturfarben: werden Elemente mit einer Konturfarbe vor dem Aufruf des Kreuzstich-Assistent mitausgewählt, ist es möglich, diese Farben hier als Farbpalette für die Farbreduktion einzusetzen
- Liste mit RGB Werten: definiere eine Liste mit RGB-Werten, z.B.
0 0 0 255 255 255für eine Schwarz-Weiß-Bild - Gimp-Farbpalette
- Sättigung, Helligkeit und Kontrast: passe die Werte an, um bessere Ergebnisse zu erzielen
- Transparenzschwelle (%): Pixel mit einem geringeren Transparenzwert werden nicht dargestellt
- Hintergrundfarbe: definiere eine Hintergrundfarbe. Dies erlaubt, diese zu entfernen.
- Hintergrund entfernen: entfernt Füllelemente mit der Hintergrundfarbe
Bei den Tutorials findest du mehrere Beispiele für die Umwandlung von Pixelgrafiken in Kreuzstich-Muster.
Knockdown Füllung
Hilfsmethode zur Erstellung von:
- einem Füllbereich unter allen gewählten Elementen, optional mit positivem oder negativem Versatz. Dies kann sehr nützlich sein, für das Arbeiten mit hochflorigen Stoffen (bei positivem Versatz) oder um eine globale Unterlage zu erstellen (negativer Versatz)
- einem rechteckigen oder kreisförmigen Bereich um alle ausgewählten Elemente herum, wobei die Elemente selbst ausgespart werden. Dies kann für einen Embossing-Effekt nützlich sein.
- Elemente auswählen
Erweiterungen > Ink/Stitch > Werkzeuge: Füllung > Auswahl zu Knockdown-Stich- Einstellungen anpassen
- Auf
Anwendenklicken - Füllparameter im Parameterdialog anpassen (
Erweiterungen > Ink/Stitch > Parameter)
Diese Funktion ist Teil einer zukünftigen Ink/Stitch Version und ist in der aktuellen Version noch nicht verfügbar.
Der Reihenabstand wird automatisch an die gewählte Stichlänge angepasst.
Einstellungen
Optionen
- Löcher erhalten: bestimmt ob die neue Füllfläche Löcher enthält
- Versatz: der Versatz (mm) um die Auswahl. Offset can be positive or negative
- Methode (rund, Gehrung, Abschrägung): Beeinflusst das Ergebnis um die Ecken herum
- Gehrungslimit: Beeinflusst das Ergebnis um die Ecken herum
Embossing
- Form: Definiert die äußere Form des Embossing-Effekts. Optionen sind Rechteck oder Kreis. Die Form wird um alle ausgewählten Elemente herum angelegt, so dass alle umschlossen werden. Die Elemente selbst, werden dabei ausgespart.
- Form ohne Ausschnitt: gibt die Form (Rechteck oder Kreis) ohne Motivausschnitt aus
- Versatz (Form): Ein positiver Wert erweitert den Embossing Bereich. Der Versatz berechnet sich auf die ausgesparte Form und bezieht den Versatz unter Optionen mit ein.
- Methode (rund, Gehrung, Abschrägung): Beeinflusst das Ergebnis um die Ecken herum
Anmerkung: wenn Embossing-Formen verwendet werden, ist der ausgesparte Bereich genauso angelegt, wie die Knockdown-Füllung sonst gewesen wäre. Der Versatz unter Optionen beeinflusst also die Größe der Embossing-Form.
Tartan
Der Farbeditor ist unter Erweiterungen > Ink/Stitch > Werkzeuge: Füllung > Tartan zu finden.
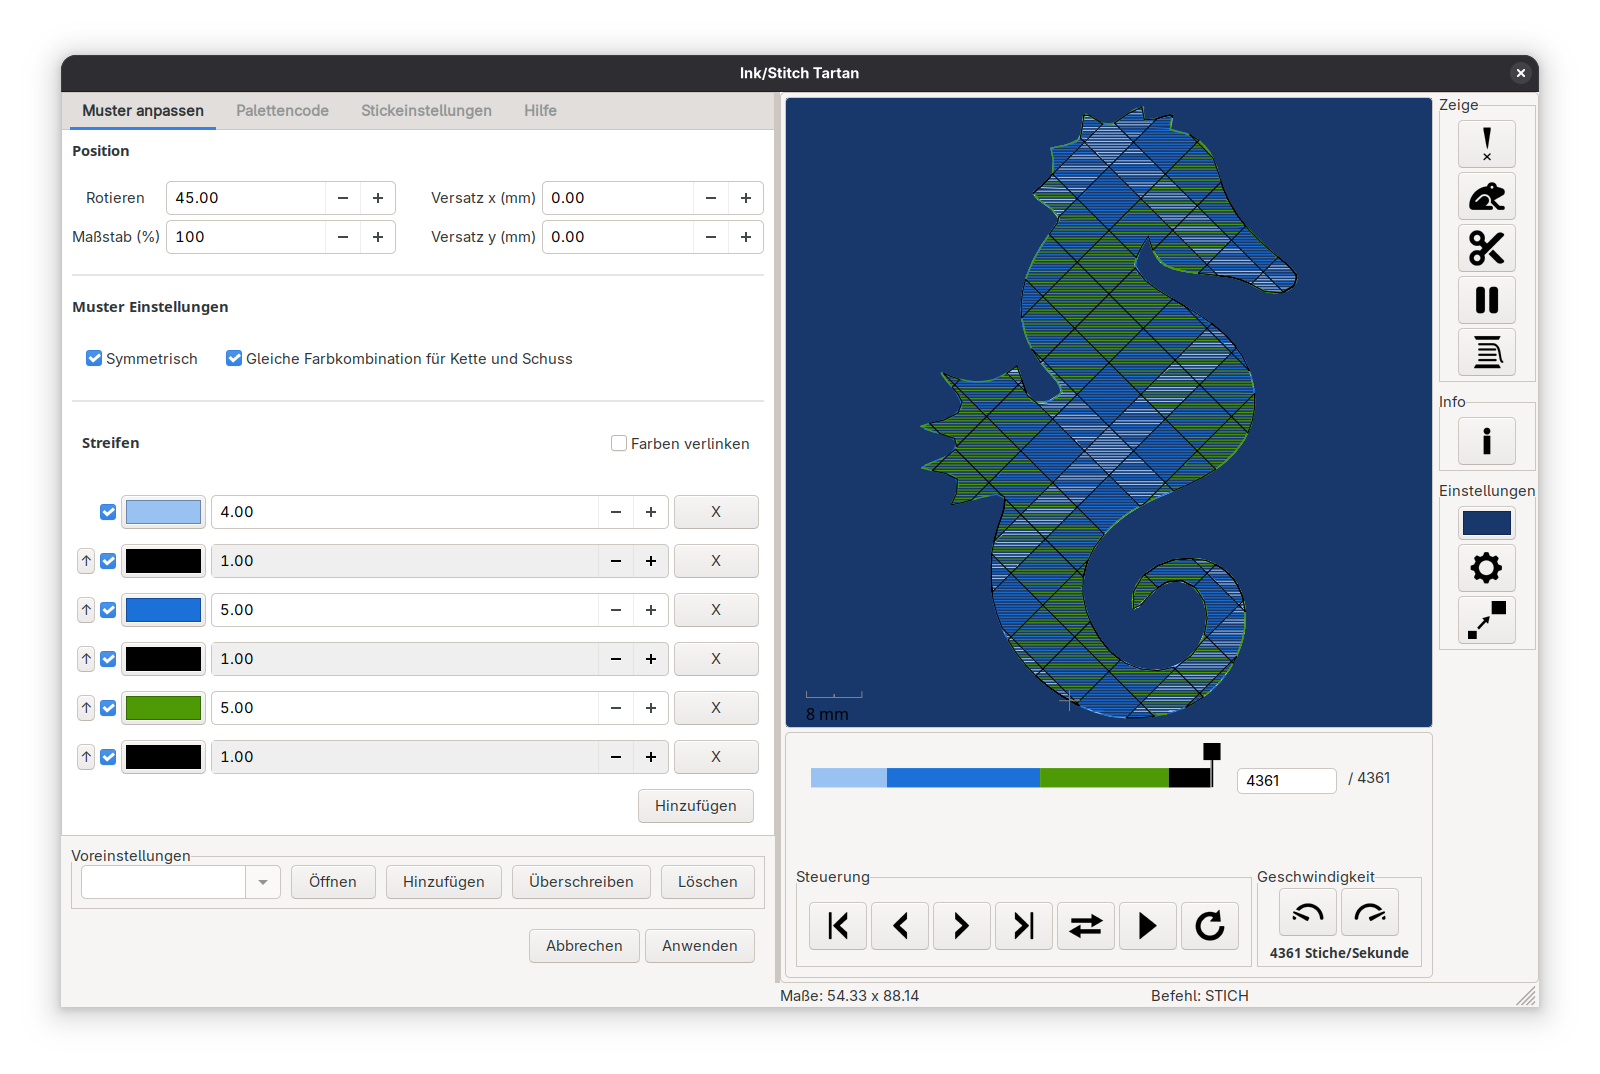
Muster anpassen
Position
Das Muster kann als Ganzes rotiert, skaliert (%) und verschoben (mm) werden.
Muster Einstellungen
- Symmetrie: Muster können gespiegelt (symmetrisch) oder wiederholt (asymmetrisch) werden.
- Ein gespiegeltes Muster kehrt die Farbreihenfolge in jeder zweiten Iteration um (ohne den äußeren Streifen, den Drehpunkt, zu wiederholen) Dies würde ein Muster mit drei Farben (grün, schwarz, gelb) wie folgt ausgeben: grün, schwarz, gelb, schwarz, grün, schwarz, gelb, …
- Ein wiederholtes Muster wird das gesamte Muster einfach immer wieder wiederholen: grün, schwarz, gelb, grün, schwarz, gelb, grün, …
- Gleiche Farbkombination für Kette und Schuss
- Ist diese Funktion deaktiviert, können für Kette und Schuss jeweils unterschiedliche Farben festgelegt werden
- Ist diese Funktion deaktiviert, folgen Kette und Schuss der gleichen Farbkombination
Streifen
- Farben können über die Schaltfläche
Hinzufügenhinzugefügt werden - Hinter jedem Farbstreifen befindet sich ein
Xmit dem Farben gelöscht werden können - Die Streifenpositionen kann durch Klicken und Ziehen auf der Schaltfläche
⁝geändert werden (mit Vorsicht verwenden). - Soll eine Farbe nur als Platzhalter dienen, kann die Ausgabe als Stickpfad über das Kontrollkästchen deaktiviert werden (☑)
- Soll Kette und Schuss nicht gleich sein, so werden die Farben für die Kettfäden vertikal und für Schussfäden horiztonal ausgegeben
- Über das Farbfeld kann die Farbe des jeweiligen Streifens geändert werden
- Gleiche Farben können gleichzeitig geändert werden, wenn das Kontrollkästchen
Farben verlinkenaktiviert ist
Palettencode
Der Ink/Stitch Code ist die Information die in die SVG-Datei eingespeichert wird. Hierüber können alle Parameter des Tartanmusters direkt angepasst werden.
Ein Palettencode sieht beispielsweise so aus: (#000000)/5.0 (#FFFFFF)/?5.0.
- Streifen sind durch Leerzeichen getrennt
- Jede Farbdefinition ist in runde Klammern eingeschlossen
(#000000) - Ein Schrägstrich (
/) definiert das Muster als symmetrisch (gespiegelt), während drei Punkte (...) ein sich wiederholendes (asymmetrisches) Muster repräsentieren...(#000000)5.0 (#FFFFFF)?5.0.... - Ein senkrechter Strich (
|) trennt Kette von Schuss und wird nur dann eingesetzt wenn diese nicht gleich sind.
Hinweis: Das Scottish Register of Tartans hatte eine große Sammlung and registrierten Tartan-Mustern. Ink/Stitch ist fähig den Code den man sich per Mail zuschicken lassen kann in Ink/Stitch Palettencode umzusetzen. Bitte beachtet dabei die entsprechenden Lizenz-Regulierungen.
Das Scottish Register of Tartans hat eine große Sammlung mit registrierten Tartanmustern. Ink/Stitch kann den dort ausgegebenen Code interpretieren und in den Ink/Stitch spezifischen Farbcode umwandeln. Wir bitten darum, die Lizenzbestimmungen zu beachten. Definiere die Breite eines Tartanfadens, bevor du auf „Code anwenden“ klickst.
Hier ist ein Beispiel zum Ausprobieren: ...B24 W4 B24 R2 K24 G24 W2... (Quelle)
Stickeinstellungen
In den Stickeinstellungen kann festgelegt werden, ob das Tartanmuster als ein einziges Stickelement ausgegeben werden soll oder ob es in SVG-Elemente umgewandelt wird, die im Anschluss einzelnd bearbeitet werden können.
Füllstich-Element
Tartan als Stickelement führt zu einem einheitlichen Erscheinungsbild mit optimaler Stichplatzierung. Es können verschiedene Parameter eingestellt werden, die im Anschluss im Parameterdialog verfeinert werden können.
Die Parameter sind auf der Seite für die Tartanfüllung genauer beschrieben.
Der einzige Parameter der nur über dieses Menu eingestellt werden kann ist Minimale Streifenbreite für Füllstich. Streifen die schmaler sind als dieser Wert werden als Geradstich ausgegeben.
SVG Elemente
- Definiere die Stichart (veraltete Füllung oder Füllstich) und setzte die Parameter den persönlichen Vorlieben entsprechend. Streifen die schmaler sind als
Minimale Streifenbreite für Füllstichwerden als Geradstich ausgegeben. Die einzelnen Elemente können nach einem Klick aufAnwendenin Inkscape bearbeitet werden.
Hinweis: Für Füllstich-Elemente wird der Stickpfad nach dem Anwenden etwas optimiert und nicht so viele Sprungstiche enthalten wie in der Tartan-Simulation. Trotzdem können Anpassungen nötig sein.
Tutorials zu Füllwerkzeugen
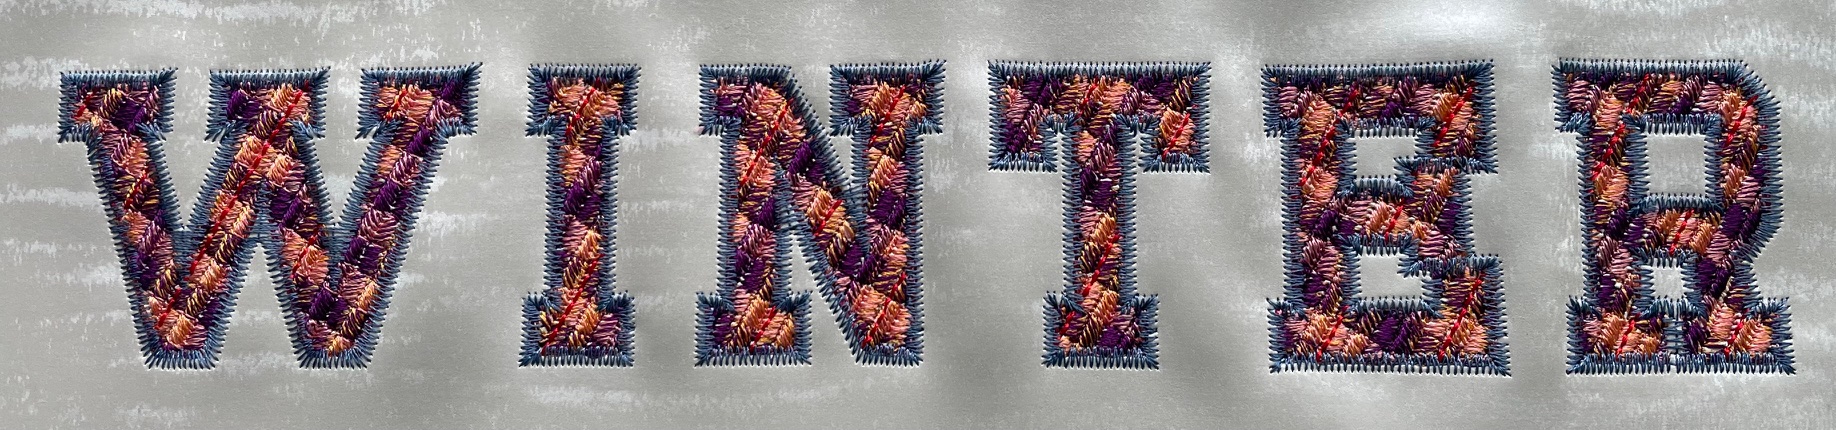
Farbwechsel bei Tartan-Schriften reduzieren
So machst du deine Tartan-Schrift nutzerfreundlicher
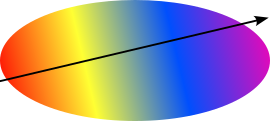
Farbübergänge
Farbübergänge
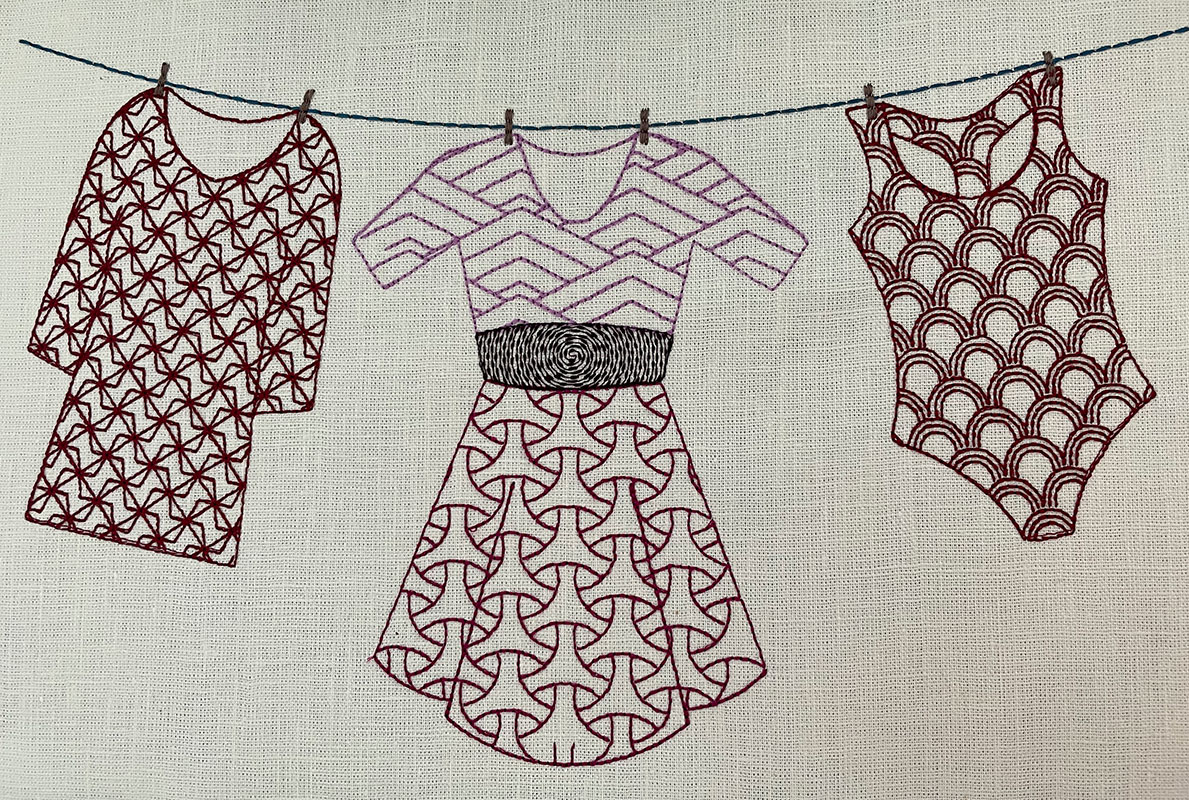
Kacheln
Gemusterte Füllungen mit dem Kachel-Pfadeffekt
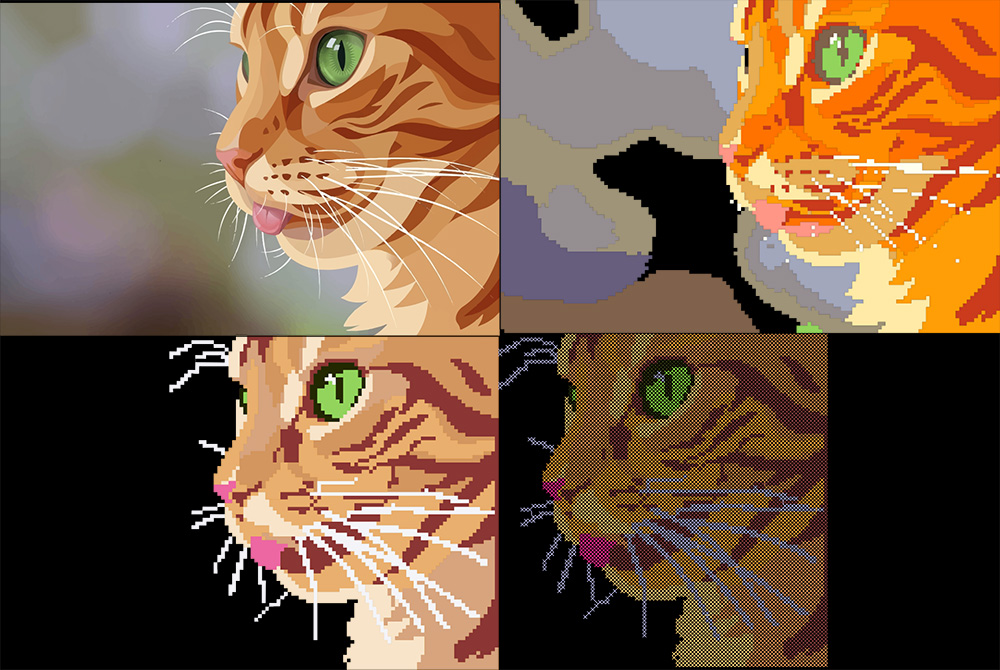
Vom Bild zum Kreuzstich
Mit dem Kreuzsich-Assistent ein Bild in Kreuzstichfüllungen umwandeln
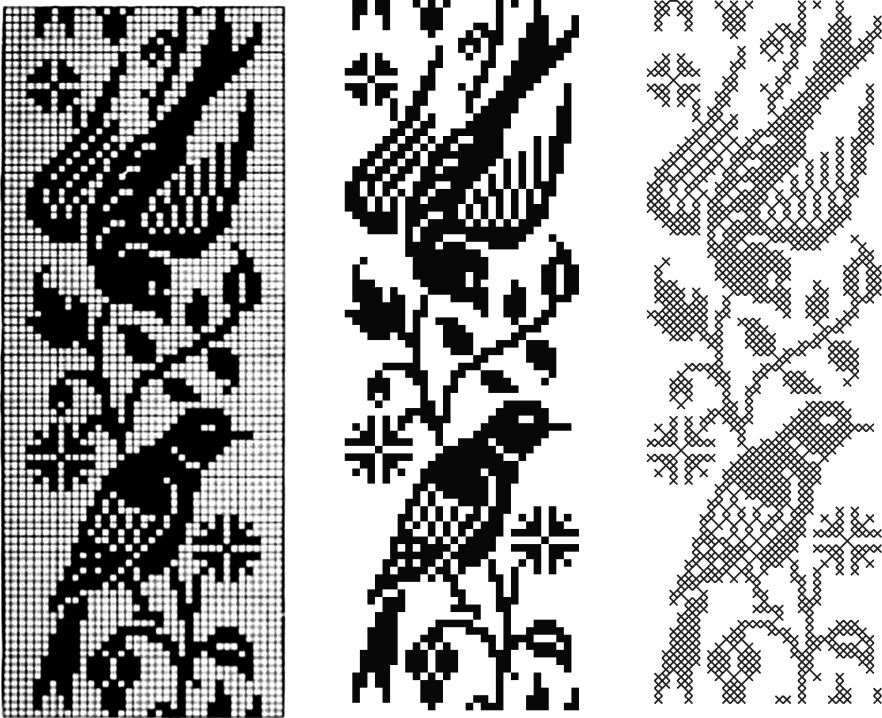
Von einer Kreuzstichvorlage für Handstickerei zu Kreuzstich-Füllungen
Mit Hilfe des Kreuzsich-Assistenten eine Vorlage für Kreuzstichmuster für das Maschinensticken aufbereiten