Tools: Fill
Break Apart Fill Objects
Fill objects can be treated best, if they are single elements without any crossing borders. Sometimes these rules are not easy to meet and your shape will have tiny little loops which are impossible to see in Inkscape.
Therefore error messages for fill areas happen quiet often and are annoying for users. This extension will help you to fix broken fill shapes. Run it on every fill shape which is causing trouble for you. It will repair your fill element and separate shapes with crossing borders into it’s pieces if necessary.
Usage
- Select one or more fill objects
- Run: Extensions > Ink/Stitch > Tools: Fill > Break Apart Fill Objects
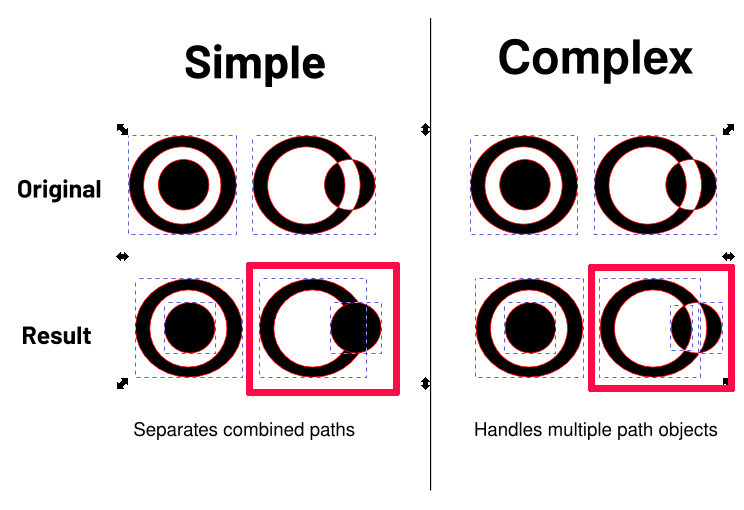
Simple or Complex
Always prefer simple when possible. It retains holes and repairs the “border crossing error” by splitting up loops into separate objects or deletes them if they are too small to embroider.
While “simple” splits up loops, it will not respect overlapping subpaths. It will treat them as separate objects. Complex is capable to recognize overlapping paths and treat them well.
“Break apart fill objects” can be expressed in native Inkscape functions:
- Path > Union (Solve subpath issues)
- Path > Break apart (Separate objectes)
- Delete objects which are too small to embroider
- Path > Combine (if you want to preserve holes)
- Path > Combine (if you want to preserve even more holes)
Info: For overlapping paths step 1 is only performed by complex.
Convert to gradient blocks
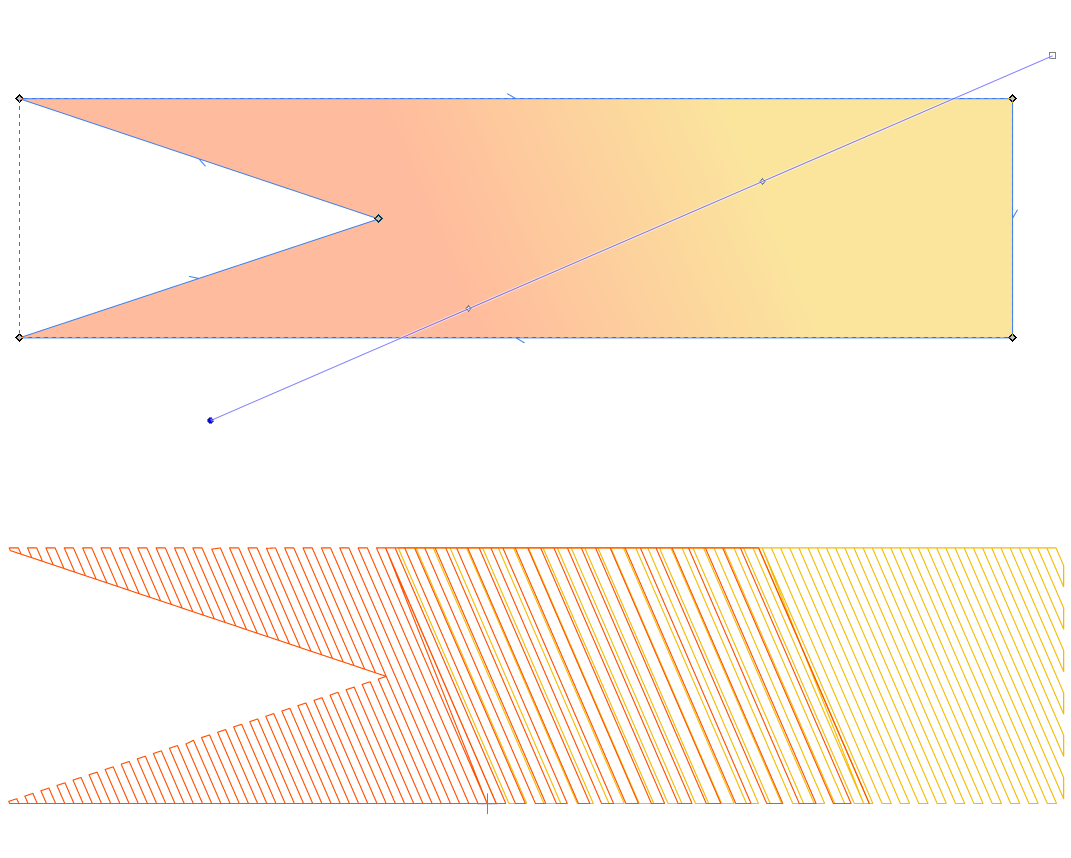
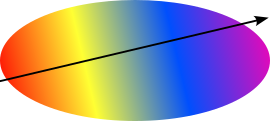
Convert to gradient blocks will split a fill with a linear gradient into multiple blocks of solid color and adapted row spacing.
Usage
- Apply a linear fill color gradient to an element.
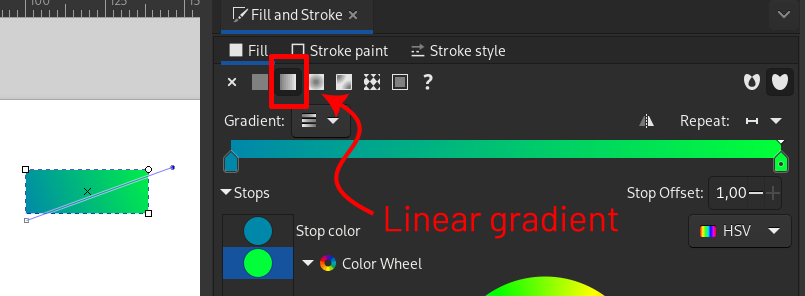
- Run `Extensions > Ink/Stitch > Tools: Fill > Convert to gradient blocks
Cross Stitch Assistant
The cross stitch assistant can assist in various ways when creating cross stitch patterns.
 It helps you to:
- Check and adapt the diagonal stitch length
- Create the page grid for cross stitch alignment (and visual support while working on cross stitches)
- Pixelize and combine the outline of selected elements, to avoid jump stitches, overlaps and to receive a better representation of the cross stitch positioning
- Apply cross stitch params to selected elements
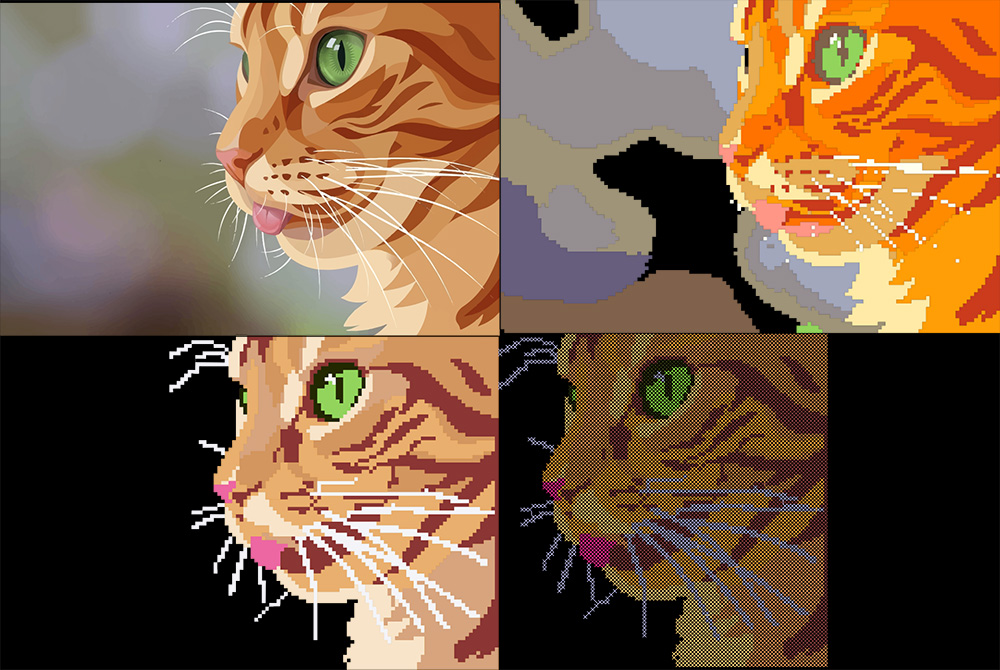
- Convert bitmap images into cross stitch fill elements
Usage
- Optional: select fill elements and/or bitmap images. Without a selection you can adapt the page grid only.
- Open the assistant extension under
Extensions > Ink/Stitch > Tools: Fill > Cross Stitch Assistant - Set the parameters, the output options and the bitmap settings (see below)
- Click on
Apply
Settings
-
Grid settings
To ensure that adjacent areas are well coordinated, cross stitches are aligned according to a grid. This means that the embroidery pattern may change depending on where an element is located on the canvas. To plan this better, it is helpful to adjust the page grid to the size of the cross stitch pattern. This makes it easier to visually estimate the stitch positions.
Check if the page grid is aligned at the top left corner of the page.
If it is not, you’ll need to manually adjust the grid underFile > Document Properties... > Grids. You will find anAlign to pagesetting, that cannot be accessed via the Ink/Stitch plugin. Set it to the top left corner.When specifying the grid size, the stitch lengths of the diagonal crosses are not immediately apparent. However, stitch lengths always play an important role in machine embroidery. The Cross Stitch Assistant therefore has a field for displaying and adapting the diagonal stitch lengths.
-
Params, pixelate and bitmap settings
You can directly set the cross stitch fill params here, according to the grid spacing.
Output options
-
Apply grid settings: Here you decide most of what the assistant is going to do.
- Parameters: If checked, the cross stitch parameters will be applied to all selected fill elements, according to the Parameters tab of the cross stitch assistant.
- Pixelize: If checked the Cross Stitch Assistant automatically pixelate selected fill elements based on the grid settings. This makes it possible to adjust the shapes directly to the grid and visually identify the stitch positions accurately.
- Add nodes: One can chose to add nodes at each grid intersection. This will make it easier to manually adapt the outline of the shape. In non-square grids, nodes may not match grid intersections in vertical direction.
- Element handling:
- Remove overlaps: decide if superpositions are kept or not.
- Setup page grid:
- Define whether or not to adapt the page grid
- Define grid color
- Chose whether or not to remove the previously set cross stitch grids from the document. Your manual page grids will not be removed, but disabled.
Bitmap settings
- Convert bitmaps: If checked all selected bitmap images are converted into fill shapes
- One cross each pixel: check if you want to convert pixel art images
- Color selection: chose between specifying either
- a number of colors, in this case you can also chose the color reducing algorithm. The proposed algorithms will give different results, and the best one really depends on your image
- a list of rgb colors, for example set to
0 0 0 255 255 255to receive a black and white image - a gimp color palette
- or add strokes with the colors you want to use and add them to the selection before using the assistant.
- Saturation, Brightness and Contrast of the original image may be tweaked here to achieve better results
- Transparency threashold: pixels with at least that transparency are ignored.
- Background color: define the background color here, will allow you to remove the background.
- Remove background: decide what to do with fills with background color
In our tutorial section you can find multiple in depth instructions on how to convert images into cross stitch embroideries.
Knockdown Fill
Helper method to generate either
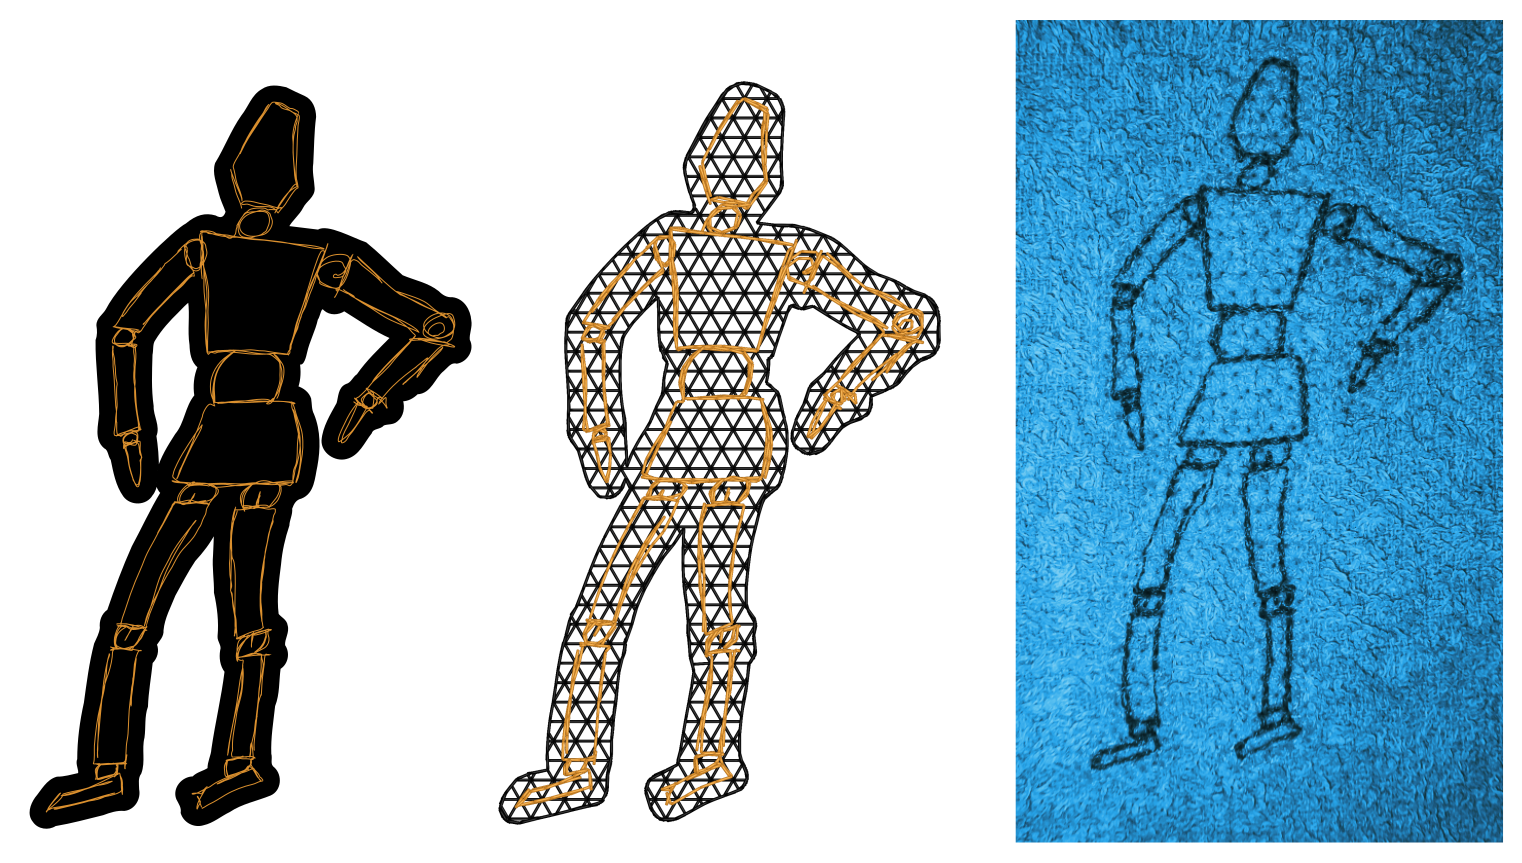
- a fill area underneath all selected elements, optionally with a positive or a negative offset. This can be very useful when working with high pile fabric (usually with a positive offset) or to create global underlay (usually with a negative offset)
- a rectangle or a circle area around all selected elements (but not underneath). This can be useful to create an embossing effect.
- Select elements
- Open
Extensions > Ink/Stitch > Tools: Fill > Selection to Knockdown Fill - Adapt settings
- Click apply
- Adapt fill settings in the params dialog (
Extensions > Ink/Stitch > Params)
This feature will be part of an upcoming Ink/Stitch release. It is not yet integrated in Ink/Stitch.
The row spacing parameter has been computed acccording to the stitch length setting in the Selection to Knockdownn fill extension
Settings
Options tab
- Keep holes: Chose whether the shape should contain holes
- Offset: The offset (mm) around the selection. Offset can be positive or negative
- Method (round, miter, bevel): Influences how edges will look like
- Miter limit: Influences how edges will look like
Embossing tab
- Shape: If None, the extension creates a knockdown fill area underneath the selected elements, taking into account the offset (from options tab) value. If on the other hand, you wish an embossing effect, chose between rectangle and circle to create a knockdown fill around the selected elements, excluding the area underneath the selected elements (still taking the offset into account).
- Use only shape: emboss the whole shape (rectangle or circle) without excluding the motif shape.
- Shape offset : Any positive value will extend the embossing area. The excluded area may be modified by using the offset parameter in the options tab.
- Method (round, miter, bevel): Influences how edges will look like
Note : if the shape parameter is set to circle or rectangle, the excluded area is exactly what the knockdown fill with Shape set to None would be. If the shape offset is 0, the embossing shape is the smallest circle/rectangle that contains the excluded area. If shape offset is positive, the outside border of the circle/rectangle is extended in every direction according to this value. The excluded area is unchanged.
Tartan
The Stripe Editor can be found in Extensions > Ink/Stitch > Tools: Fill > Tartan
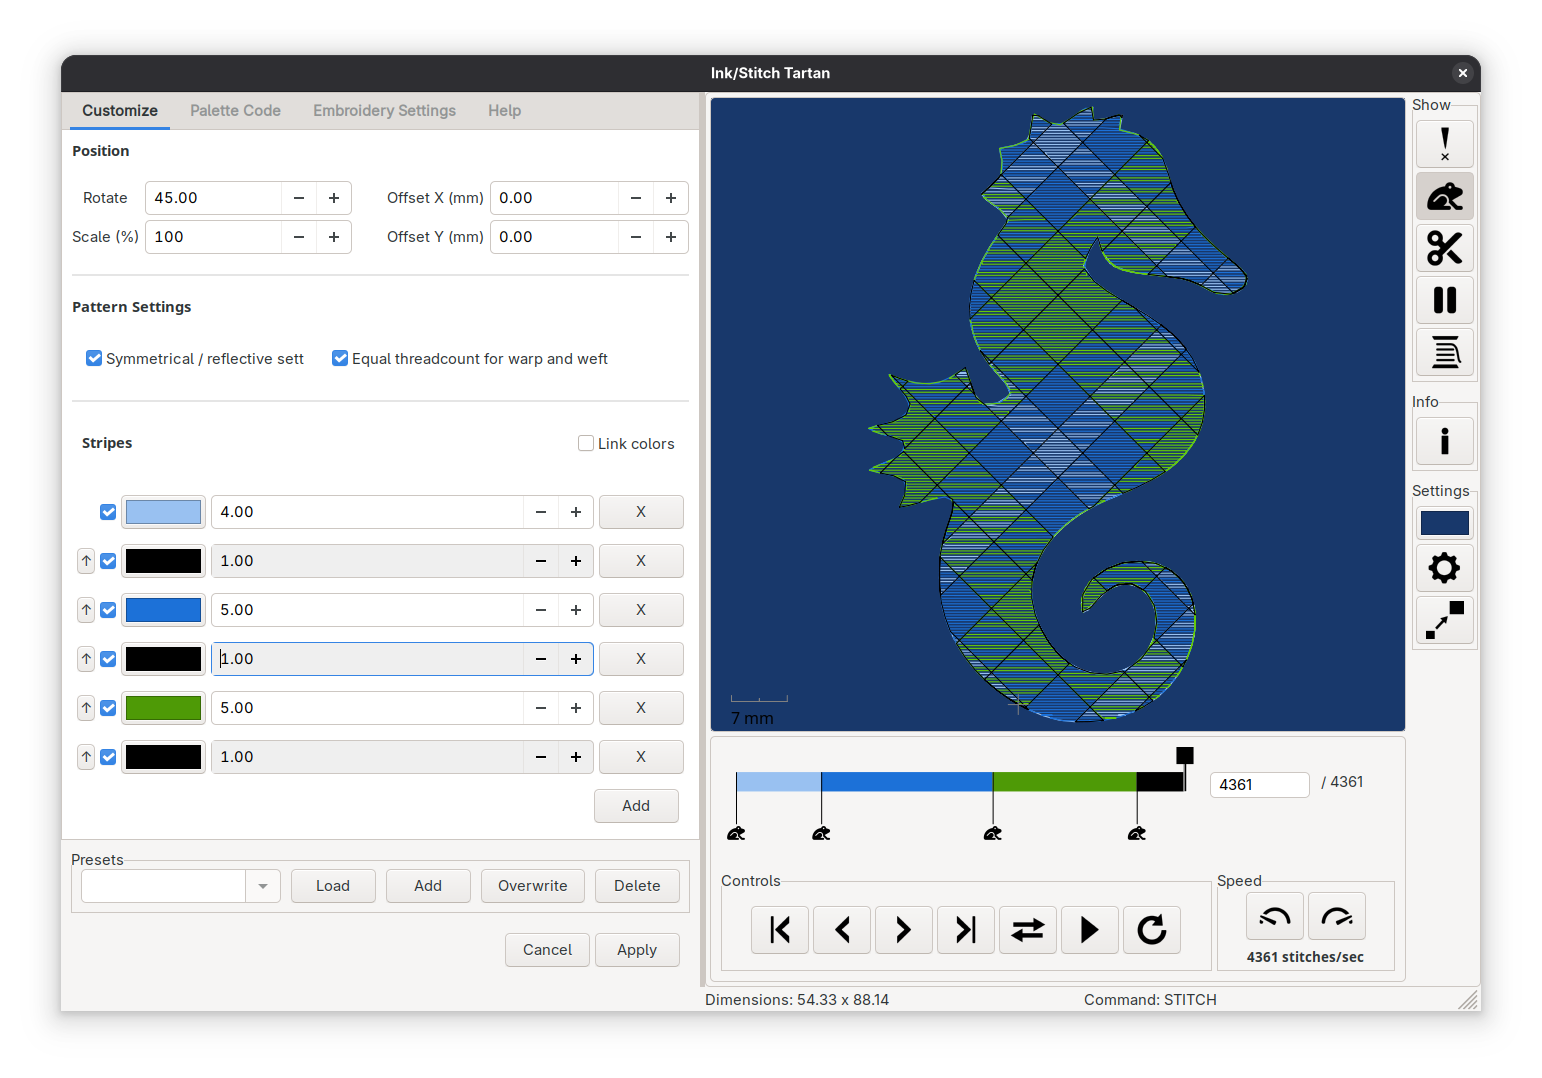
Customize
Positioning
The pattern can be rotated, scaled (%) and translated (mm) as a whole
Pattern Settings
- Symmetry: Patterns can be reflected or repeated.
- A reflected pattern will reverse the stripes every second time (without repeated the pivot point). This means a pattern with three colors (green, black, yellow) will be rendered as follows: green, black, yellow, black, green, black, yellow, …
-
A repeating sett will simply repeat the whole pattern over and over again: green black yellow, green, black, yellow, green, …
- Equal threadcount for warp and weft
- if disabled you can define different color setts for warp and weft
- if enabled warp and weft are the same
Stripes
- Add colors with the
Addbutton - Remove colors by clicking on
Xbehind a stripe - Alter stripe positions by click and drag
⁝(use with care) - Enable, disable stripe rendering with the checkbox (☑)
- When equal threadcount is disabled: warp defines the vertical lines, weft defines the horizontal lines
- Click on the colored field to select an other color
- When you want to change a color in multiple stripes at once, enable
Link colorsand equal colors will update simultanously
Palette Code
The Ink/Stitch code is what will be saved into the svg, but can also be edited directly.
A palette code looks for example like this: (#000000)/5.0 (#FFFFFF)/?5.0.
- Stripes are separated by spaces
- Each color is encapsulated in round brackets
(#000000) - A slash (
/) indicates a symmetrical/reflective order, whereas three points at the start and end of the code (...) represent a asymmetrical/repeating sett...(#000000)5.0 (#FFFFFF)?5.0.... - A pipe (
|) is a separator for warp and weft and should only be used if they differ in threadcount
Info: The Scottish Register of Tartans has a huge collection of registered tartan patterns. Ink/Stitch is capable to use their code which they send out per mail and convert it into the Ink/Stitch color code. Please respect their particular license regulations. Make sure to define the width of one tartan thread before you click on Apply Code.
Here’s an example code you can try out: ...B24 W4 B24 R2 K24 G24 W2... (source)
Embroidery Settings
In the embroidery settings you can decide if you want to render the tartan as a single embroidery element or if you want to receive multiple svg elements which you can edit and transform afterwards to your liking.
Embroidery Element
Rendering a tartan as a embroidery element will result in a uniform look with optimal stitch placement. You can set various parameters which can also be refined in the params dialog.
Please refer to the params listed on the tartan fill page.
The only param that will only show up here is the Minimum stripe width for fills. Stripes smaller than this value will be rendered a running stitch/bean stitch on top of the fill stripes.
SVG Elements
- Define a stitch type (Legacy Fill or AutoFill) and choose your prefered stitch settings. Stripes smaller than the
Minimum stripe width for fillsvalue will turn into strokes (running stitches). Elements can be edited on canvas after clicking onApply.
Info: For AutoFill the final routing will be better than shown in the simulator. Hit Apply can run the stitch plan to see the final result.
Tutorials using Tools: Fill
Color Blending
Color Blending Methods
Cookie Cutter Tiling
Using Tiling LPE, clipping path and autorouting to achieve Pattern Fill
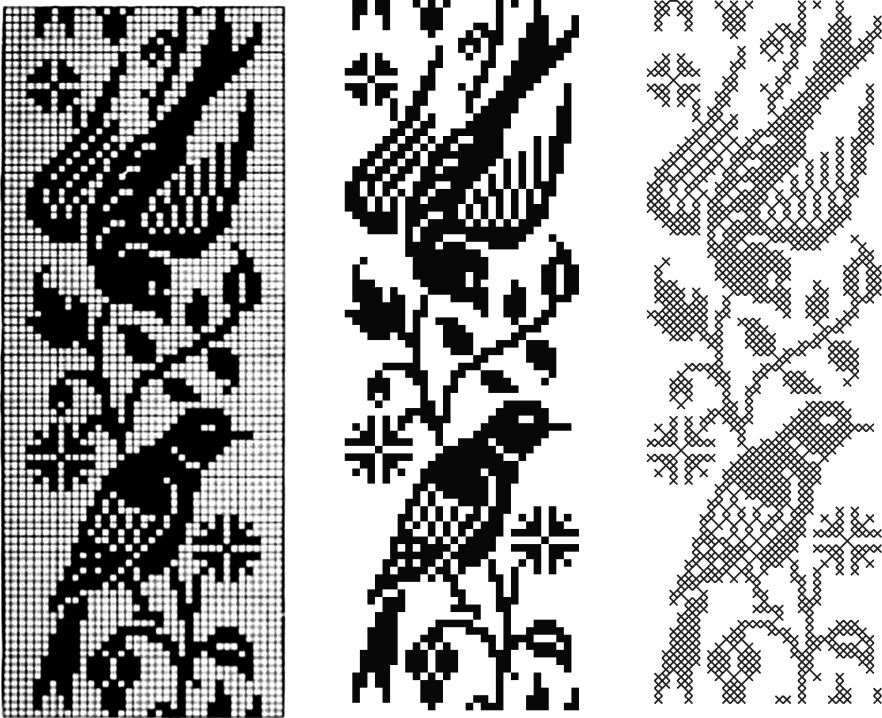
From hand cross stitch embroidery chart to cross stitch fills
Using the cross stitch assistant to convert a cross stitch chart intended for hand embroidery
From image to Cross Stitch
Using the Cross Stitch Assistant to convert an Image into Cross Stitch Fills
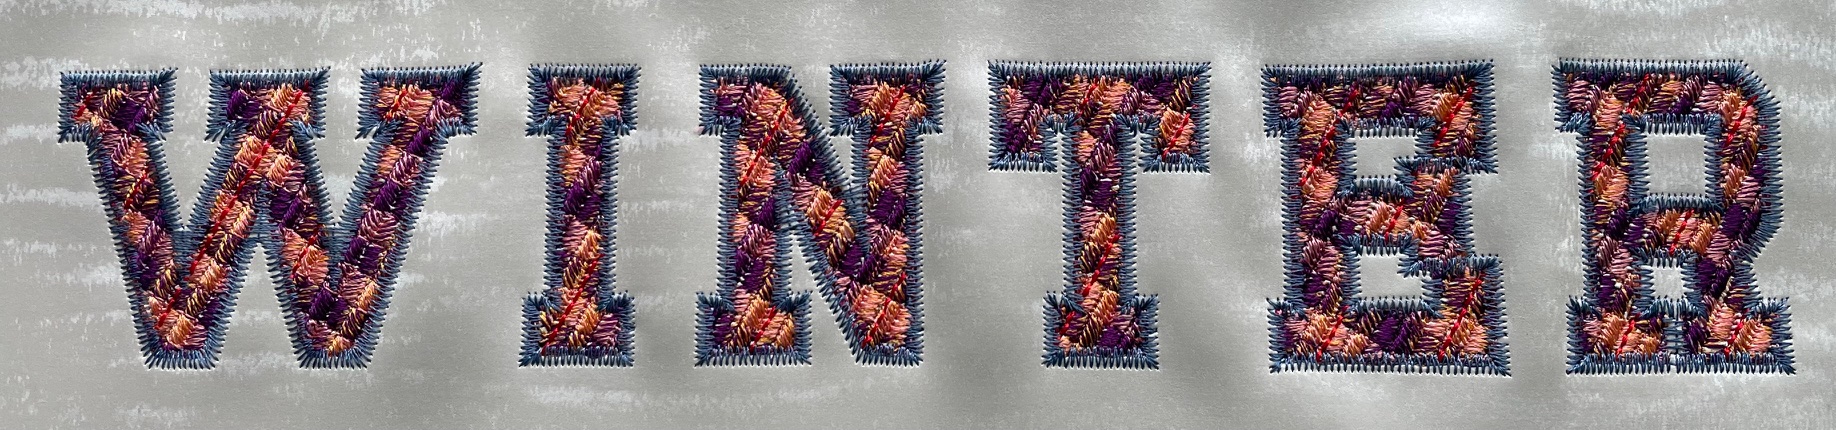
Using a single tartan on several letters and have much fewer thread changes
Making tartan font more user friendly