Satin Column
Description
Satin column are used for borders, letters or small fill areas.
Creation
Ink/Stitch offers several methods to create satin columns. Method 1 does no conversion but render a stroke as a satin. Methods 2 to 5 convert to a manual satin column which can then be modified as necessary. Method 5 allows for more customization.

- Stroke rendered as Satin: for even width satin columns
- Stroke to Satin: for even width satin columns
- Stroke to Live Path Effect Satin: modifiable satin column with optional patterned outline
- Zigzag to Satin: satin column creation for graphic tablets and touch screens
- Fill to Satin: create satin columns from fills
- Manual Satin Column: take full control over every part of the satin column
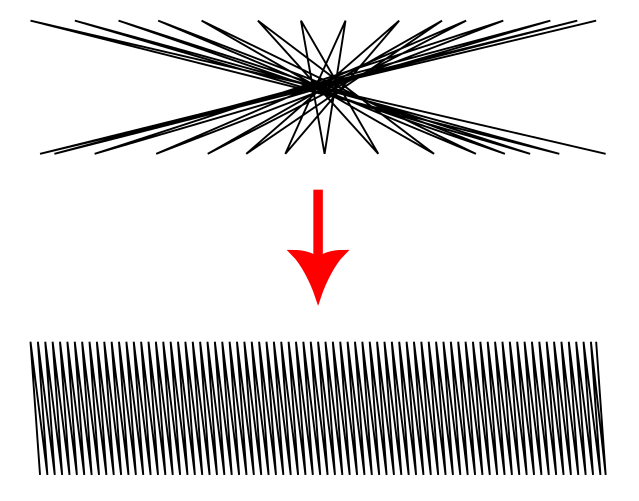
1 - Render a stroke as satin
This feature will be part of an upcoming Ink/Stitch release. It is not yet integrated in Ink/Stitch.
This method renders paths with a stroke color directly as satins and is therefore the easiest one to create uniform width satin columns.
- Add a stroke color to a path object (with no fill).
- Set contour width to the size of the desired satin stitch (the value should be larger than 1.5 mm, see preferences for a deeper insight of the minimum satin width value)
- Run `Extensions > Ink/Stitch > Params
- Open the Satin Column Tab and activate Custom Satin Columns
The position of the nodes can influence how the satin is rendered:
2 - Stroke to Satin
- Add a stroke color to a path object (with no fill).
- Set stroke width to the width of the desired satin stitch.
- Run
Extensions > Ink/Stitch > Satin Tools > Convert Stroke to Satin - Use as-is or customize rungs and/or rails
Get more information about Stroke to Satin
3 - Stroke to Live Path Effect Satin
This can be used to create a satin which can either have a patterned outline or to create a satin which is easier to adapt in width. Please note, that once you use auto-routing on this type of satin, the live path effect will be applied and the path can only be adapted manually afterwards.
Use Path > Object to path to convert this to a standard satin column.
Get more information about Live Path Effect Satins
4 - Zigzag Line to Satin
This method is convenient when you use a a touch screen or graphic tablet.
Get more information about Zigzag to Satin
5 - Fill to Satin
Fill to Satin can be used to convert a fill into a satin column. It is a semi-automatic function and requires additional manual work.
Get more information about Fill to Satin
6- Manual Satin Column
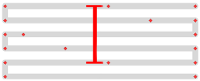
A satin column is defined by a shape made of two mostly-parallel lines. Ink/Stitch will draw zig-zags back and forth between the two lines. The thickness of the column will be based on the distance between the two lines.
- Combine two strokes with
Path > Combineor hitCtrl+K. - Check path directions.Both rails should run in the same direction. If not, Ink/stitch by default will automatically reverse one of them, but you will have better control if you reverse one of them, which is done by selecting one point of one rail with the Node Editor Tool (
N) and runPath > Reverse. This will reverse only the selected rail. - Use node or rung method as described below.
- Then select your satin column and run params through
Extensions > Ink/Stitch > Paramsor a custom shortcut key.
Stitch direction control
Node Method
 Depending on the complexity of your design, this method might be time consuming, because the two paths must have the same number of points. This means that each path will be made up of an equal number of Bezier curves. Each pair of points (one on each rail) acts as a “checkpoint”: Ink/Stitch will ensure that a “zag” ends up going from one point to the other.
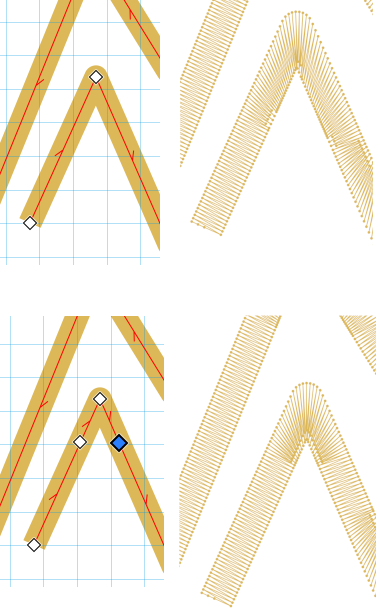
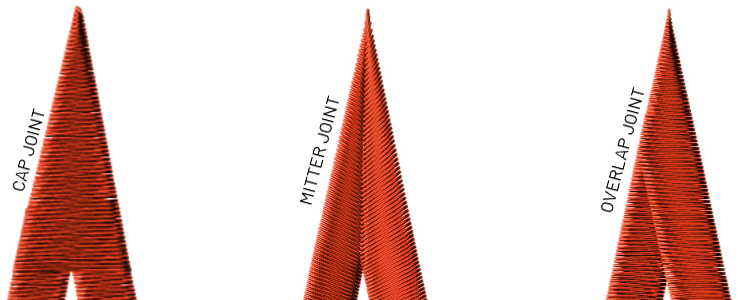
Rung Method
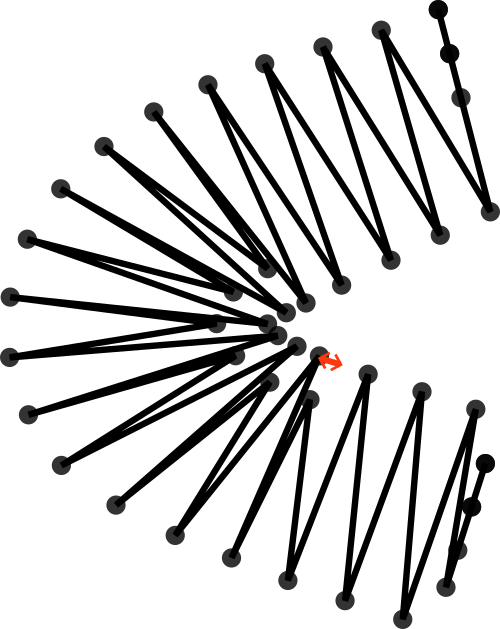
 The rung method will give you more control over the way the satin column is rendered. Good positioning of points on each of the two lines helps getting the stitch directions right. However, there are situations where you need to add direction lines (“rungs”) for satin columns:
- Some tricky corner areas
- Complicated drawings where moving points is both difficult and time consuming
- Special situations where you want the stitch directions to be weird
Manual addition of rungs
- Make sure the existing satin column path (with the two subpaths) is selected with the Node Editor tool.
- Press
Por select the Pencil Tool. - Hold
Shift. - Click once at the start of the rung.
-
Click a second time at the end of the rung.
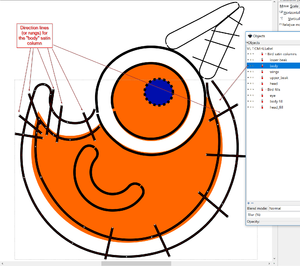
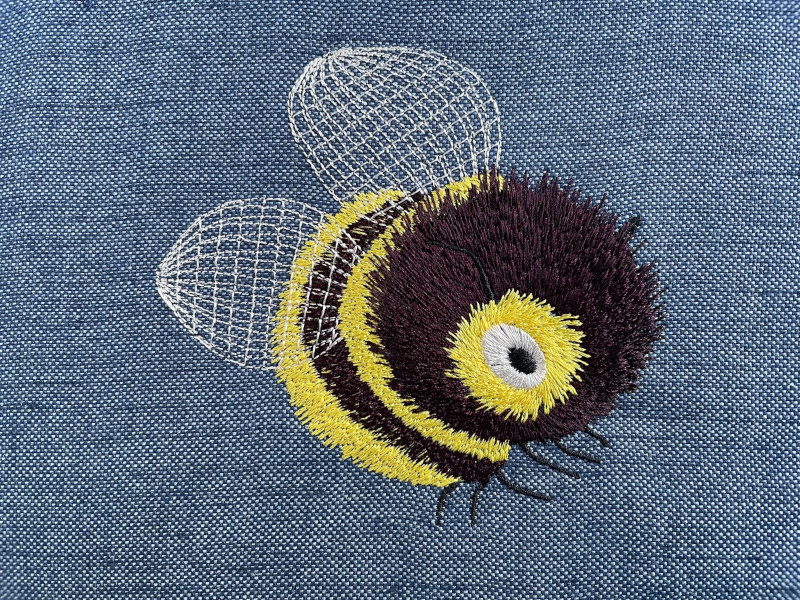
Original design by Liv Iko edited by EDUTECH Wiki

Info: We strongly recommend to use at least three rungs. If you use exactly two rungs (and two rails) it is hard for Ink/stitch to decide which is which.
Start and end position
Satin columns automatically start at the nearest point to the previous element and end at the nearest point to the next element.
To disable this behavior open the params dialog and disable one or both of the start/end at nearest point options.
Alternatively add a start or end point manually by attaching a command to the satin column.
Parameters
Running Extensions > Ink/Stitch > Params will give you the possibility to fine-tune your satin column and to use underlay.
Satin Column supports three kinds of underlay, of which you can use any or all simultaneously.
Read also this excellent article on satin column design.
Asymmetrical parameter
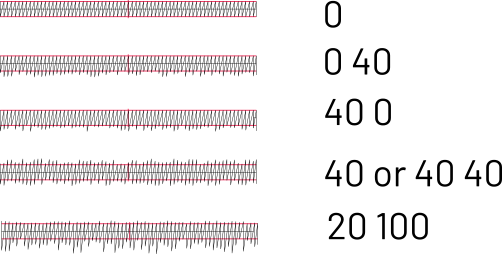
Some satin column parameters are asymmetrical, meaning that different values can be applied to the two rails.
For example, the “Random percentage of satin width increase” is an asymmetrical parameter. If a single value is entered, it applies to both rails; if two values are entered separated by a space, the first applies to the first rail, and the second applies to the second rail.
Some of these params are not part of the recent release.
Satin Top Layer
Some parameters will be part of an upcoming Ink/Stitch release. It is not yet integrated in Ink/Stitch.
Custom satin column
Must be enabled for these settings to take effect.
Method
Select Satin Column
Maximum stitch length
Stitches wider than this will be split up (split stitches).
Minimum stitch length
Stitches smaller than this value will be removed.
Overwrites the global minimum stitch length setting.
Split Method

Split stitches apply, when a maximum stitch length is set and the stitch length exceeds this value. Options:
- default
- Simple
- Staggered
Random Jitter for split stitches
Randomizes split stitch length if random phase is enabled, stitch position if disabled.
Random Phase for split stitches
Controls whether split stitches are centered or with a random phase (which may increase stitch count).
Stagger this many times before repeating
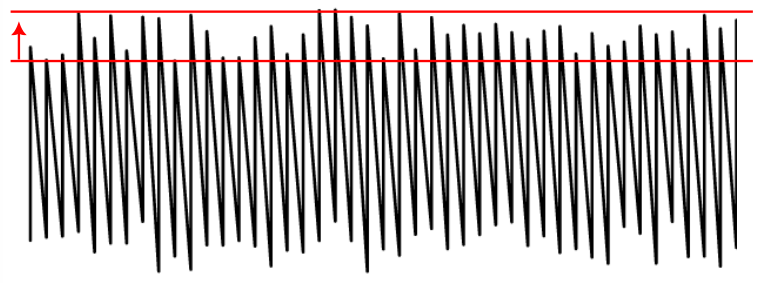
Stitches are staggered so that neighboring rows of stitches don’t all fall in the same column (which would create a distracting valley effect).
Setting this dictates the length of the cycle by which successive stitch rows are staggered.
Fractional values are allowed and can have less visible diagonals than integer values.
Active only when split method is staggered
Minimum length for random-phase split
Defaults to maximum stitch length. Smaller values allow for a transition between single-stitch and split-stitch.
Short stitch distance
Shortens stitchen when the distance between consecutive stitches is smaller than this value (mm).
Short stitch inset

Stitches in areas with high density will be inset by this amount (%)
Short stitch inset can take multiple values separated by a space.
When multiple values are set, the satin column will use these to level consecutive short stitches
Pull compensation (%)
Additional pull compensation which varies as a percentage of stitch width. Two values separated by a space may be used for an asymetric effect.
Pull compensation (mm)
Satin stitches pull the fabric together, resulting in a column narrower than you draw in Inkscape.
This setting expands each pair of needle penetrations outward from the center of the satin column by a fixed length.
Two values separated by a space may be used for an asymetric effect.
Negative values lead to the opposite effect.
Push compensation
Satin stitches push out to the ends, which results into a longer columns than drawn in Inkscape.
This settings shortens the column by the given amound (mm) at start and/or end.
Two values separated by a space may be used for an asymetric effect.
Negative values lead to the opposite effect.
Random percentage of satin width increase
Lengthen stitch across rails at most this percent. Two values separated by a space may be used for an asymetric effect.
Random percentage of satin width decrease
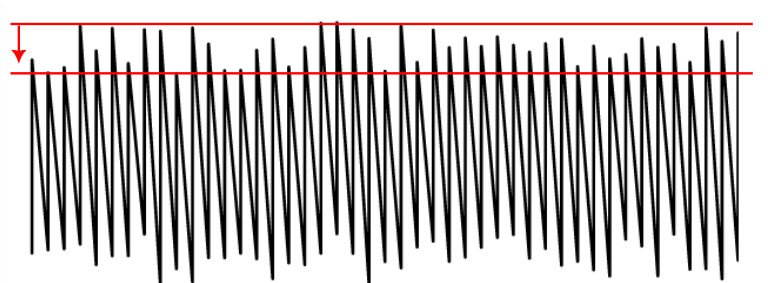
Shorten stitch across rails at most this percent. Two values separated by a space may be used for an aysmmetric effect.
Zig-zag spacing (peak-to-peak)
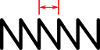
The peak-to-peak distance between zig-zags
Random zig-zag spacing percentage
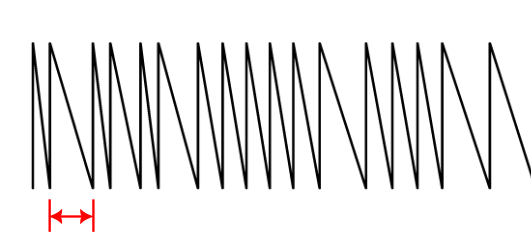
Amount of random jitter added to zigzag spacing
Stitch length
Stitch length (in mm) of the underpaths from section to section
Running stitch tolerance
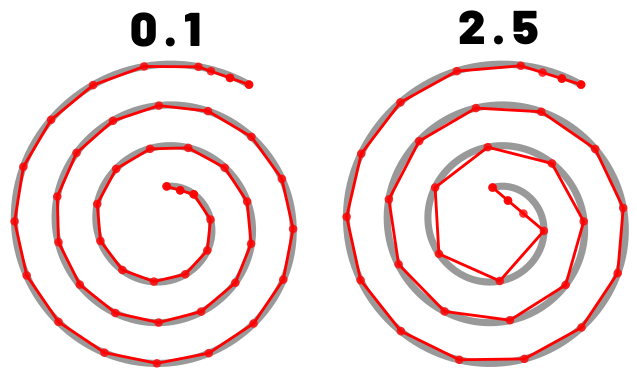
Determines the acceptable distance from the path. A lower tolerance will bring the stitches closer together. A higher tolerance allows for stitches to be farther away from the path. A higher tolerance may mean sharp corners may be rounded.
Running stitch position
Position of underpath from between the rails. 0% is along the first rail, 50% is centered, 100% is along the second rail.
Random seed
Change the result of random stitches.
If empty, the seed is the element ID.
Re-roll if you are not happy with the result.
Reverse rails
Enabling this may help if your satin renders very strangely. Options are:
- Automatic: detect and fix rails with opposing directions (default)
- Don’t reverse , disable automatic detection
- Reverse first rail
- Reverse second rail
- Reverse both rails
Swap rails
Swaps the first and the second rails of a satin column. Affecting which side the thread finishes on as well as any other sided property.
Start at nearest point
Start at nearest point to the previous element. A start position command will overwrite this setting.
End at nearest point
End at nearest point to the next element. An end position command will overwrite this setting.
Minimum jump stitch length
Shorter distances to the next object will have no lock stitches.
Overwrites the global minimum jump stitch length setting.
Allow lock stitches
Enables lock stitches in only desired positions
Force lock stitches
If checked, lock stitches are sewn after this element,regardless of the minimum jump stitch length value.
Tack stitch
Determines the type of tack stitch.
Tack stitches are small stitches at the beginning of a stitch. They help to secure the beginning of the thread.
Read more
Lock stitch
Determines the type of lock stitch.
Lock stitches are small stitches at the end of stitch. They help to secure the end of the thread.
Read more
Scale tack stitch / Scale lock stitch
Some lock stitches have a scaling option in either mm or percent.
Custom path
This setting is only available for custom lock stitches.
Enter a custom mm or svg path.
The first node of an svg path will not be emboirdered, but represents the first (tack) or last (lock) stitch of the element.
Read more
Trim After
Determines if the thread is trimmed after sewing this object.
Stop After
Determines if the machine is stopped after sewing this object. Before stopping it will jump to the stop position (frame out) if defined.
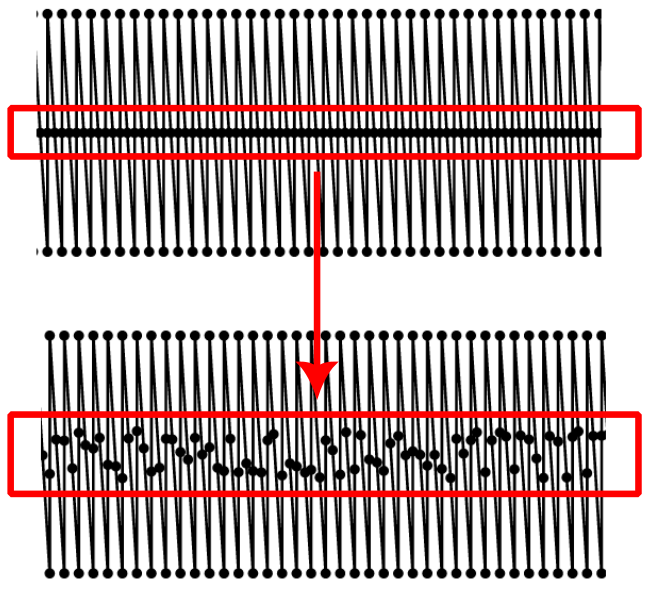
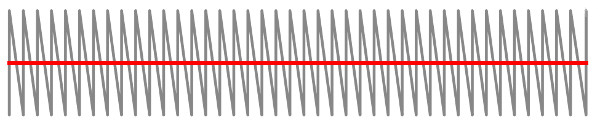
Center-Walk Underlay
This is a row of running stitch down the center of the column and back. This may be all you need for thin satin columns. You can also use it as a base for more elaborate underlay.
Repeats
Defines how many times to stitch along the path
- Odd number: stitches will end at the end of the path
- Even number: stitching will return to the start of the path
Odd numbers of repeats will reverse the stitch direction of the satin column, causing it to start and end at the same position.
Running stitch tolerance
Determines the acceptable distance from the path. A lower tolerance will bring the stitches closer together. A higher tolerance allows for stitches to be farther away from the path. A higher tolerance may mean sharp corners may be rounded.
Stitch length
Stitch length (in mm)
Running stitch position
Position of underpath from between the rails. 0% is along the first rail, 50% is centered, 100% is along the second rail.
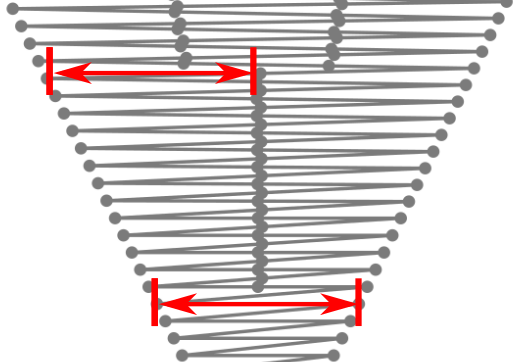
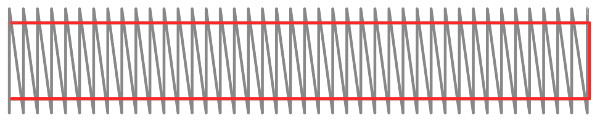
Contour Underlay
This is a row of running stitch up one side of the column and back down the other. The rows are set in from the edge of the column by an amount you specify. For small or medium width satin, this may serve well enough by itself.
Running stitch tolerance
Determines the acceptable distance from the path. A lower tolerance will bring the stitches closer together. A higher tolerance allows for stitches to be farther away from the path. A higher tolerance may mean sharp corners may be rounded.
Stitch length
Stitch length (in mm)
Inset distance (fixed)
Shrink the outline by a fixed length, to prevent the underlay from showing around the outside of the satin column.
Negative values are possible.
It is possible to enter two space separated values to define different values for each side
Inset distance (proportional)
Shrink the outline by a proportion of the column width, to prevent the underlay from showing around the outside of the satin column.
Negative values are possible.
It is possible to enter two space separated values to define different values for each side
Zig-Zag Underlay
This is essentially a lower-density satin column sewn to the end of the column and back to the start. Added with contour underlay, you get the “German Underlay” mentioned in this article. For wide columns or challenging fabrics, you can use all three underlay types together.

Maximum stitch length
Stitches wider than this will be split up (split stitches).
Inset distance (fixed)
Shrink the outline by a fixed length, to prevent the underlay from showing around the outside of the satin column.
Negative values are possible.
It is possible to enter two space separated values to define different values for each side
Inset distance (proportional)
Shrink the outline by a proportion of the column width, to prevent the underlay from showing around the outside of the satin column.
Negative values are possible.
It is possible to enter two space separated values to define different values for each side
Zig-zag spacing (peak-to-peak)
The peak-to-peak distance between zig-zags
Satin Tools
Make sure to have a look at the Satin Tools. They will make your life with Satin Columns a lot easier.
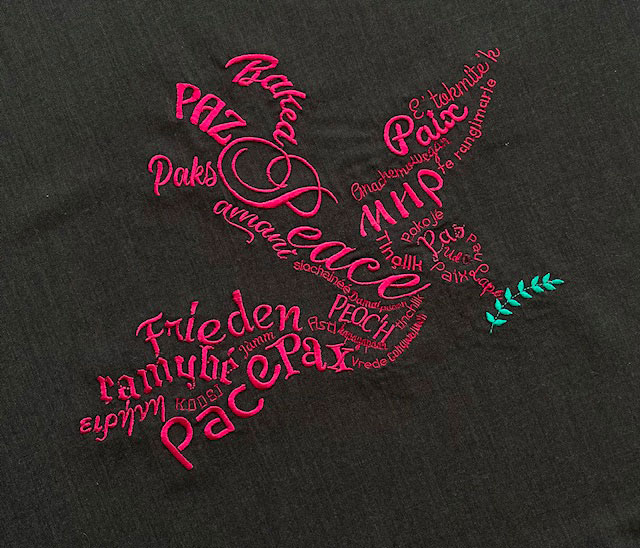
Sample Files Including Satin Column

Applique
Applique example file

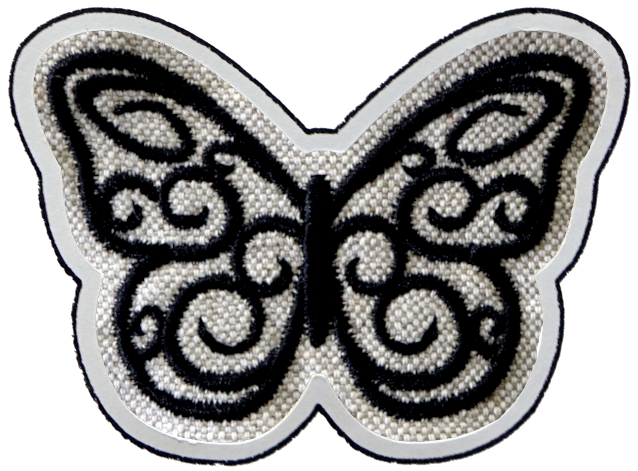
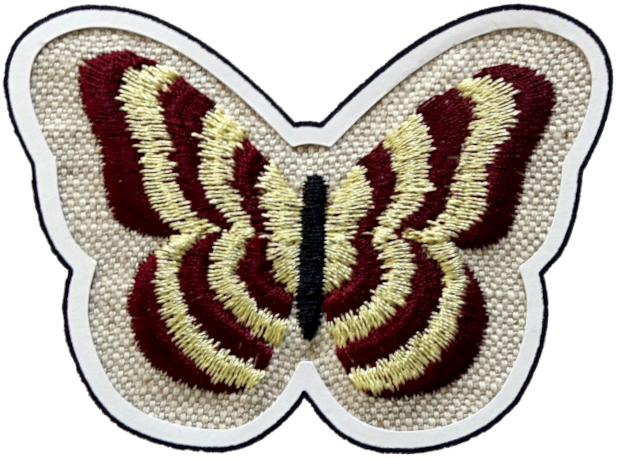
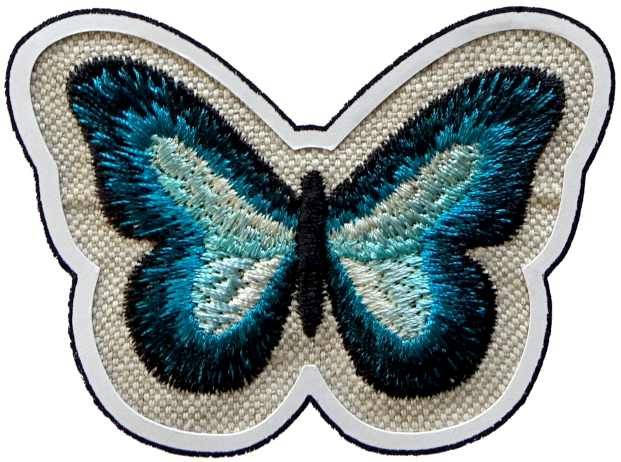
Free Standing Lace - Butterfly
Free Standing Lace - Butterfly

Fringe
Fringe example file
Ink/Stitch Logo & Branding Guide
Ink/Stitch logo as SVG file, digitized version and branding guide.

Monogram Frame
Monogram Frame Example
Multicolor Satin
Simulating multicolor satin collumns

Puff
Puff example file
Random Satin
Random Satin
Satin Stitch Edges
Sample file for satin stitch edges

Software Freedom Day
Software Freedom Day example file
Using distort path effects
Using distort paths effects