Stitch patterns
Patterns are created by special stitch positioning.
Generate Patterns
In Ink/Stitch you can generate patterns by either adding stitches or removing stitches from any existing embroidery element.
-
Create embroidery element(s). This can be either a satin column or fill area. Patterns will also work on strokes, but they may not be the best target for patterns.
-
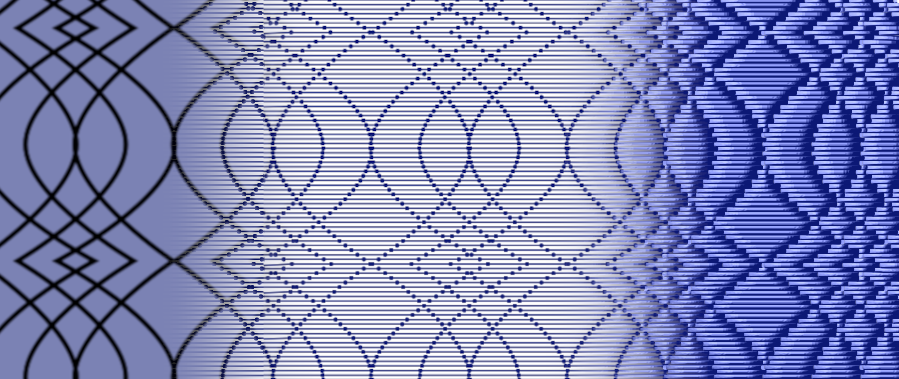
Create pattern path(s). A pattern consists of strokes or fill areas (or both at the same time). Strokes will be used to add stitches, while patterns with a fill will remove stitches from the embroidery element.
-
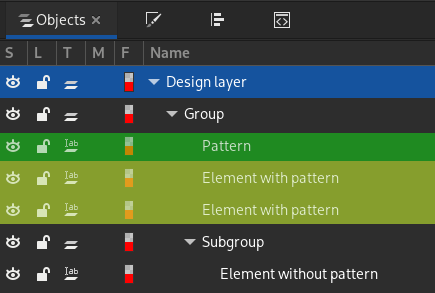
Select both, the embroidery element and the pattern and hit
Ctrl+Gto group them together. -
Convert to pattern.
Select only the pattern and run Extensions > Ink/Stitch > Edit > Selection to pattern.
This will add a start marker to the pattern element to indicate, that it will not be embroidered but will be used as a pattern for all elements in the same group.
Elements in subgroups of the very same group will not be affected.
This feature will be part of an upcoming Ink/Stitch release. It is not yet integrated in Ink/Stitch.
Interval: An interval can be set for patterns with a stroke color. This value determines at which pattern the addition of nodes at path intersections should be skipped. Multiple values are separated by spaces.
Offset: Patterns with a stroke color only begin after this number of path intersections.
Remove Pattern Marker
Remove the pattern marker by running Extensions > Ink/Stitch > Edit > Selection to Pattern, select the Remove pattern marker option.
Manual pattern marker removal
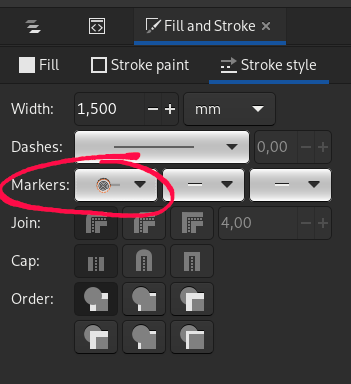
The pattern marker can be removed in the fill and stroke panel (Ctrl+Shift+F). Open the Stroke style tab and set the first dropdown list in “Markers” to the very first (empty) option.
