Tatami Stitch (Fill Stitch)
Description
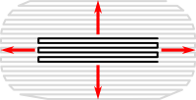
Fill stitch is used to fill big areas with a color by moving back and forth in rows.
Creation
To use a Tatami-Fill, create a closed path with a fill color. Shapes are allowed to have holes.
Tip: If you are having trouble filling your area, run the “fill repair tool (break apart)” on them. This will solve most of your issues very easily.
Set Start and End Point
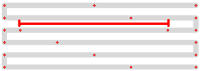
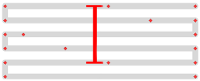
A fill starts as close as possible to the previous embroidery element and ends as close as possible to the next embroidery element by default.
Change this behavior by setting start and end points for your fill objects with visual commands.
Parameters
Top Layer
Run Extensions > Ink/Stitch > Params to tweak the settings to your needs.
Fill stitching
Enables or disables fill stitches for the selected object(s)
Fill method
Select Tatami
Maximum fill stitch length
The length of each stitch in a row. “Max” is because a shorter stitch may be used at the start or end of a row.
Randomize stitch length
Allows for randomize stitch length.
Random stitch length jitter
Only available if Randomize stitch length is selected. Determines the variation in the length of each stitch.
Minimum stitch length
Stitches smaller than this value will be removed.
Overwrites the global minimum stitch length setting.
Angle of lines of stitches

The angle of the rows of stitches, in degrees.
0 is horizontal, and the angle increases in a counter-clockwise direction.
Negative angles are allowed.
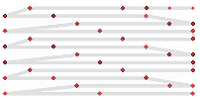
Stagger rows this many times before repeating
Stitches are staggered so that neighboring rows of stitches don’t all fall in the same column (which would create a distracting valley effect).
Setting this dictates the length of the cycle by which successive stitch rows are staggered.
Fractional values are allowed and can have less visible diagonals than integer values.
Gap Filling

Add extra rows to compensate for gaps between sections caused by distortion.Rows are always added in pairs, so this number will be rounded up to the nearest multiple of 2.
Pull compensation
Fill stitch can pull the fabric together, resulting in a shape narrower than you draw in Inkscape. This setting expands each row of stitches outward from the center of the row by a fixed length. Two values separated by a space may be used for an asymmetric effect.
Pull compensation percent
Additional pull compensation which varies as a percentage of row width. Two values separated by a space may be used for an asymmetric effect.
Expand
Expand the shape before fill stitching, to compensate for gaps between shapes.
Spacing between rows

Distance between rows of stitches
End row spacing
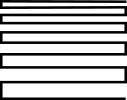
If set, increases or decreases the row spacing towards the end
Skip last stitch in each row
The last stitch in each row is quite close to the first stitch in the next row. Skipping it decreases stitch count and density.
Stitch length
Stitch length (in mm) of the underpaths from section to section
Running stitch tolerance
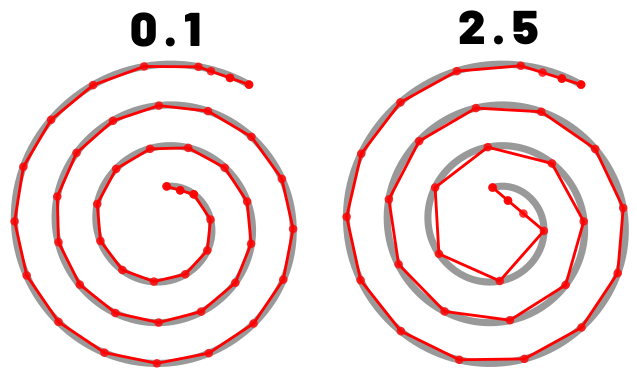
Determines the acceptable distance from the path. A lower tolerance will bring the stitches closer together. A higher tolerance allows for stitches to be farther away from the path. A higher tolerance may mean sharp corners may be rounded.
Underpath

Must be enabled to let running stitches travel inside shape instead of around the border when moving from section to section
Random seed
Change the result of random stitches.
If empty, the seed is the element ID.
Re-roll if you are not happy with the result.
Minimum jump stitch length
Shorter distances to the next object will have no lock stitches.
Overwrites the global minimum jump stitch length setting.
Allow lock stitches
Enables lock stitches in only desired positions
Force lock stitches
If checked, lock stitches are sewn after this element,regardless of the minimum jump stitch length value.
Tack stitch
Determines the type of tack stitch.
Tack stitches are small stitches at the beginning of a stitch. They help to secure the beginning of the thread.
Read more
Lock stitch
Determines the type of lock stitch.
Lock stitches are small stitches at the end of stitch. They help to secure the end of the thread.
Read more
Scale tack stitch / Scale lock stitch
Some lock stitches have a scaling option in either mm or percent.
Custom path
This setting is only available for custom lock stitches.
Enter a custom mm or svg path.
The first node of an svg path will not be emboirdered, but represents the first (tack) or last (lock) stitch of the element.
Read more
Trim After
Determines if the thread is trimmed after sewing this object.
Stop After
Determines if the machine is stopped after sewing this object. Before stopping it will jump to the stop position (frame out) if defined.
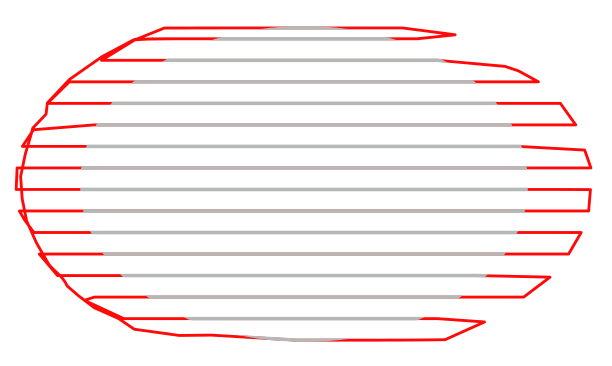
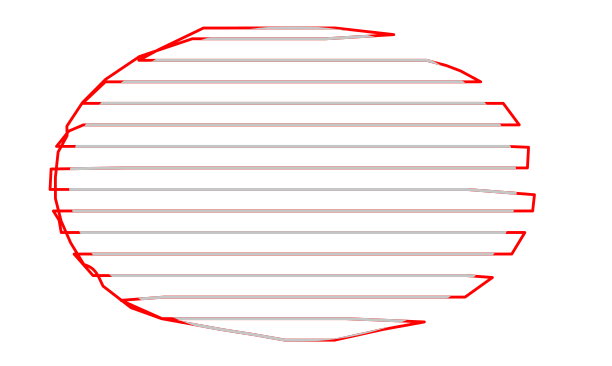
Underlay
If only one layer of fill stitches is used, it usually doesn’t look good. The individual stitches tend to sink into the fabric (even if it’s thin), and the filling appears rather sparse. The fabric can even bulge out between the rows.
To solve this, you need underlay. This is an initial layer of stitches that hold up the final stitches. Underlay for fill stitch usually comprises of fill stitching 90 degrees offset from the final fill (called “top stitching”). The row spacing should be much wider than in the top stitching. The goal is to flatten out the fabric and give the top stitches “rails” to sit on.
Underlay is enabled in Ink/Stitch by default. In some rare cases (e.g. a fill layer with big row spacing) you will want to disable it. Uncheck the checkbox “Underlay” in the Fill Underlay tab in your params dialogue window. Other cases will require multiple underlay. To enable, enter a space separated list of fill angles and it will result into multiple underlay layers.
Underlay
Must be enabled for these settings to take effect.
Maximum fill stitch length
The length of each stitch in a row. “Max” is because a shorter stitch may be used at the start or end of a row.
Angle of lines of stitches
The angle of the rows of stitches, in degrees.
0 is horizontal, and the angle increases in a counter-clockwise direction.
Negative angles are allowed.
Inset
Inset to cover the underlay entirely by the top layer. Negative values are possible (usefull for “knockdown” stitches).
Spacing between rows
Distance between rows of stitches
Skip last stitch in each row
The last stitch in each row is quite close to the first stitch in the next row. Skipping it decreases stitch count and density.
Underpath
Must be enabled to let running stitches travel inside shape instead of around the border when moving from section to section
Sample Files Including Fill Stitches

Applique
Applique example file
Color Blending
Color Blending Methods

Free Standing Lace - Butterfly
Free Standing Lace - Butterfly

Fringe
Fringe example file
Ink/Stitch Logo & Branding Guide
Ink/Stitch logo as SVG file, digitized version and branding guide.
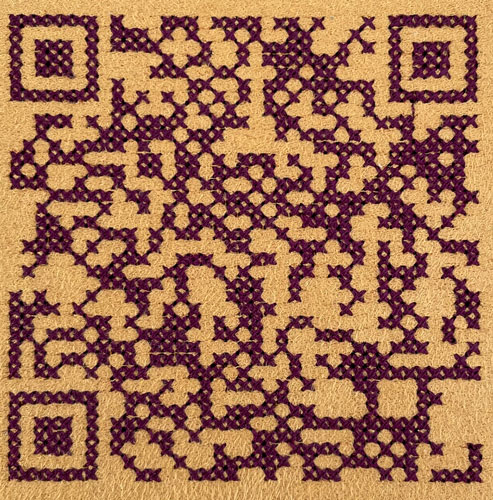
QR code
Create a cross Stitch QR Code

Software Freedom Day
Software Freedom Day example file
Legacy Fill
Legacy Fill is the old manual mode before tatami routing was implemented.
In legacy fill, the extension will still break up the shape into sections, each of which can be embroidered in one go. Then these sections will be fill-stitched one at a time, jumping directly between sections.
You’ll almost certainly want to break your shape up into smaller shapes and connect them using running stitches. It’s a painstaking process, made more so because you’ll need to do it twice: once for the underlay and again for the top stitching.
Run Extensions > Ink/Stitch > Params to alter stitch details.
Some parameters will be part of an upcoming Ink/Stitch release. It is not yet integrated in Ink/Stitch.
Fill stitching
Enables or disables fill stitches for the selected object(s)
Fill method
Select Cross stitch
Maximum fill stitch length
The length of each stitch in a row. “Max” is because a shorter stitch may be used at the start or end of a row.
Minimum stitch length
Stitches smaller than this value will be removed.
Overwrites the global minimum stitch length setting.
Angle of lines of stitches
The angle of the rows of stitches, in degrees.
0 is horizontal, and the angle increases in a counter-clockwise direction.
Negative angles are allowed.
Stagger rows this many times before repeating
Stitches are staggered so that neighboring rows of stitches don’t all fall in the same column (which would create a distracting valley effect).
Setting this dictates the length of the cycle by which successive stitch rows are staggered.
Fractional values are allowed and can have less visible diagonals than integer values.
Expand
Expand the shape before fill stitching, to compensate for gaps between shapes.
Spacing between rows
Distance between rows of stitches
End row spacing
If set, increases or decreases the row spacing towards the end
Skip last stitch in each row
The last stitch in each row is quite close to the first stitch in the next row. Skipping it decreases stitch count and density.
Flip fill
The flip option can help you with routing your stitch path. When you enable flip, stitching goes from right-to-left instead of left-to-right. Using flip and rotating 180 additional degrees (by adding or subtracting 180 from angle), you can cause fill stitching for a given shape to start from any of the four possible corners.
Reverse fill
Reverses fill path
Minimum jump stitch length
Shorter distances to the next object will have no lock stitches.
Overwrites the global minimum jump stitch length setting.
Allow lock stitches
Enables lock stitches in only desired positions
Force lock stitches
If checked, lock stitches are sewn after this element,regardless of the minimum jump stitch length value.
Tack stitch
Determines the type of tack stitch.
Tack stitches are small stitches at the beginning of a stitch. They help to secure the beginning of the thread.
Read more
Lock stitch
Determines the type of lock stitch.
Lock stitches are small stitches at the end of stitch. They help to secure the end of the thread.
Read more
Scale tack stitch / Scale lock stitch
Some lock stitches have a scaling option in either mm or percent.
Custom path
This setting is only available for custom lock stitches.
Enter a custom mm or svg path.
The first node of an svg path will not be emboirdered, but represents the first (tack) or last (lock) stitch of the element.
Read more
Trim After
Determines if the thread is trimmed after sewing this object.
Stop After
Determines if the machine is stopped after sewing this object. Before stopping it will jump to the stop position (frame out) if defined.