Workflow

 Step 1: Prepare a Vector Image
Start with a design you want to turn into an embroidery file. This can be a new drawing created from scratch or an existing image. The design needs to be in vector format (SVG) so it can be edited in Inkscape and prepared for use with Ink StItch.
Make a New Vector Image in Inkscape
Create Paths
Inkscape provides several tools for creating vector images. You can draw shapes, use the Bezier tool to create custom paths, add text, or import artwork and convert it into editable vector objects. These tools let you build or refine a design before preparing it for embroidery with Ink/Stitch.
 Freehand lines (
P ) Bezier curves (
B )
Explore the other tools in the toolbar as well. For example, you can use predefined shape tools such as rectangles, circles, stars, and polygons to build clean and consistent elements in your design. These shapes can later be adjusted, combined, and converted to paths for embroidery preparation.
 Rectangle
 Circle
 Star/Polygon
 Spiral
Edit Paths
Edit objects and paths with:
 Select tool (
S ) and Node editor tool (
N )
Use the Select tool to scale, rotate, and move objects as a whole. Switch to the Node tool to edit individual nodes and adjust path shapes with greater precision.
You can also apply path effects by selecting Path > Path Effects. Path effects offer additional ways to modify and refine vector shapes without permanently changing the original path.
Use an Existing Picture or Graphic
When you base a design on an existing picture or graphic, import it into Inkscape on a separate layer. Working this way keeps the source image available for reference while you build vector shapes on top of it.
Some graphics work well with Inkscape auto-tracing feature You can access this feature from Path > Trace Bitmap or by using Shift+Alt+B. Results often improve if you simplify the image first in a raster editor such as GIMP before tracing.
After tracing, refine the vector shapes. Use Path > Simplify or Ctrl+L to reduce unnecessary complexity and remove extra nodes manually when possible. Aim for a clean design that uses a small number of Bezier curves while still representing the original image accurately.
Auto tracing often creates tiny or fragmented objects that do not work well for embroidery. To address this, clean up the document by selecting Extensions > Ink/Stitch > Troubleshoot > Cleanup document. This step helps remove problematic elements before moving on to stitch settings.
When you need to trace an image manually, use the Freehand drawing tool to draw the paths. This tool creates paths with many Bezier nodes, which can make the design harder to manage.
After drawing, simplify the curves to reduce complexity. Fewer nodes lead to cleaner paths and better results when preparing the design for embroidery.
Tip: Using an existing SVG image can save time. Try searching for images with the file type or filter set to SVG, then adapt the vector artwork for your embroidery design.
A Note About Text
When working with text, choose the font with care. Narrow satin stitches (1 mm wide or less) often produce poor results, so font weight plays a large role in readability. Sans serif fonts are usually easier to work with and produce more consistent stitching.
For text smaller than 4 mm in height, lowercase letters can be difficult to stitch cleanly. In these cases, block capitals tend to work better. Cursive or script fonts can produce attractive results, though they require more adjustment and testing than simpler font styles.
Ink/Stitch includes ready to use embroidery fonts. You can insert these fonts into your document by selecting Extensions > Ink/Stitch > Lettering. This tool creates text objects that are already optimized for embroidery workflows.
 Step 2: Convert to Embroidery Vectors and Parametrize
At this stage, you should have a vector graphic version of your design. The next step is to convert those vector objects into formats that Ink/Stitch can interpret and prepare for embroidery.
Use the Layers and Object Panel
At this stage, using layers and groups helps keep the design organized and easier to manage as it becomes more complex.
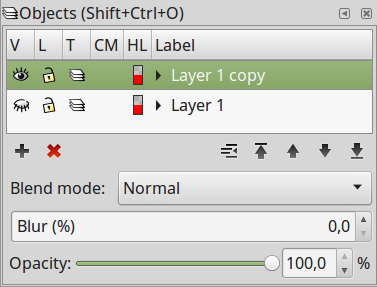
You can manage layers, groups, and individual objects in the Objects panel. Open it with Ctrl+Shift+O. This panel gives you visibility into the document structure and lets you control how elements are arranged and edited.
You can preserve the original image by duplicating its layer:
- Right click the layer. If it has not been renamed, it appears as
Layer 1 - Select Duplicate
- Click the eye icon to hide the original layer
This hides the source image while keeping it available for reference. Ink Stitch ignores layers, groups, and vector objects that are set to invisible.
Use Groups
Use groups to organize related objects in your design:
- Select objects with your mouse
- Add or remove objects by holding Shift while clicking
- Press Ctrl+G to group the selected objects
To ungroup objects:
- Select one or more groups
- Press Ctrl+Shift+G
A Note about Stitch Types
Ink/Stitch supports several stitch types. The three primary categories are available:
-
Fill stitches
These stitches fill a closed shape. They are used for larger areas and create a textured surface and provide coverage while maintaining flexibility in the fabric. -
Stroke stitches
These stitches follow the direction of a path. They are used for outlines, fine lines, and decorative accents where a narrow stitched line works better than a filled shape. -
Satin stitches These stitches cover narrow shapes with smooth, parallel stitches. They run back and forth across a shape, creating a glossy, raised appearance that works well for borders, lettering, and fine details.
You configure stitch behavior through Object > Fill and Stroke or by pressing Ctrl+Shift+F. Review the table below and follow the links to learn how to set up each stitch type correctly.
| Path Object | Stitch Type |
|---|---|
| (Dashed) stroke | running stitch, manual stitch, zig-zag stitch, bean stitch |
| Two combined strokes (with optional rungs) or a single stroke with width larger than 0.3mm | satin column, e-stitch |
| Closed path with a fill color | fill stitch, guided fill, contour fill, meander fill, circular fill, cross stitch fill |
Set Stitch Parameters
The Extensions > Ink/Stitch > Params dialog controls how Ink/Stitch generates stitches for the selected objects. Parameters vary by stitch type and include values such as stitch length, density, underlay, direction, or pull compensation.
Each parameter includes a short description. A more detailed explanations are available in the Params section of this documentation. Use these references to understand how changes affect stitch quality and appearance.
When you update parameter values, Ink/Stitch shows a simulated preview. This preview helps you evaluate the result before committing changes to the design. Depending on the aize and complexity of the file, the preview may take some time to display. Adjust the values as needed until the preview reflects the outcome you want, then select Apply and close. This action stores the parameter values directly in the SVG file.
Once you have updated the parameter values, save your SVG file. If Inkscape starts to feel slow or unresponsive, close and reopen it before continuing. Restarting can improve performance during longer or more complex projects.
 Step 3: Plan Stitch Order and Attach Commands
Stitch Order
When you design for embroidery machines that do not cut thread during stitching or switch colors automatically, plan the stitch path carefully. A well planned path reduces visible jump stitches and limits color changes. When possible, avoid stitching over jump stitches, since trimming them by hand later can be time consuming and frustrating.
Stitch order also affects how fabric behaves. Each stitch pulls and shifts the material slightly, which can lead to distortion as the design builds. This can lead to your fabric bunching or pulling. Adjust stitch direction and sequence to account for this movement and apply compensation where needed. For a deeper explanation, see Push and pull compensation.
After you finish setting parameters for the design, arrange the objects in the correct stitch order. This step controls how the design stitches out on the machine.
Use the Inkscape Objects tool by selecting Objects > Objects. This panel lets you reorder objects so stitching follows a logical sequence. Adjust the order to limit color changes and reduce or hide jump stitches.
You can also use the Ink Stitch sorting feature to reorder objects based on your selection order. See Re stack objects in order of selection for details.
Ink/Stitch processes objects in the order they appear in the objects pane, starting from the bottom of the stacking order and moving upward. This order directly controls how the design stitches out on the embroidery machine. The last layer in the list will stitch first and the top layer will stitch last.
When the distance between two objects is large, Ink/Stitch automatically inserts a jump stitch to move the needle between them. Thread color is determined by the object color, so a color change from one object to the next results in a thread change command in the exported embroidery file.
Tip: Inkscape lets you change stacking order with the PageUp and PageDown keys. Newer commands, Stack Up and Stack Down, provide finer control over how objects move within the stack.
For better precision, consider binding PageUp and PageDown to these commands instead. This setup makes it easier to control stitch order when preparing a design for embroidery. See Shortcut keys for details.
Info: You can also adjust object order by editing the SVG structure directly through Inkscape XML Editor. Open it with Ctrl Shift X. The Raise and Lower buttons change the order of XML tags in the SVG file, which directly affects stitch order.
Keep in mind that the XML Editor displays objects in the reverse order compared to the Objects panel. Items shown at the top of the XML list appear lower in the stacking order within the document.
Commands
Commands can also help optimize the stitch path. These tools let you define start and end points, move the hoop to specific positions, and add trim or cut instructions. Using commands gives you finer control over how the design stitches out on the machine. They let you define start and end points, control trims, jumps, stops, and color changes, and move the hoop to specific positions. Using commands helps reduce visible travel stitches, limit manual trimming, and improve overall stitch flow on the embroidery machine.
 Step 4: Visualize your design
Ink/Stitch provides three ways to preview your design before exporting:
-
Simulator
Shows how the design stitches out step by stepe. -
Print Preview
Creates a printable overview of the design, useful for planning colors, size, and placement. -
Stitch Plan Preview
Displays the stitch order and paths directly in the document. You can undo this view with Ctrl+Z.
 Step 5: Save the Embroidery File
After you place objects in the correct stitch order, export the design to a machine compatible format. Select File > Save a copy and choose a format supported by your embroidery machine. Many machines support DST, while some Brother models work better with PES. See Import and export for format details.
Also save the design in SVG format. Keeping the SVG file allows you to reopen the project in Inkscape and adjust settings, stitch order, or design details later.
 Step 6: Sew a Test Run
Testing helps reveal opportunities for improvement. Prepare a test fabric that closely matches the final material. Use the same stabilizer and the same fabric type. For t-shirts, choose a similar knit fabric, since knits require substantial stabilization.
Stitch the design while observing the machine. Look for gaps that suggest fabric distortion. Also check for areas where stitches are packed too tightly and the machine struggles to sew. These signs usually indicate stitch density set too high and signal that adjustments are needed before final production.
 Step 7+: Optimize
After the test run, return to the design and adjust settings as needed. It often takes several iterations to achieve the desired result, and small refinements can significantly improve stitch quality and appearance.