Ripple Stitch
Description
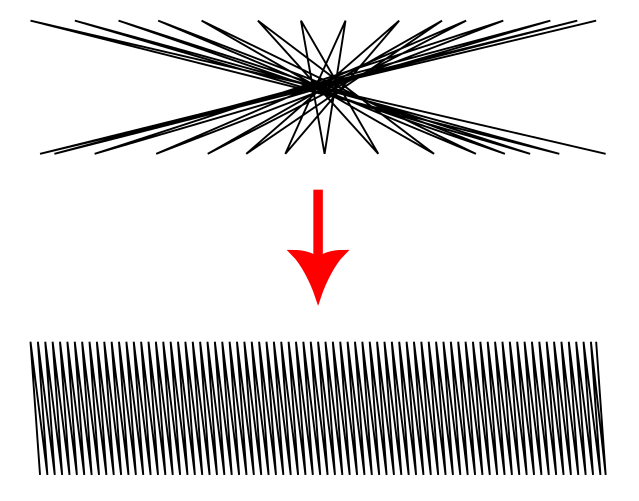
Ripple stitch is part running stitch and part fill. It behaves like a running stitch, in that it follows a path/stroke. It also behaves like a fill, in that it spreads outward from the line to cover or fill an area. It creates soft bands that resemble ripples, hence the name.
Closed shapes will be filled with a spiral (circular ripples). Open shapes will be stitched back and forth (linear ripples).
Creation
Circular Ripples
- Create one closed path and apply a stroke color.
- Keep it as a single path only. Avoid combined paths like shapes with holes.
- Optional: Create target point or guides.
- Open the Params dialog: Extensions, Ink/Stitch, then Params.
- Set Method to Ripple.
- Adjust the Ripple settings as you wish.
- Click Apply.

Linear Ripples
Linear ripples can be created in various ways. It can be a simple curve or it can be constructed like a satin column.
- Create a open shape (simple stroke, two combined strokes or even a satin column)
- Create target point or guides (optional)
- Open params dialog (
Extensions > Ink/Stitch > Params) and set themethodtoRipple. - Set params to your liking and apply

Looping ripples
Loops are allowed and welcomed in any ripple path. Use loops to achieve special nice effects.

Guiding ripples
Ripples with only one subpath (closed shape or a simple bezier curve) can be guided in either of the three following methods.
Target point
Define a ripple target position with visual command:
- Open
Extensions > Ink/Stitch > Commands > Attach Commands to selected objects ... - Select
Target positionand apply - Select the symbol and move it to the desired position
If no guiding information is provided, the center of the path is used as the target.
Guide line
- In the very same group (no subgroup) of the ripple stitch object create a stroke curve with the bezier tool, starting close to the ripple curve, leading away from it.
- Select that curve and run
Extensions > Ink/Stitch > Edit > Selection to guide line. - Select the ripple curve and run params. Adapt the parameters to your liking.
Satin guide
With satin guides you will have the ability to lead the ripples precisely using the satin rung method. The width of the satin guide will also have an effect on the ripple width. The positioning of the original ripple shape will be ignored and it will start where the satin begins.
- In the very same group of the ripple stitch object create a satin column like object with rails and rungs.
- Select the newly created object and run
Extensions > Ink/Stitch > Edit > Selection to guide line. - Select the ripple object and run params. Adapt parameters to your liking.
The pattern for satin guided ripples can be adjusted in its direction with the help of a so-called anchor line.
- Draw a line from top to bottom across the pattern. The positioning corresponds to the satin rungs.
- Select the line and mark it as an anchor line via
Extensions > Ink/Stitch > Edit > Selection to anchor line.

Clipping
This feature will be part of an upcoming Ink/Stitch release. It is not yet integrated in Ink/Stitch.
Ripple stitches can be clipped to form the outline.
- Create the ripple stitch
- Create the clip shape (must be on top of the ripple stitch)
- Select both and run
Object > Clip > Set clip
Parameters
Some parameters will be part of an upcoming Ink/Stitch release. It is not yet integrated in Ink/Stitch.
Running stitch along paths
Must be selected to use these settings.
Method
Determines which stitch type to use.
Select Ripple stitch
Repeats
Defines how many times to stitch along the path
- Odd number: stitches will end at the end of the path
- Even number: stitching will return to the start of the path
Bean stitch number of repeats
Determines the number of times to repeat each stitch.
- A value of
0does not repeat the stitch (normal stitch) - A value of
1repeats each stitch three times (forward, back, forward). - A value of
2repeats the stitch six times. - By entering multiple numbers, it is possible to define a custom repeat pattern. For instance
0 1will create alternating single and triple stitches (≡-≡-≡).
Running stitch length
Determines the length of stitches (mm). By entering multiple values, it is possible to define a custom stitch length pattern.
For instance 2 4 will create stitches of length alternatively 2 and 4 mm.
Running stitch tolerance
Determines the acceptable distance from the path. A lower tolerance will bring the stitches closer together. A higher tolerance allows for stitches to be farther away from the path. A higher tolerance may mean sharp corners may be rounded.
Randomize stitch length
Allows for randomize stitch length.
Random stitch length jitter
Only available if Randomize stitch length is selected. Determines the variation in the length of each stitch.
Minimum stitch length
Stitches smaller than this value will be removed.
Overwrites the global minimum stitch length setting.
Manual stitch placement
If selected, extra stitches will not be added to the original ripple pattern and the running stich length value will be ignored.
Pattern position
Pattern position for satin guided ripples:
- Line count / Minimum line distance (default): uses either the value for line count or minium line distance (if given)
- Render at rungs renders a pattern at each rung
- Adaptive + Minimum line distance: adapts the pattern distance according to it’s size
Skip first lines
Skip last lines

Set the number of lines to skip (do not embroider) at the and/or end of the run.
Flip every second line
Linear ripple only: whether to flip the pattern every second line or not
Grid size

If the size is strictly positive a grid effect is added. The grid size controls how far apart the new lines are.
Stitch grid first
Reverse the stitch path, so that the grid is stitched first.
Scale axes
guided ripple only
Starting scale
Size of the first copy of the line in percent.
For guided ripple only
Ending scale
Size of the last copy of the line in percent.
For guided ripple only
Rotate
For guided ripple only
Join Style

for non circular ripple, how the ripples are joined : Flat(top) or Point(bottom)
Stagger rows this many times before repeating
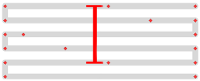
Stitches are staggered so that neighboring rows of stitches don’t all fall in the same column (which would create a distracting valley effect).
Setting this dictates the length of the cycle by which successive stitch rows are staggered.
Fractional values are allowed and can have less visible diagonals than integer values.
Number of lines

Determines the number of ripples. Increasing the number of lines will increase the density of the lines.
Minimum line distance
Sets the minimum distance between each line. Overrides the number of lines setting.
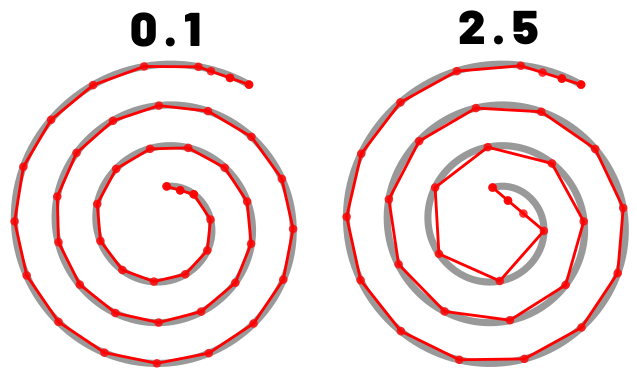
Line distance exponent

Doesn’t apply to satin guided ripples
- Default 1: constant distance between lines
- Value > 1: the space between two consecutive replications increases
- Value < 1: the space between two consecutive replications decreases
Flip exponent
Exchange role of first and last line in the computation of line distance
Random seed
Change the result of random stitches.
If empty, the seed is the element ID.
Re-roll if you are not happy with the result.
Reverse
Flip start and end point and run the path in revese direction
Reverse rails
Enabling this may help if your satin renders very strangely. Options are:
- Automatic: detect and fix rails with opposing directions (default)
- Don’t reverse , disable automatic detection
- Reverse first rail
- Reverse second rail
- Reverse both rails
Takes effect on a satin guide line.
Swap rails
Swaps the first and the second rails of a satin column. Affecting which side the thread finishes on as well as any other sided property.
Takes effect on a satin guide line.
Minimum jump stitch length
Shorter distances to the next object will have no lock stitches.
Overwrites the global minimum jump stitch length setting.
Allow lock stitches
Enables lock stitches in only desired positions
Force lock stitches
If checked, lock stitches are sewn after this element,regardless of the minimum jump stitch length value.
Tack stitch
Determines the type of tack stitch.
Tack stitches are small stitches at the beginning of a stitch. They help to secure the beginning of the thread.
Read more
Lock stitch
Determines the type of lock stitch.
Lock stitches are small stitches at the end of stitch. They help to secure the end of the thread.
Read more
Scale tack stitch / Scale lock stitch
Some lock stitches have a scaling option in either mm or percent.
Custom path
This setting is only available for custom lock stitches.
Enter a custom mm or svg path.
The first node of an svg path will not be emboirdered, but represents the first (tack) or last (lock) stitch of the element.
Read more
Trim After
Determines if the thread is trimmed after sewing this object.
Stop After
Determines if the machine is stopped after sewing this object. Before stopping it will jump to the stop position (frame out) if defined.
Sample Files Including Ripple Stitches
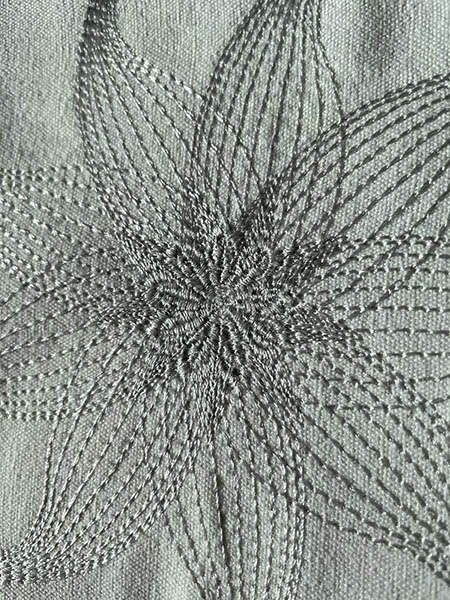
Monochrome flower, using ripple stitch and contour stitch
sample file : monochrome flower
Random Satin
Random Satin
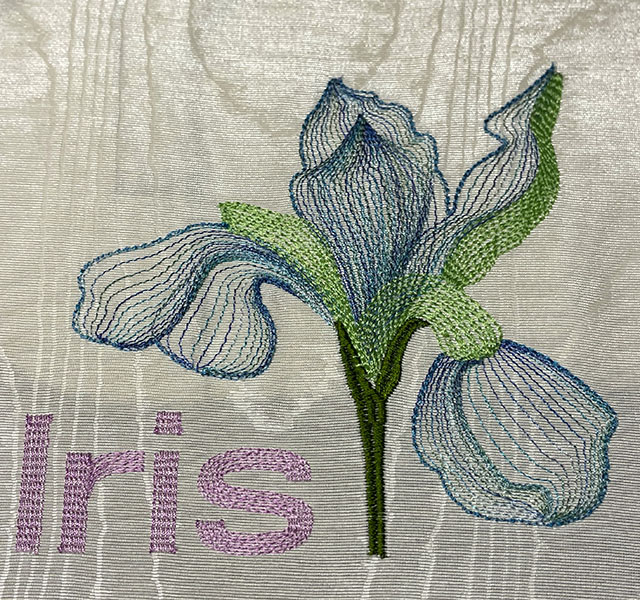
Ripple Iris
Sample file: Ripple Iris
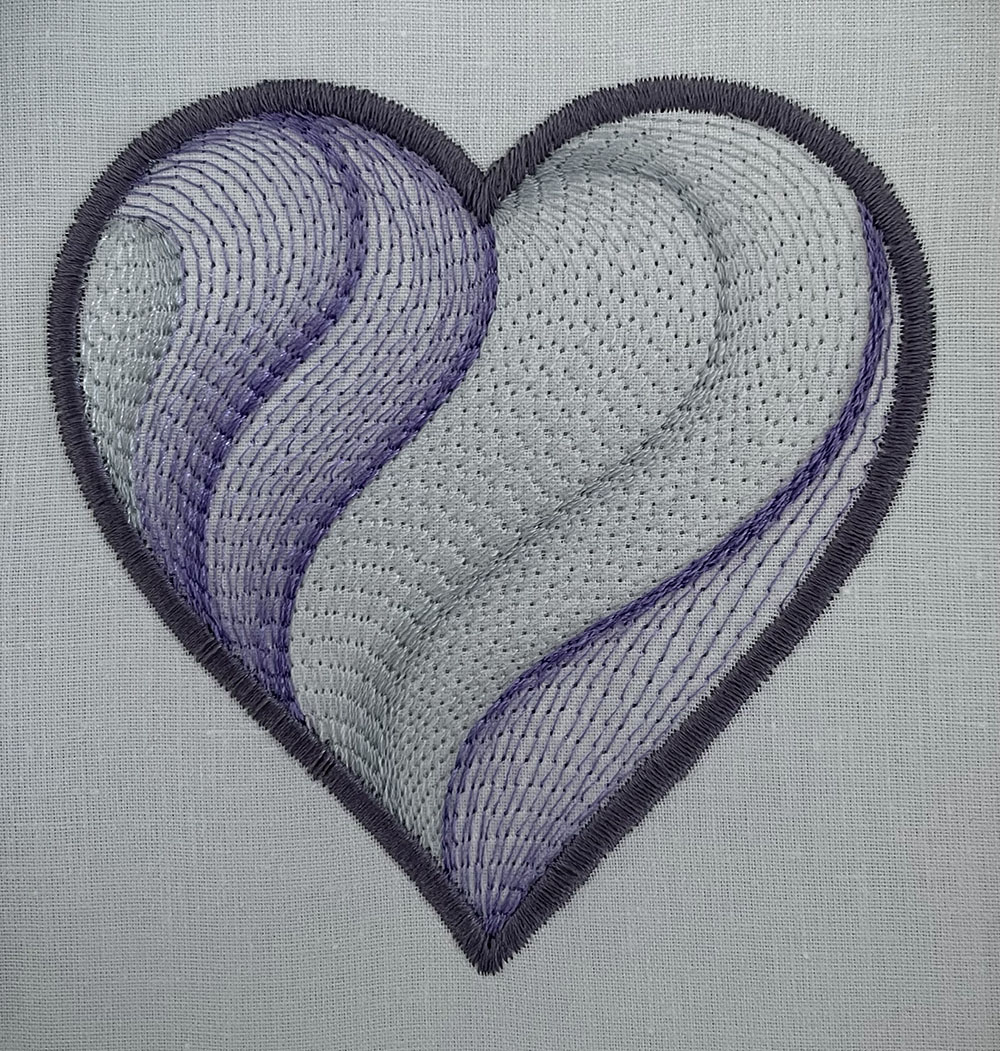
Ripple Stitch Heart
ripple stitch heart
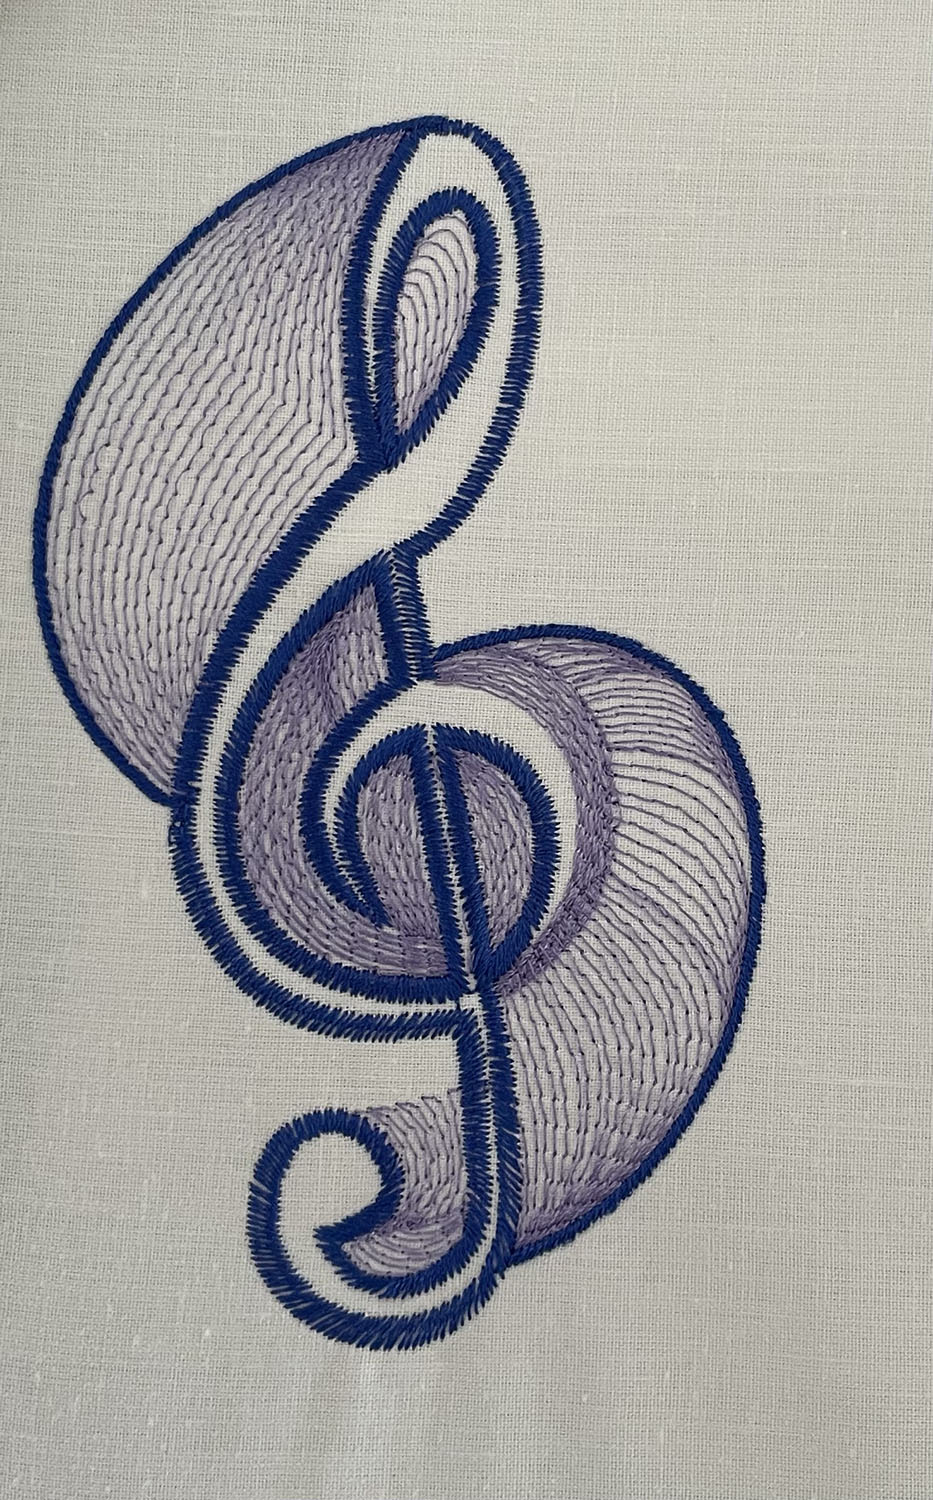
Ripple Stitches Treble Clef
sample file : ripple stitches Treble Clef
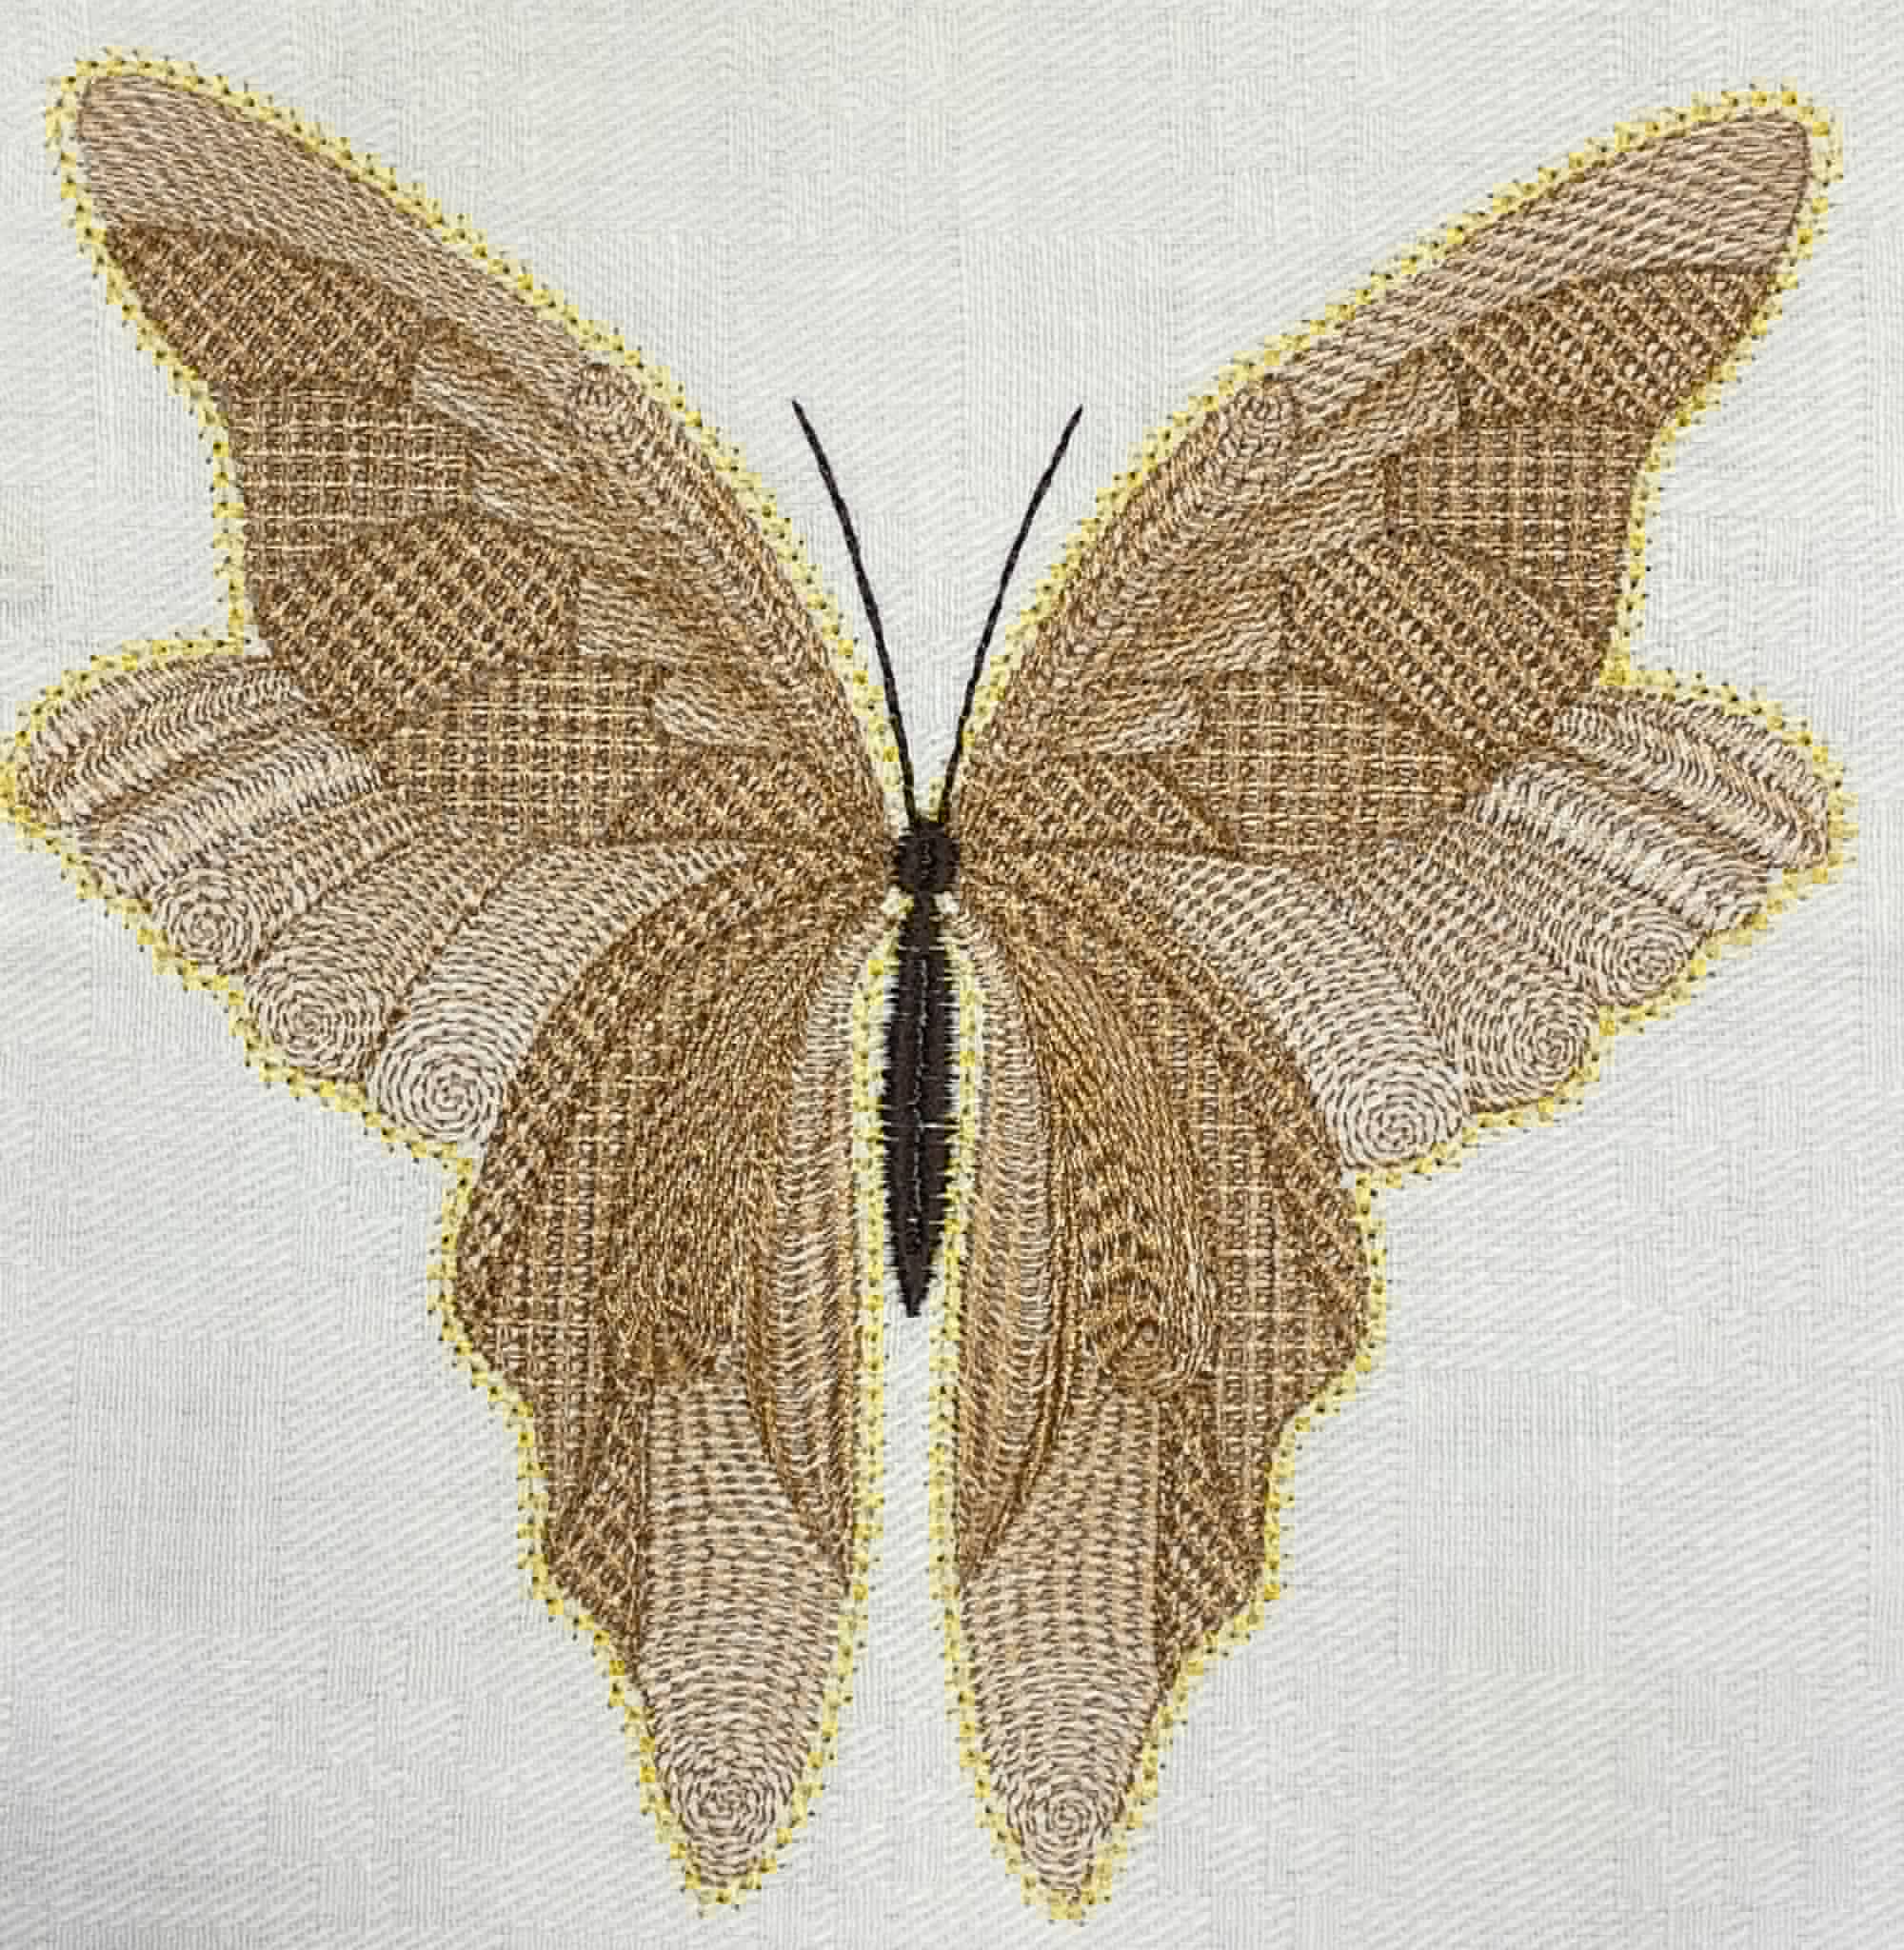
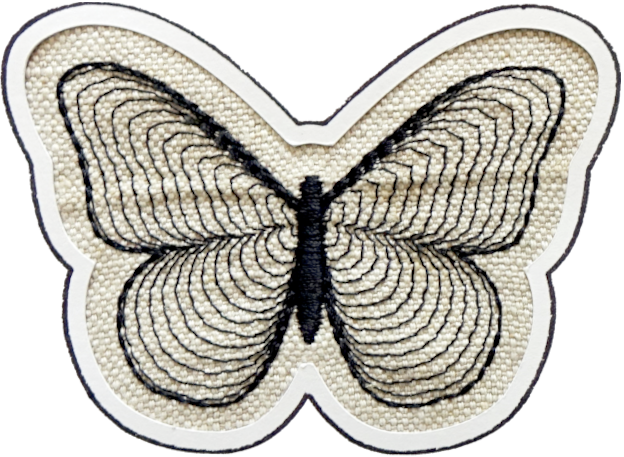
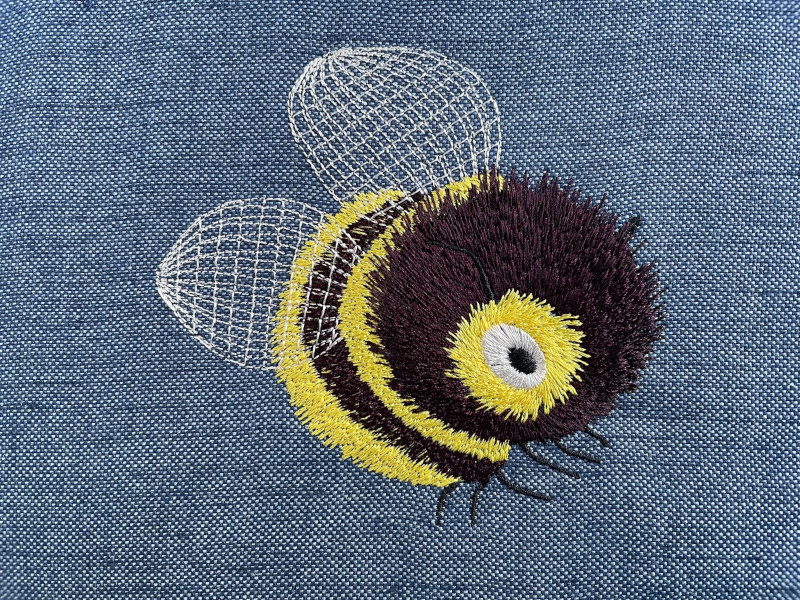
Ripple Stitches and Circular Fills Butterfly
Btterfly sample file : ripple stitches and circular fills

Ripple Tinkerbell Woman
Sample file: Tinkerbell Woman as sample of Pattern Stitch and Ripple Stitch

Ripple bird
Sample file of ripple stitch and guided fill bird
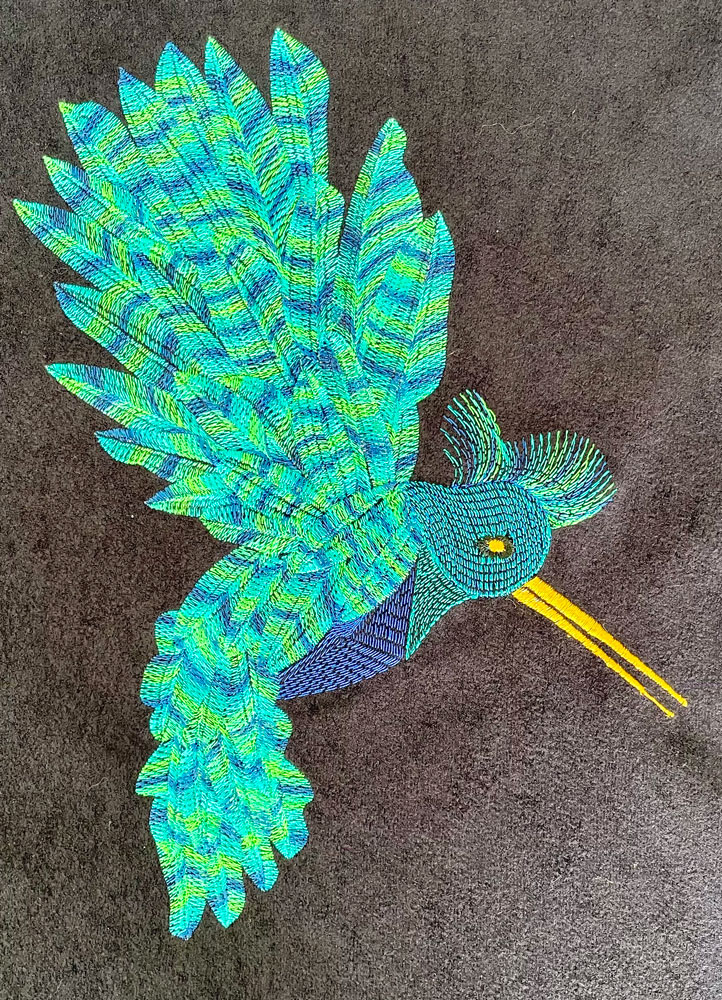
Satin guided ripple stitch hummingbird
humming bird as a sample file for satin guided ripple stitches