Tack and Lock Stitches
What it is
Tack and lock stitches are small stitches at the beginning (tack) or the end (lock) of a color block or before and after jump stitches or trim commands. They help to secure the thread.
Influencing Factors (When Lock Stitches Apply)
The embroidery file contains several embroidery objects which will be embroidered one after another. Lock stitches are set when between objects there is either a color change, a trim command or a long distance. Allow lock stitches can prevent the usage of lock stitches, while force lock stitches will ensure that they are present.
Minimum Jump Stitch Length
The minimum jump stitch length value can be set in Extension > Ink/Stitch > Preferences and object based in the params dialog.
It defines whether the stitch between two objects is a jump stitch or a normal stitch.
Only if the distance between two objects is greater than the minimum jump stitch length value, a jump stitch is applied. Only if a jump stitch is used, lock stitches are added at the end of the first object and tack stitches at the begining of the second object.

But there are more parameters which can influence the question wheter tack- and lock stitches are applied.
Color Changes
Lock and tack stitches are applied before and after a color change.
Trim Commands
Ink/Stitch inserts lock stitches on the object with the trim command and tack stitches on the next object.

Trim commands can be applied with two different methods
- either as a visual command using
Extension > Ink/Stitch > Commands > Attach commands to selected objects - or by ckecking
Trim afterin the params dialog
Allow Lock Stitches
Allow lock stitches can suppress tack and/or lock stitches when they normally would apply.

The allow lock stitch parameter can prevent lock stitches before or after the object (or both). So when the distance between two objects is big enough for a jump stitch, but the first object has set the allow lock stitches parameter to Before, no lock stitches will be set at the end of this object.
Force Lock Stitches
It is however possible to force lock and tack stitches even for objects with small distances. Check the force lock stitch parameter of the first object to add lock stitches before the jump and tack stitches after the jump (to the second object).

Beware not to check force lock stitch on the second object, as you would then force the “lock stitches” for it, not the “tack stitches”, plus you would force lock stitches for next object, whatever its distance from after jump object.
Force lock stitches will always apply lock stitches and overides the allow lock stitches parameter.
Types of Lock Stitch
Ink/Stitch offers various types of tack and lock stitches and even allows to define your own.
Default Lock Stitches
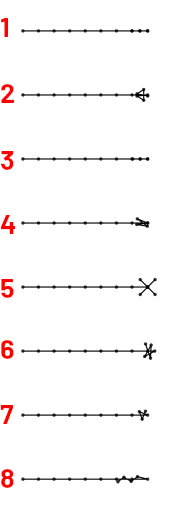
- Half stitch. This is the default and the only lock stitch available in older Ink/Stitch versions. It has no scaling option but it is relative to the stitch length: two half stitches back and two half stitches forth.
- Arrow, scales in %
- Back and forth, scales in mm
- Bowtie, scales in %
- Cross, scales in %
- Star, scales in %
- Triangle, scales in %
- Zigzag, scales in %
- Custom. Scales in % or mm depending on the path type.
Custom lock stitches
Custom lock stitches can be defined by an svg path in mm units (scale: %) or with relative units of steps to go back and forth (scale: mm).
Custom svg path
The svg path is always built as if it is a tack (start) lock stitching, if positioned at the end it will be reversed.
At the end of the svg path there is an extra node to indicate in which angle the path connects to the lock stitch. It will be removed when the angle has been processed.
For instance the triangle lock stitches corresponds to the custom path M -0.26,0.33 H 0.55 L 0,0.84 V 0 L 0.34,0.82 (this is the d attribute of the path). On next image, they are the black paths, on one copy the last segment is green colored for clarity.
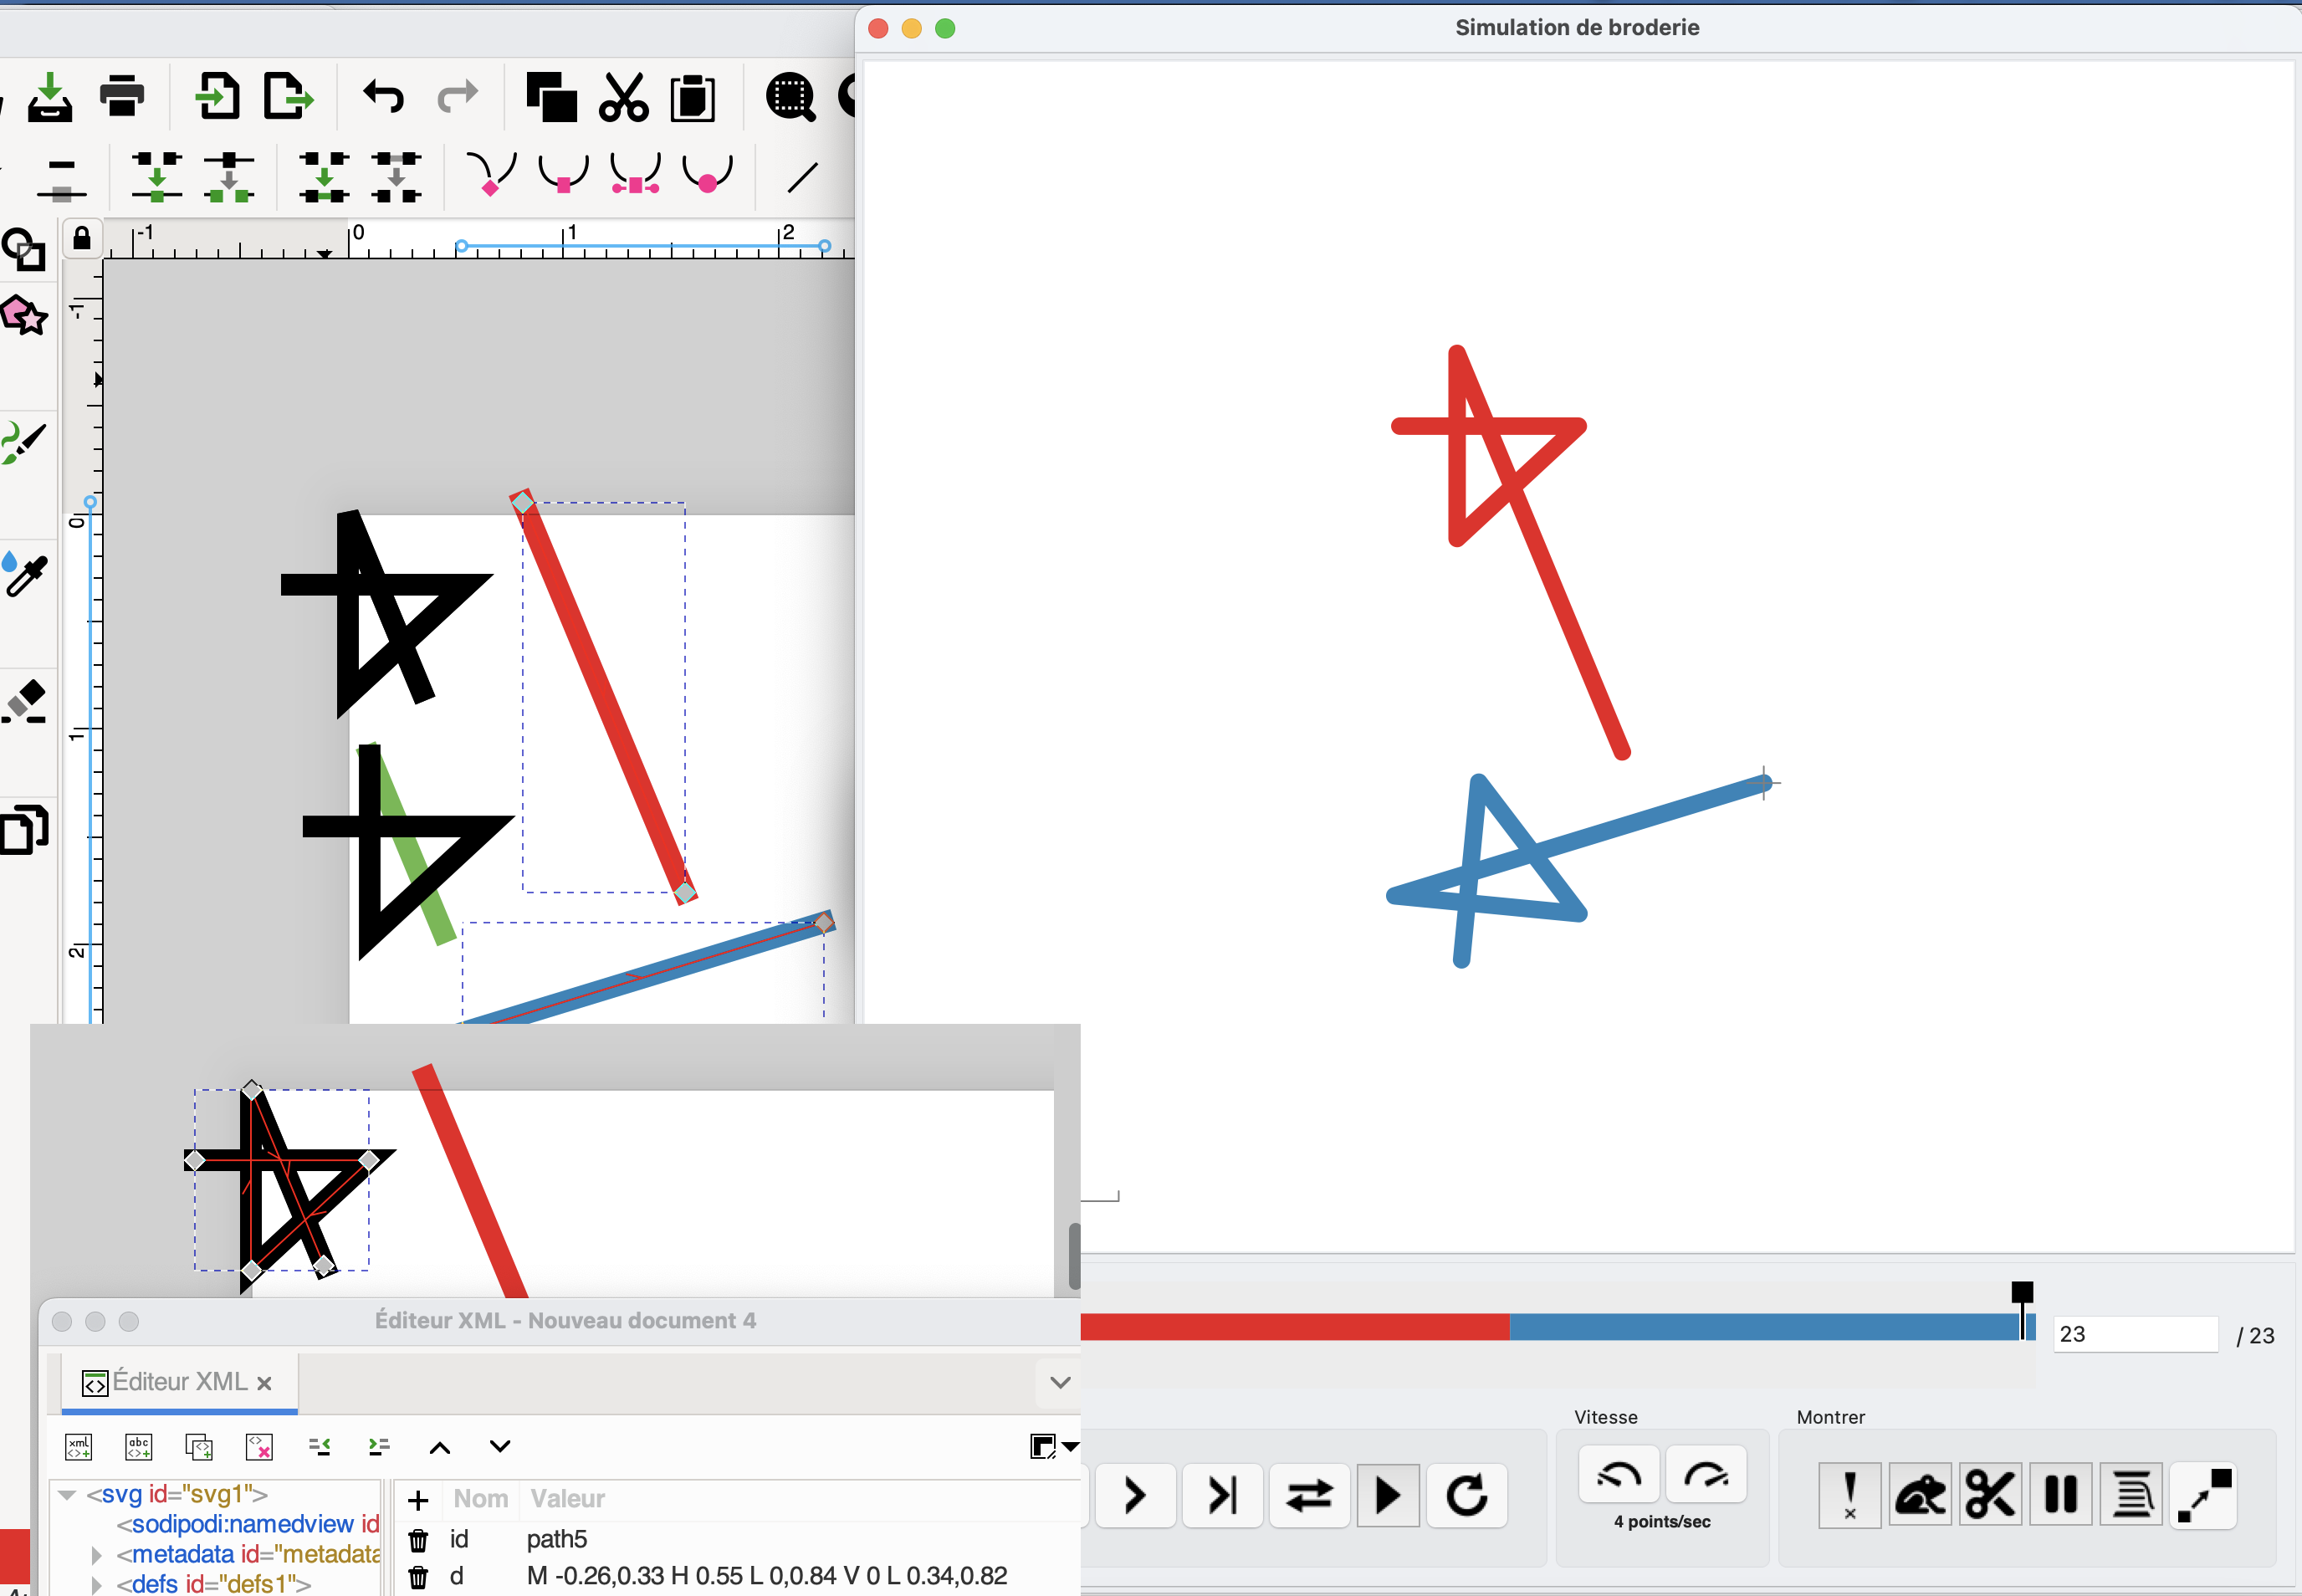
Both red and blue path have a triangle tack down.
The custom svg path is rotated in such away that its last segment (green) has the same direction as the begining of red and blue paths. It is only used to compute this rotation angle, and is not part of the actual tack down, and will not be embroidered.
Custom mm path
Custom mm values are separated by a space. E.g. a custom lock stitch with a path value of 1 1 -1 -1 with a scale setting 0.7 mm will travel 0.7 mm forward (twice) and 0.7 mm backwards (twice). Path values can also be floats (e.g. 0.5 2.2 -0.5 -2.2) if the user wants to travel only fractions of the size setting.