Cutwork
Cutwork in machine embroidery describes a technique, where specific needles are used to cut holes into the fabric. These needles come mostly in a set of four. Each needle is capable to cut in a specific angle range. Therefore it is necessary to split an element into the angle sections of your needles.
Usage
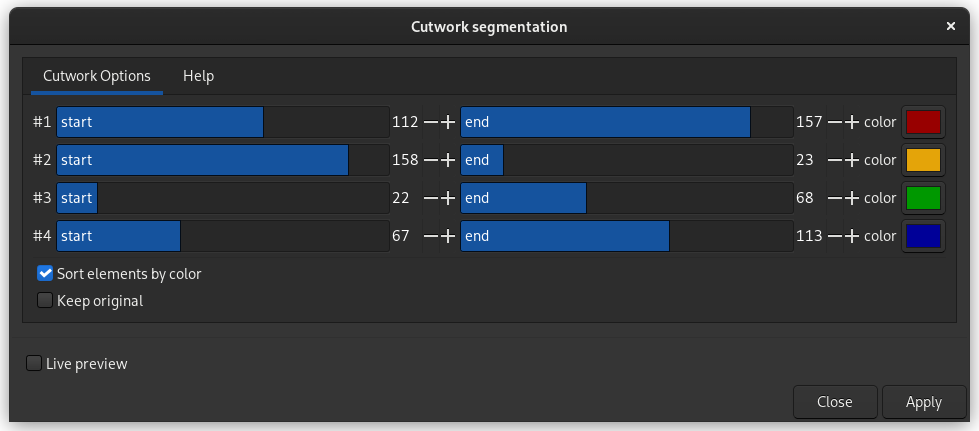
Ink/Stitch comes with a tool that will help you to split your elements according to the needle angles.
- Select one or more stroke objects
- Open
Extensions > Ink/Stitch > Cutwork segmentation
- Set the angles and colors as you need them for your specific needle kit
- Apply

Sometimes it will be necessary to leave gaps in the border of the hole, so that the cutout fabric stays connected to the main piece. This will prevent that the machine pulls in small cutout pieces of fabric.
Attention: Do not rotate your design after applying this feature.
Common needle setups
| Needle | Angle | Start | End |
|---|---|---|---|
| | | 90° | 67 | 113 |
| / | 45° | 112 | 157 |
| ― | 0° | 158 | 23 |
| \ | 135° | 22 | 68 |
| Brand | #1 | #2 | #3 | #4 |
|---|---|---|---|---|
| Bernina | | | / | ― | \ |
| Pfaff, Husqvarna Viking, Inspira | Red / | Yellow ― | Green \ | Blue | |
| Brother, Babylock | Blue / | Purple ― | Green \ | Orange | |
| Janome | Red ― | Blue / | Black | | Green \ |
Cutwork with Bernina/Bernette
Save the .inf file along with your .exp file (name it equally) and the machine will recognize the cutwork lines and displays the correct needle numbers (as you defined in the cutwork segmentation tool).
Use the following settings (these are the typical colors, but they do not matter for cutwork recognition):
| Needle | Color | Start | End |
|---|---|---|---|
| 1 | #ffff00 | 67 | 113 |
| 2 | #00ff00 | 112 | 157 |
| 3 | #ff0000 | 158 | 23 |
| 4 | #ff00ff | 22 | 68 |