Cross Stitch
This feature will be part of an upcoming Ink/Stitch release. It is not yet integrated in Ink/Stitch.
What is it?
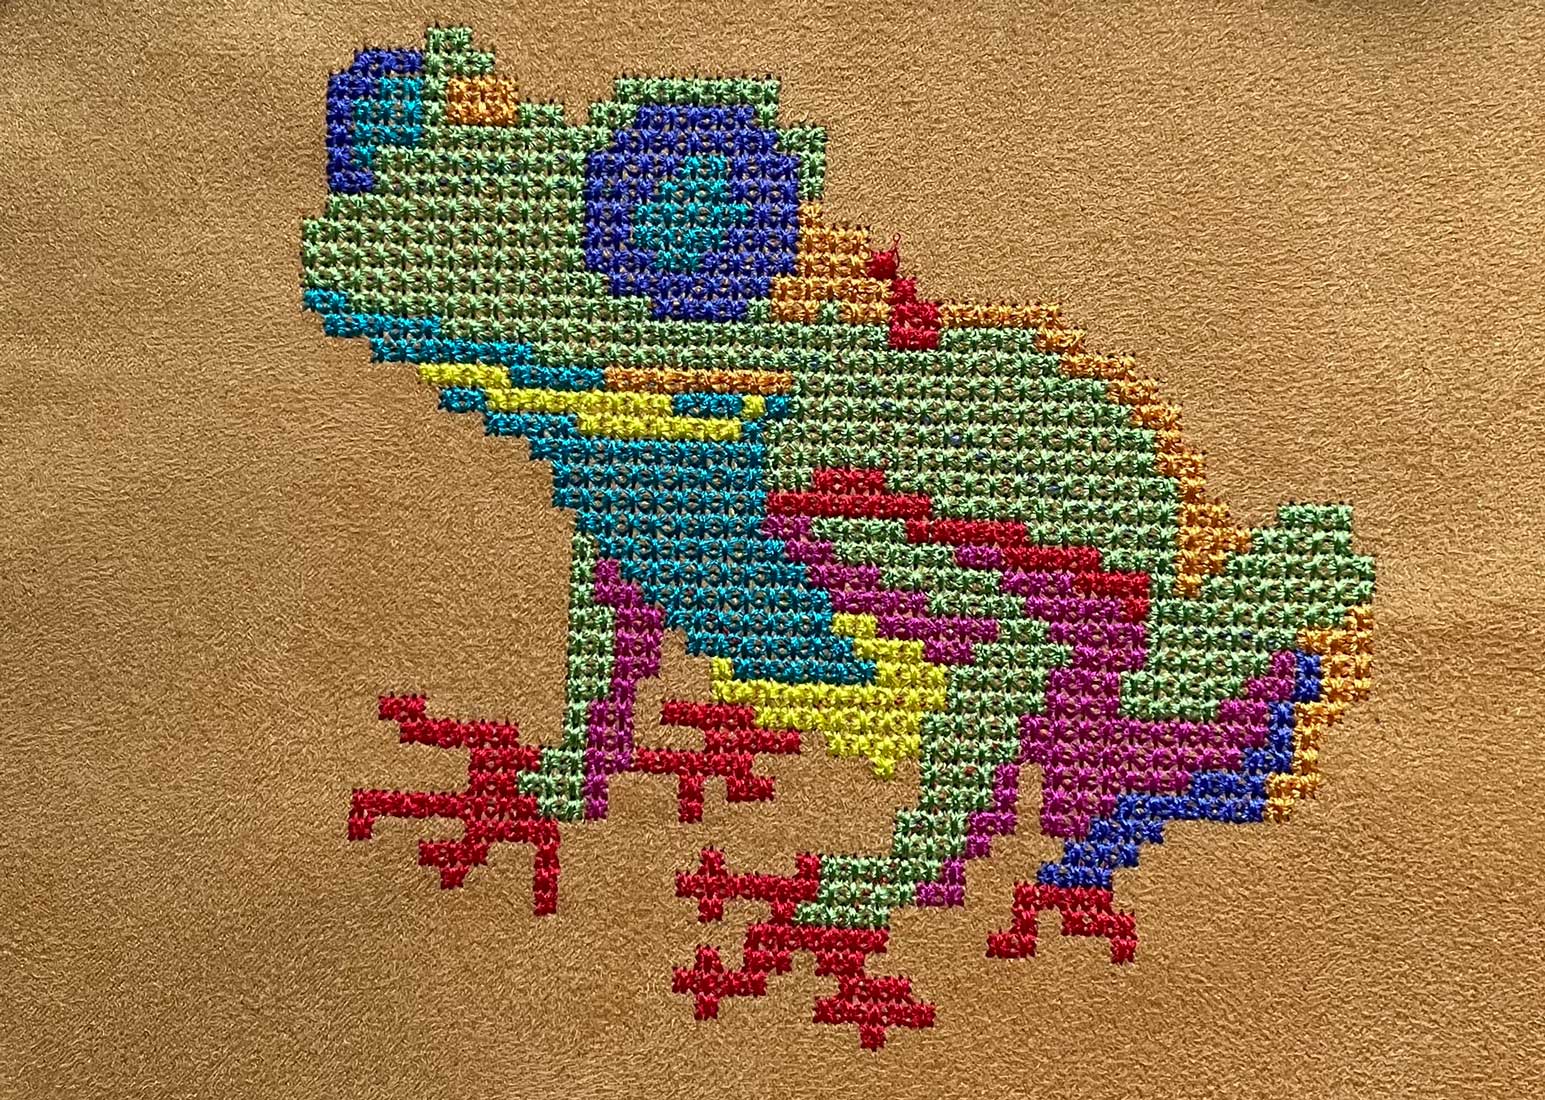
Cross stitch mimics traditional hand embroidery techniques. Cross-stitch is characterized by small, even crosses, which give the embroidered image a flat, blockish look.
How to Create it
- Draw a closed shape with a fill color
- Open the params dialog
- Select
Cross stitchas the fill method
Grids And The Coverage Parameter
It is important to understand the cross stitch coverage parameter.
The coverage parameter defines the percentage of overlap for each cross with the fill area. This means, it influences wether a cross is build at a specific spot or not.
Cross stitches are alignde to a grid in pattern size. The grid itself is (by default) aligned to the top left corner of the page canvas.
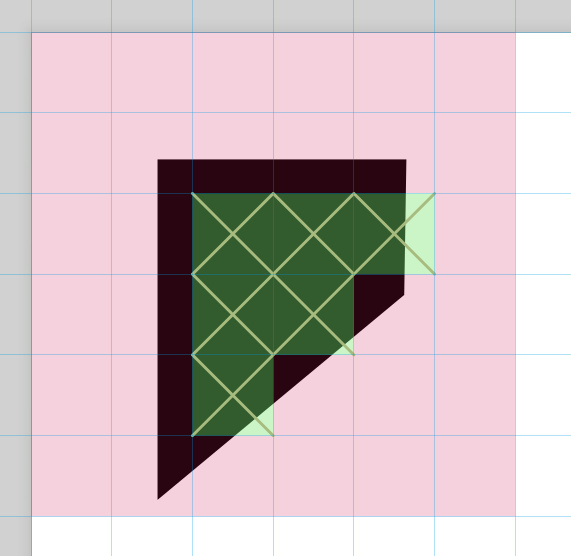
Ink/Stitch will check how much percent of each grid field is covered by the fill element. If coverage exceeds the value given by the coverage option (by default 50%), a cross stitch is build.
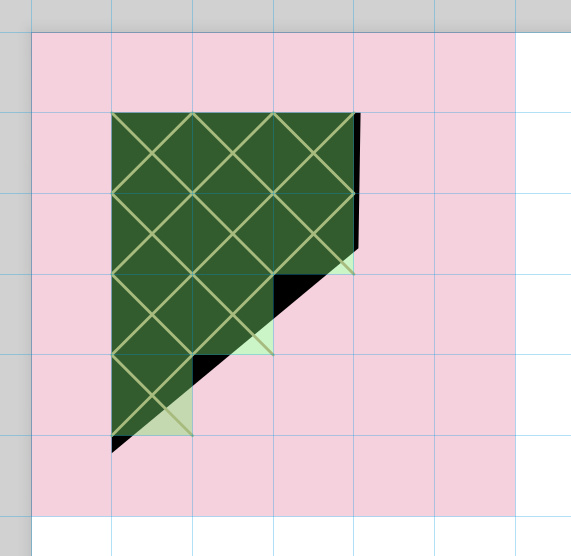
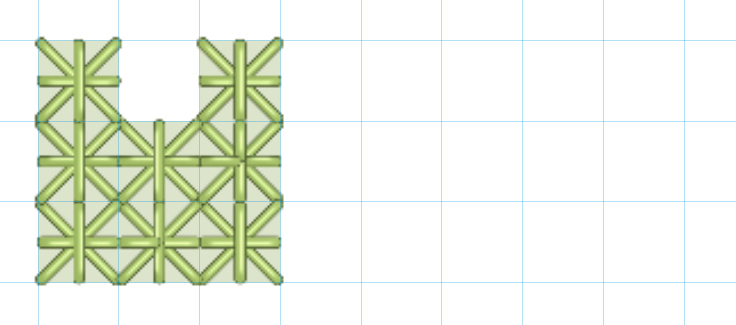
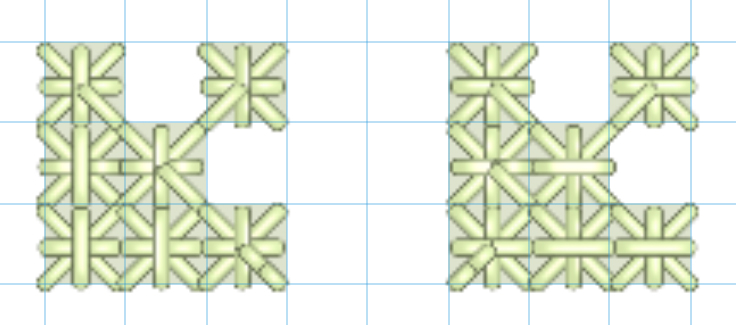
In the following example only the green fields are covered more than 50% by the black fill and receive a cross. When the black fill element is moved on canvas, more crosses are created.
When the option Align grid with canvas is disabled, the element can be moved on canvas without changing the cross stitch result.
But adjacent cross stitch areas may be misaligned.
Cross Stitch Method
In Ink/Stitch you can choose from various cross stitch methods.
-
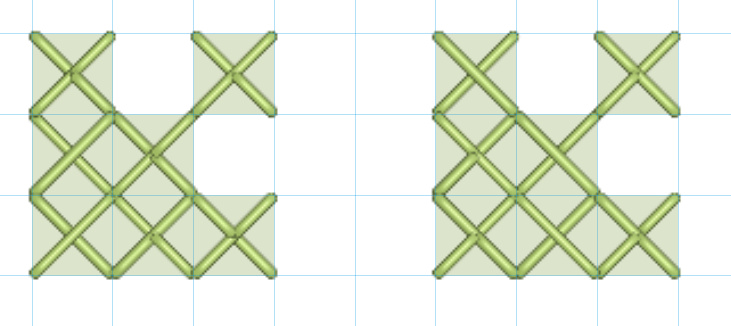
Cross stitch and cross stitch flipped
This is the most common method. Two diagonals are building a cross. When two crosses are only diagonally connected, add a small expand value to the underlying fill to ensure combined stitching.
-
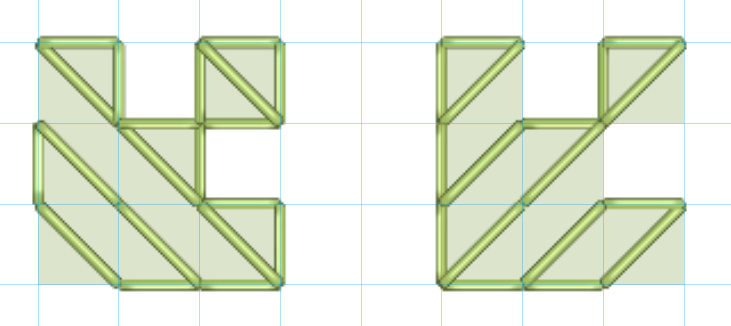
Half stitch and half stitch flipped
Half stitches build only a half cross stitch (one diagonal), traveling along the outline of the shape.
-
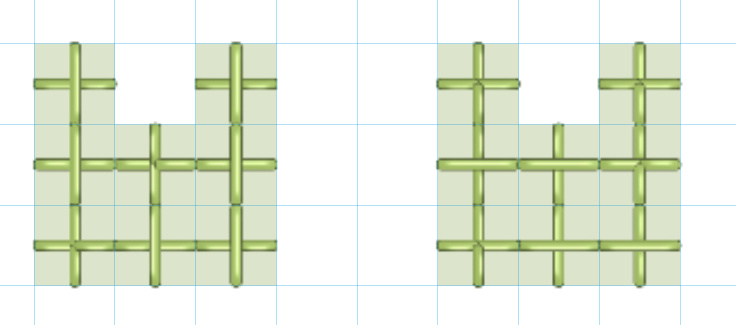
Upright cross and upright cross flipped
A cross stitch turned, building an uprigt cross. Please note, that this cross stitch method may produce jumps, when areas are connected only diagonally.
-
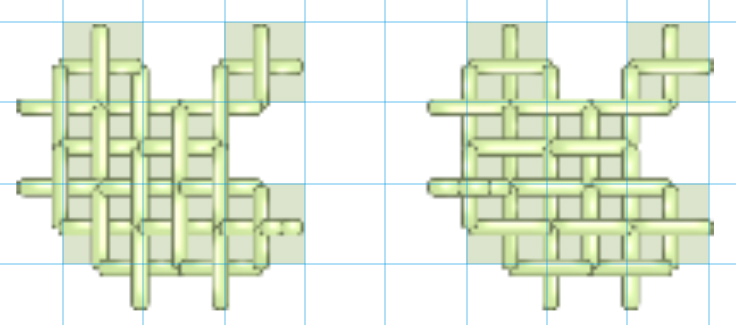
Dense upright cross and dense upright cross flipped
More upright crosses are used to fill the shape.
Coverage is set to 50% in this sample.
-
Double cross and upright double cross
A combination of cross stitch and upright stitch, with upright cross on bottom.
-
Smyrna cross and upright Smyrna cross
A combination of cross stitch and upright stitch, with upright cross on top.
Cross Stitch Helper
Ink/Stitch comes with an extension which helps you to perform cross stitch specific tasks all at once.
- Setup a grid for cross stitch alignment (and visual support while working on cross stitches)
- Apply cross stitch params to selected elements
- Pixelize the outline of selected elements, to easily see and adapt cross stitch positions
It also computes and displays the stitch length given the grid dimensions. Maximum stitch length in the cross stitches parameters should be larger than this value.
Set Start and End Point
By default, an automatic fill starts as close as possible to the previous embroidery element and ends as close as possible to the next embroidery element.
To change this behavior, set start and end points for autofill objects with Visual commands.
Parameters
Run Extensions > Ink/Stitch > Params to tweak the settings to your needs.
| Settings | Description | |
|---|---|---|
| Automatically routed fill stitching | ☑ | Must be enabled for these settings to take effect. |
| Fill method | Cross Stitch | Must be set to cross stitch. |
| Cross stitch method | Choose method (for detailed information see above) | |
| Pattern size | Defines the size of the cross stitch (grid) | |
| Align grid with canvas | This ensures good alignment for adjacent cross stitch areas, but it also means that the outcome may change when the element is moved off the grid. Disable this option to ensure, that this element stitches the same, independently on its position on the canvas. |
|
| Grid Offset | Shifts the cross stitch grid by given values. X and Y values are separated by a space. Only one input value offsets the pattern evenly for x and y. | |
| Fill coverage | Percentage of overlap for each cross with the fill area. | |
| Expand | 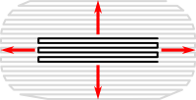 |
Expand the shape before fill stitching, to compensate for gaps between shapes. It is recommended to use at least a small expand value (e.g. 0.2) on cross stitch elements. |
| Maximum fill stitch length | 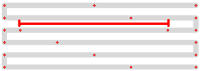 |
Usually set to at least the length of a cross diagonal. For huge crosses chose a smaller value. |
| Bean stitch number of repeats | Determines the number of times to repeat each stitch. ◦ A value of 0 does not repeat the stitch (normal stitch)◦ A value of 1 repeats each stitch three times (forward, back, forward).◦ A value of 2 repeats the stitch five times. |
|
| Minimum stitch length | Overwrite global minimum stitch length setting. Shorter stitches than that will be removed. | |
| Minimum jump stitch length | Overwrite global minimum jump stitch length setting. Shorter distances to the next object will have no lock stitches | |
| Allow lock stitches | Enables lock stitches in only desired positions | |
| Force lock stitches | ☑ | Sew lock stitches after sewing this element, even if the distance to the next object is shorter than defined by the collapse length value in the Ink/Stitch preferences. |
| Tack stitch | Chose your favorite style | |
| Scale Tack stitch | ||
| Lock stitch | Chose your favorite style | |
| Scale Lock stitch | ||
| Trim After | ☑ | Trim the thread after sewing this object. |
| Stop After | ☑ | Stop the machine after sewing this object. Before stopping it will jump to the stop position (frame out) if defined. |