Customize Ink/Stitch
Shortcuts
You can work faster in Ink/Stitch by assigning shortcuts. These shortcuts reduce menu navigation and support a more efficient workflow. These shortcuts focus on embroidery specific actions and common layout adjustments, helping design work in Ink/Stitch feel smoother.
The list below describes the shortcuts included in the downloadable file.
Several shortcuts replace Inkscape defaults. Alternative menu paths or toolbar options remain available for those actions.
| Shortcut keys | Effect | Replaces |
|---|---|---|
| PageUp | Stack up | Object > Raise. Toolbar buttons also apply |
| PageDown | Stack down | Object > Lower. Toolbar buttons also apply |
| Ctrl + R | Reverse the direction of a path | |
| Ctrl + Shift + ‘ | Restack objects based on selection order | |
| Ctrl + Shift + P | Open Params | Edit > Preferences |
| Ctrl + Shift + L | Open Simulator live simulation | |
| Ctrl + Shift + > | Stitch plan preview beside the canvas | Path > Division. Use Ctrl + / instead |
| Ctrl + Shift + O | Break apart fill objects | Object > Object Properties |
| Ctrl + Shift + I | PDF export | |
| Ctrl + Shift + Q | Lettering | Object > Selectors and CSS |
| Ctrl + Shift + Del | Troubleshoot objects and remove errors | |
| Ctrl + Shift + ! | Attach commands to selected objects | |
| Ctrl + Shift + U | Convert stroke to satin | Object > Group. Use Ctrl + G instead |
| Ctrl + Shift + J | Flip satin column rails | |
| Ctrl + Shift + B | Cut satin column | Path > Union. Use Ctrl + + instead |
| Ctrl + Shift + = | Auto route satin objects |
The Ink/Stitch simulator also provides shortcut keys.
* Stack Up and Stack Down give precise control over stitch order. This works well with the Objects panel (Objects > Objects ...). The stacking order determines the sequence in which items are stitched, starting at the bottom and moving upward.
** For satin and running stitch objects, this changes stitch direction. This works best when Show path direction on outlines is selected under Edit > Preferences > Tools > Node. When one vertex is selected in the node edit mode and Ctrl+R is pressed, Inkscape reverses a single subpath within an object. This helps align both rails of a satin so they point in the same direction.
Download and import custom shortcut keys
- Download the Ink/Stitch shortcut key file
- Go to
Edit > Preferences > Interface > Keyboard - Click on
Import... - Select and open the downloaded file
You will now be able to use the shortcut keys. They are included into the standard default.xml shortcut file.
If you want to define your own custom shortcut keys simply enter your desired key combinations in the shortcut dialog. Use the search function to find the extensions quicker. More information
Zoom correction factor
For embroidery it is essential to get a sense of the actual size of the design. Inkscape has a setting to adapt zoom levels to your display size.
- Go to
Edit > Preferences > Interface - Hold a ruler onto your display and adjust the slider until the length matches

Grids
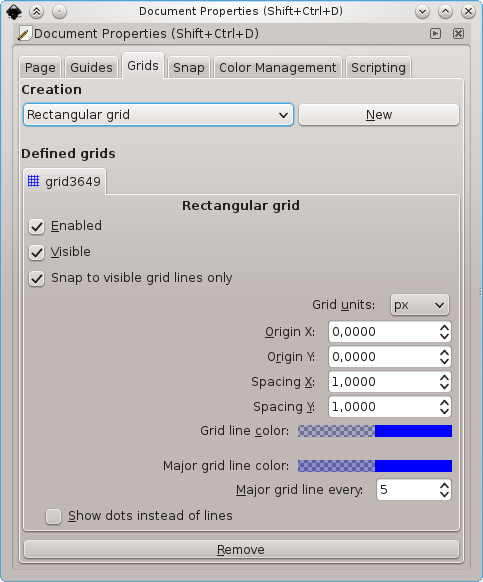
To align your vector-shapes properly, you can use the grid functionality of Inkscape. Go to View and enable Page Grid. In Snap Controls Bar make sure Snap to grids is enabled. It is also possible to adjust spacing and origin of your grids in File > Document Properties > Grids.
Enabling Path Outlines & Direction
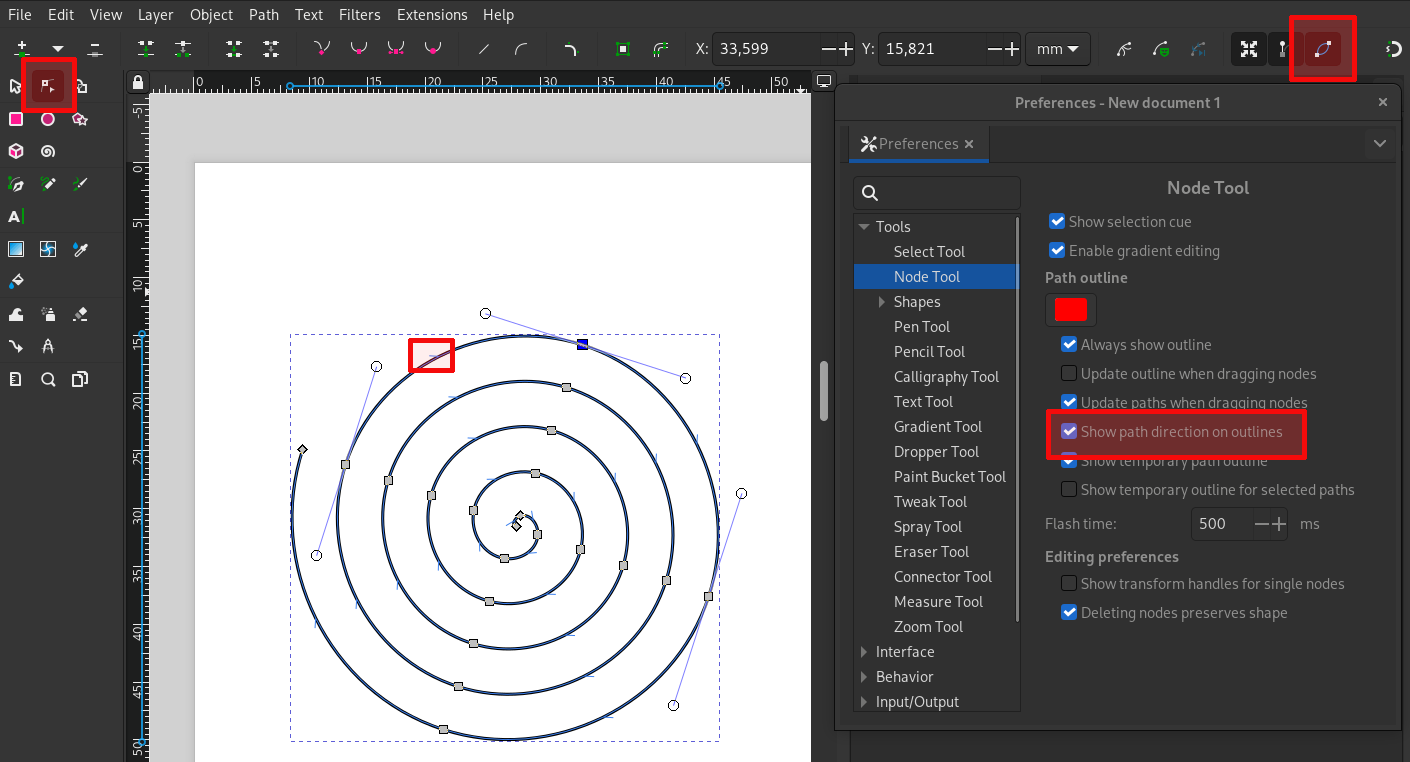
Knowing path directions is important working with Ink/Stitch. It is recommended to enable the checkboxes Show path direction on outlines and Show temporary outline for selected paths in Edit > Preferences > Tools > Node.
Make sure that also Show path outline is enabled in Tool Controls Bar as you can see in the image below.
Working with Templates
If you decided to use Ink/Stitch more frequently, you might get tired of creating the same configurations repeatedly. You can create a template for your basic embroidery setup. Once you have organised your settings, save them as a template file in your templates folder (File > Save template...). You can now access it by File > New from template > Custom.
If you use Inkscape primarily for embroidery, you can select the option Set as default template.
Tip: Get predefined templates from our tutorial section.
Install Thread Color Palettes
Ink/Stitch comes with many thread manufacturer color palettes which can be installed. This allows you to build designs with the correct colors in mind. Colors will appear in the PDF file and will also be included into your machine embroidery file, if the file format supports it.